
Project: Tool to help teachers draw rule lines for elementary kids to practice writing letters and words.
Requirements: Tool must be easy to use, easy to change markers and increase efficiency of drawing rule lines on white boards.
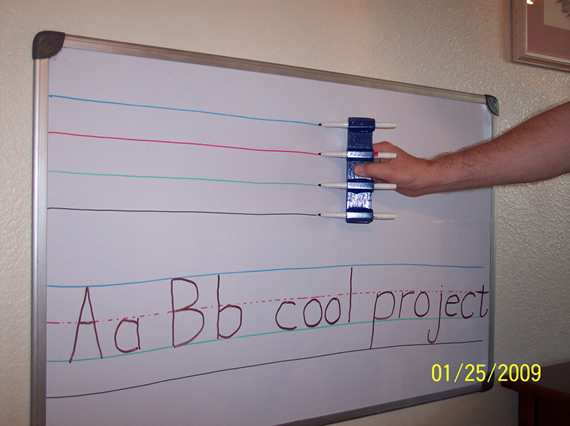
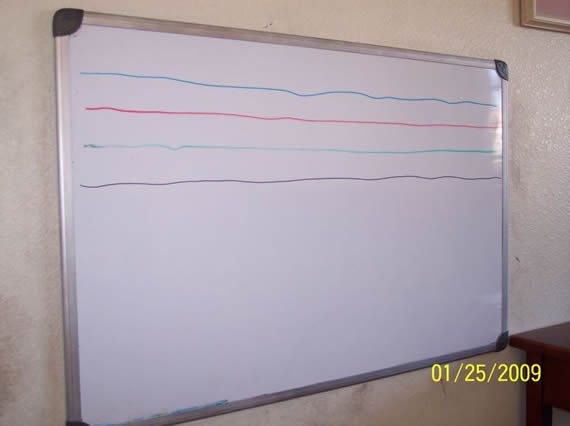
The lines in the below photo were drawn one at a time by hand if you couldn’t tell (very sad looking). Each line requires changing colored markers, capping and uncapping as well as drawing each line itself. I was doing this every night for my 5 year old’s homework assignment and believe me it got real old after a couple of weeks. This is when I started devising a tool that could draw all 4 rule lines at once.
As it turns out this project was not as easy of a build as I originally thought. The requirements meant it had to be very easy to use and the markers needed to be replaceable as they wore out. Most importantly the tool had to increase the efficiency which meant it couldn’t be fiddley to get working and keep working. What follows is one of my failures as well as my ultimate solution.
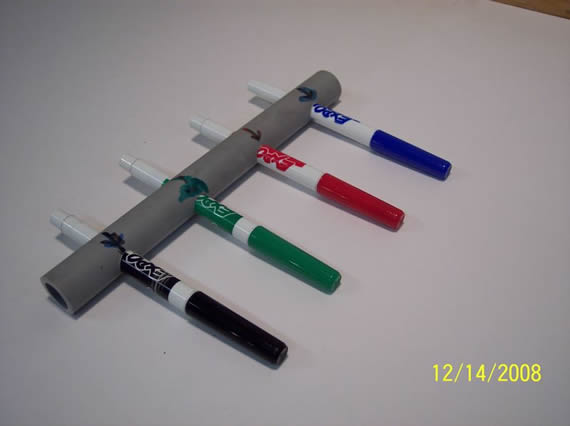
The below photo is my first solution which failed. I just drilled appropriate sized holes at 2 inch intervals in a section of PVC pipe. After a week of using this I hated it. Every time I took the caps off the markers changed position in the pipe and the tips were impossible to line up. I thought about gluing the markers in the holes but then the markers wouldn’t be replaceable. This along with the capping and uncapping of each marker individually frankly meant it wasn’t useful at all. I found myself just doing each line one at a time again.
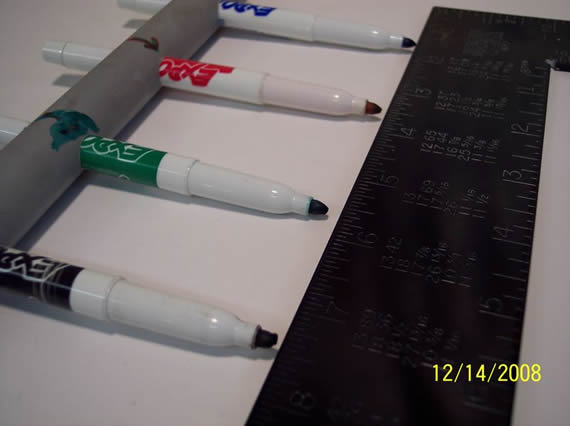
Below is just a photo showing the failure of my first solution. The straight edge shows that the tips are at different depths so the tips just don’t line up. I would always get a missing line or two even after taking the time to align the markers each and every time. Not a solution at all (sad).
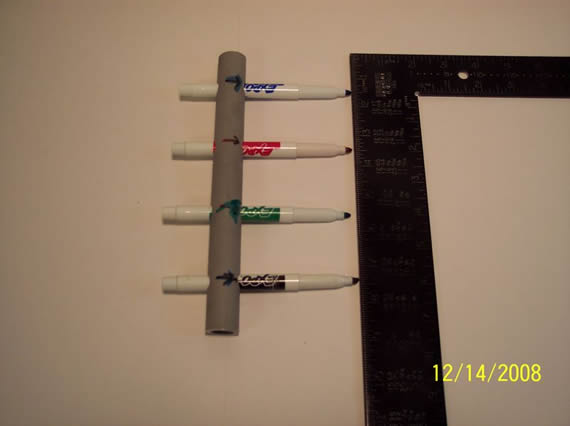
Same photo of the first failed solution closer up. The tips must be aligned perfectly and thus the solution must allow for the markers to be adjustable in the mount. I sometimes find solutions to build problems just by walking around a hardware store, so it was time to take a marker to Home Depot and let my imagination roll. This is exactly how I came upon my finial solution which follows.
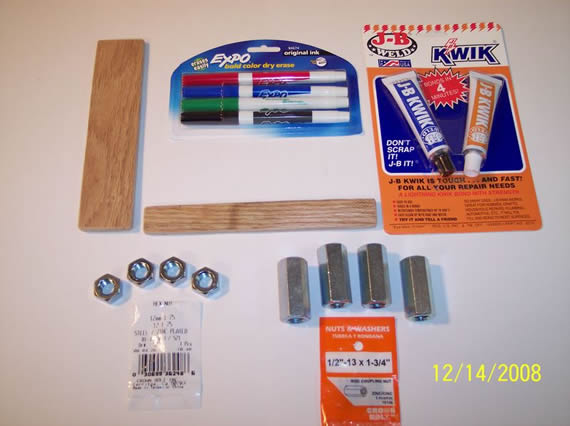
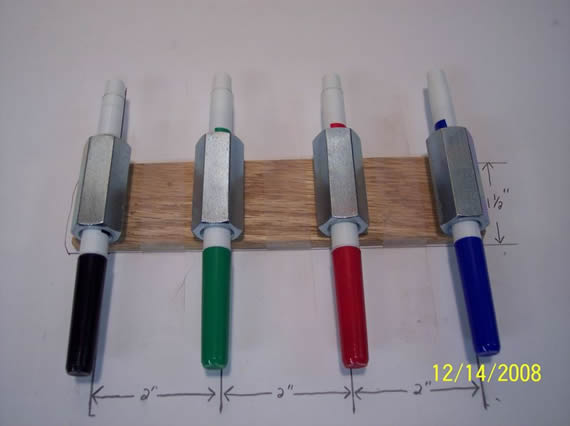
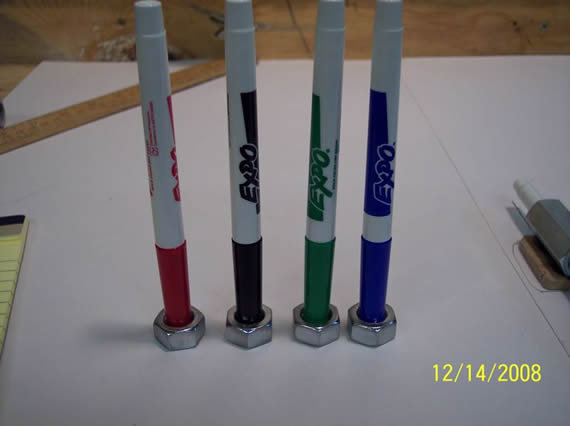
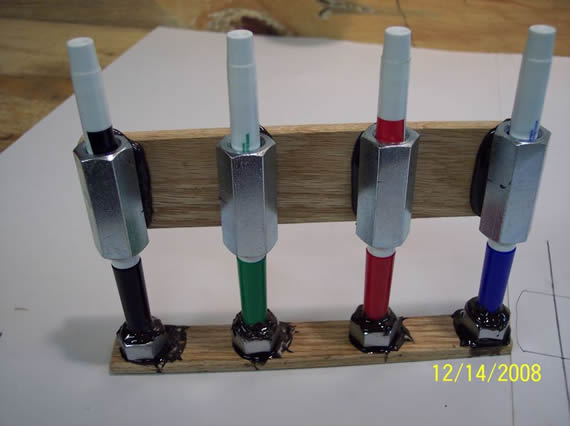
It turns out that a standard fine point “Expo” marker threads tightly into a 1/2″-13 x 1-3/4″ rod coupling nut. This means that each marker can be adjustable independently and still be replaceable at any time. I then discovered the caps thread nicely into a 12mm-1 75 hex nut. So the plan is to simply thread the markers into rod coupling nuts and the caps into standard nuts and epoxy these to some scrap wood using 4 minute J-B weld. What follows are photos of the materials and some tips on putting it all together.
Use some 120 grit sandpaper to scuff the nuts on all sides so the epoxy will hold tight.
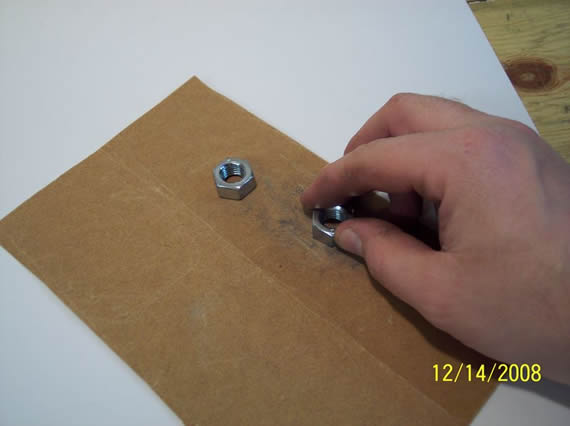
Scuff just one side of the rod coupling nuts but remember which side you scuffed because that will need to be the side you add the epoxy.

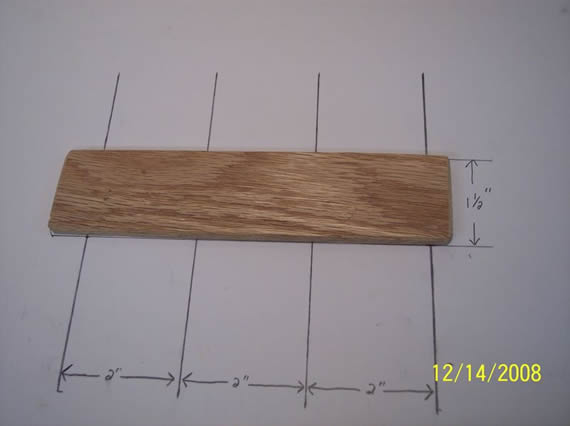
On a white sheet of paper mark out 4 long parallel lines at 2″ increments with one perpendicular line through the middle. These lines must be very exact and very straight because you will use these lines to keep the markers centered while the epoxy dries. Cut a piece of scrap wood about 1-1/2″ by 6-1/2″. Tape the wood to the sheet of paper so that one side lines up with the perpendicular middle line.
Screw one marker into each of the 4 rod coupling nuts to about the same depth stopping about 1 or 2 turns past when they get tight. This will cut some threads into the plastic of the marker making the markers adjustable in the nuts. Dry fit the markers on the board, if all looks good you are ready for epoxy.
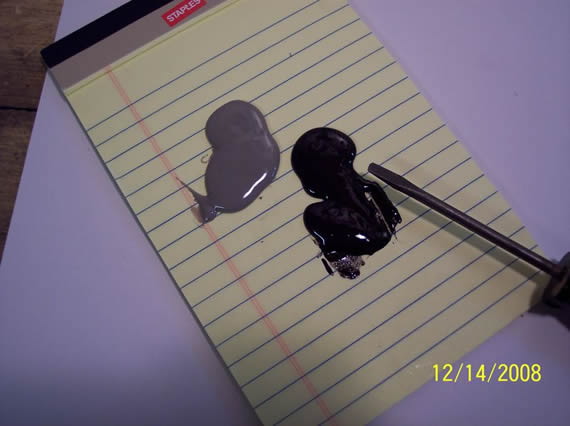
I used 4 minute J-B weld epoxy because I have no patience, but if you use this remember to only mix up enough for 2 nuts because it sets up fast and you want time to make sure the markers line up with your parallel lines before it starts to harden. This is a photo of the two part epoxy to make enough for all 4 nuts but I almost ran out time before it setup.
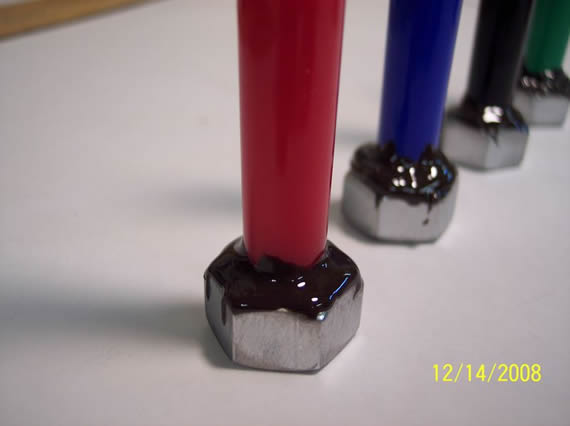
Leave the markers in the nuts and apply a liberal amount of epoxy to the scuffed side of the nut.
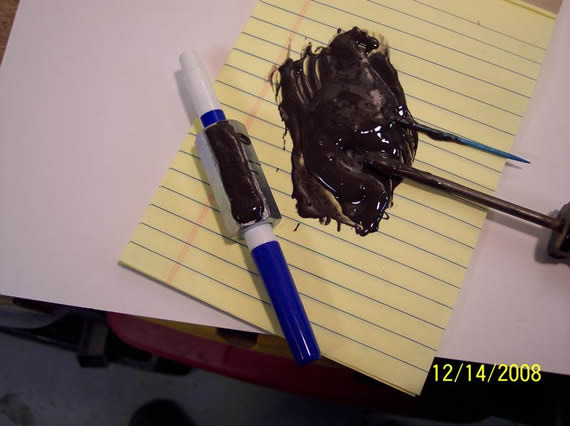
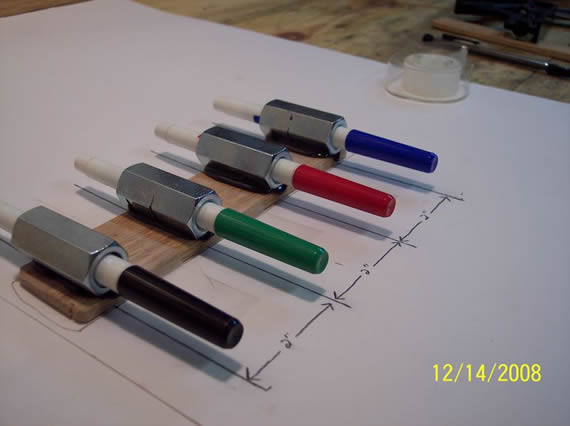
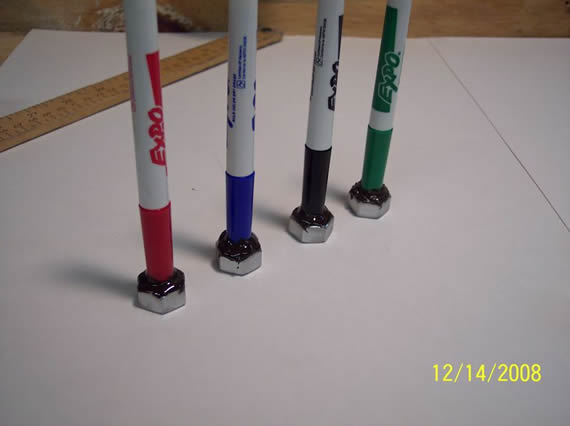
Before the epoxy sets up put the rod coupling nuts on the scrap wood and align each marker with its respective parallel line. Try to make sure the front of each nut is lined up with the front of the scrap wood.
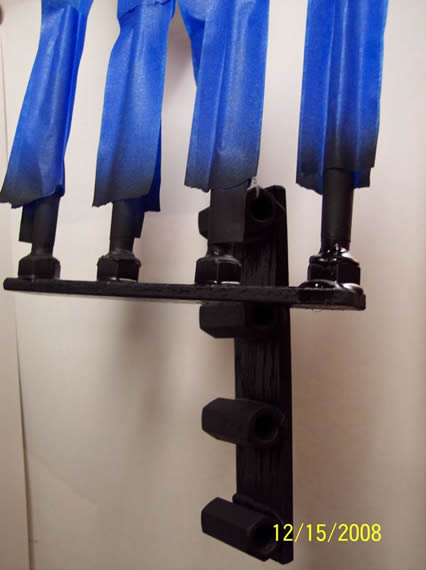
Now for the caps. I want all 4 caps to come off at once because fiddling with each cap one at a time is a pain. To do this I wanted the caps securely epoxied to another piece of scrap wood. I was afraid if I just epoxied the caps directly to a stick they would not hold up to all the capping and uncapping. I figured I would increase the surface area of each cap by screwing them into a hex nut. Then I could epoxy the caps to the nuts and the nuts to some scrap wood. Being only the markers wear out and not the caps this still meets my design requirements.
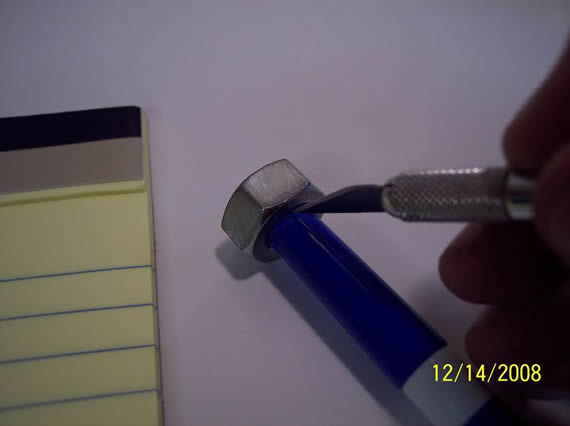
Thread each cap into a hex nut so it is exactly flush with the far side of the hex nut. Then use an exacto knife to scratch hash marks into the smooth shiny plastic cap all around the top of the hex nut. This will guarantee the epoxy holds tight to the plastic cap.
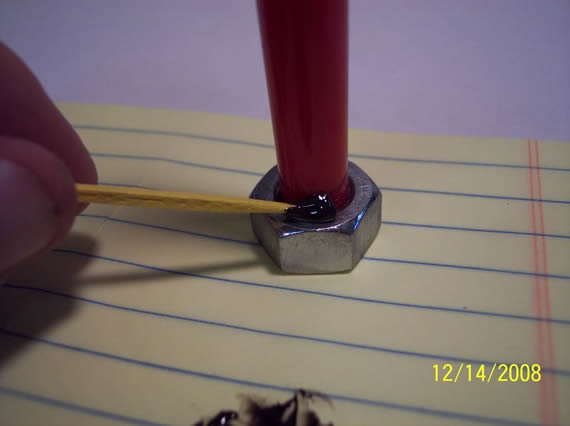
Mix up some more epoxy and use a toothpick to spread an even layer around the cap where it meets the nut. Once again only make enough 4 minute epoxy for 2 nuts at a time so you’re not rushed.
When you’re done let the epoxy dry.
Just a close up of one of my caps.
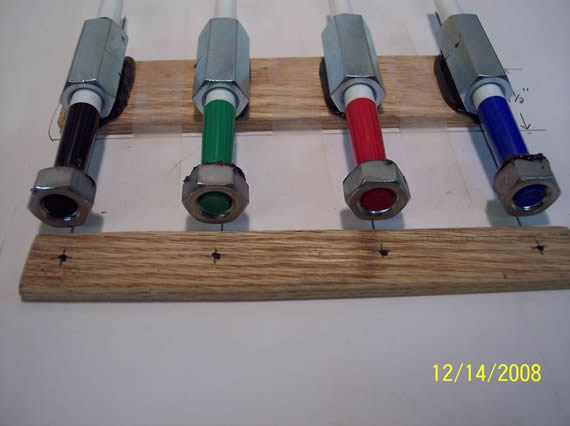
Screw the markers back into their rod coupling nuts in the correct color sequence and dry fit your scrap wood cap stick. Adjust each marker so each is tight yet slightly adjustable, in and out, as well as exactly flush the the scarp wood cap stick.
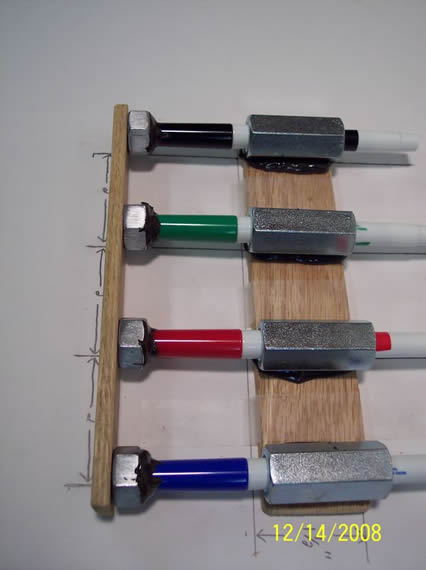
Mark the exact center of each cap nut on the scrap stick of wood. These spots are where you will put a glob of epoxy. This time you MUST mix up enough epoxy for all 4 nuts because the cap stick needs to be put on all 4 nuts at once. After you get the glob of epoxy on each center mark, place the marker holding fixture with markers on top of the wooden cap stick and let dry.
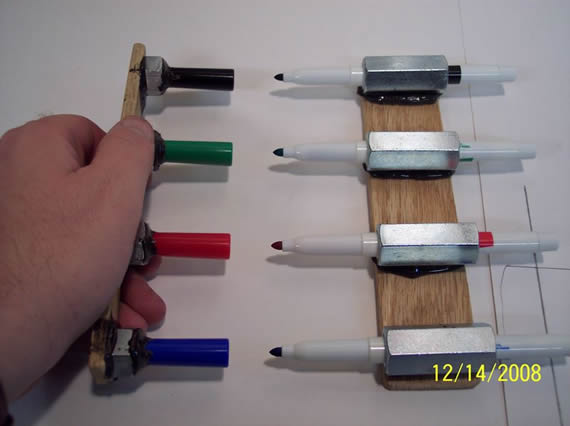
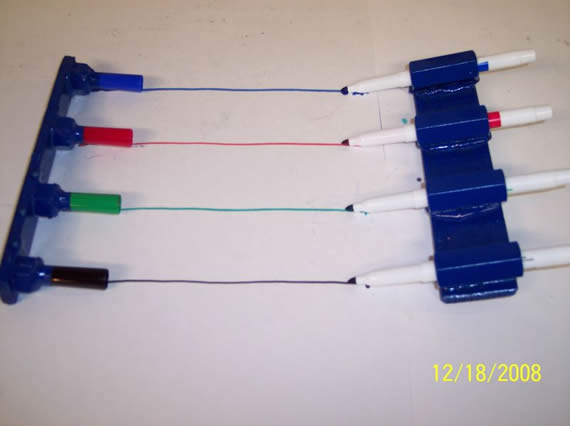
At this point I would let the epoxy dry overnight regardless of the type of epoxy you used. Once the epoxy dries a quick and even tug on the wooden cap stick will uncap all 4 markers at once. This greatly adds to the efficiency of the tool.
A perfectly working tool but it does need some paint, don’t you think?
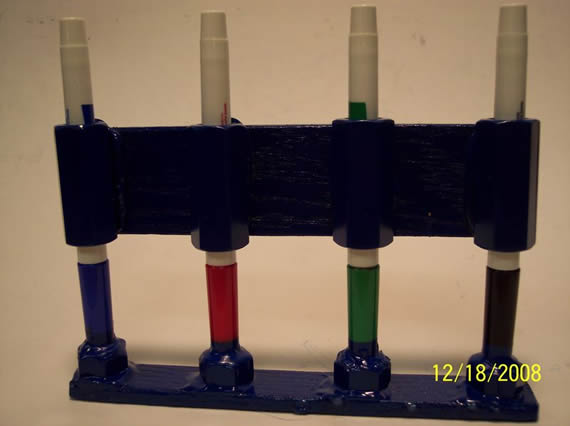
I took the markers out of their rod coupling nuts and masked the markers with painters tape. I first painted my “Teachers Aid” tool flat black but I didn’t like it so I did it again in glossy blue.
Blue looks much better, don’t you think?
I tested it on some white poster board to get the markers at the same depth and now it’s ready for hours of hard work.

Links for Beginners in Electronics }:-)
Archives
- April 2017 (1)
- March 2017 (3)
- December 2016 (1)
- November 2016 (3)
- October 2016 (2)
- September 2016 (2)
- August 2016 (4)
- June 2016 (1)
- May 2016 (6)
- April 2016 (1)
- March 2016 (3)
- February 2016 (4)
- January 2016 (3)
- December 2015 (1)
- November 2015 (5)
- September 2015 (1)
- July 2015 (2)
- June 2015 (6)
- March 2015 (1)
- January 2015 (2)
- December 2014 (2)
- November 2014 (4)
- October 2014 (2)
- May 2014 (1)
- March 2014 (5)
- February 2014 (3)
- January 2014 (1)
- September 2013 (2)
- August 2013 (1)
- July 2013 (4)
- June 2013 (3)
- May 2013 (2)
- April 2013 (1)
- March 2013 (3)
- February 2013 (2)
- January 2013 (2)
- December 2012 (1)
- November 2012 (8)
- October 2012 (5)
- September 2012 (1)
- August 2012 (1)
- July 2012 (2)
- May 2012 (2)
- April 2012 (1)
- March 2012 (3)
- February 2012 (2)
- December 2011 (2)
- November 2011 (4)
- October 2011 (1)
- September 2011 (1)
- August 2011 (2)
- May 2011 (2)
- April 2011 (2)
- March 2011 (2)
- February 2011 (2)
- January 2011 (1)
- December 2010 (2)
- November 2010 (2)
- July 2010 (3)
- June 2010 (2)
- April 2010 (1)
- March 2010 (1)
- February 2010 (2)
- January 2010 (1)
- December 2009 (2)
- October 2009 (4)
- March 2009 (1)
- December 2008 (1)
- November 2008 (1)
- August 2008 (1)
- April 2008 (1)
- March 2008 (1)
- February 2008 (1)
- June 2007 (1)
- November 2005 (1)
- April 2005 (1)