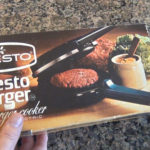
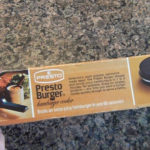
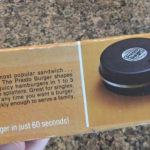
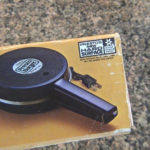
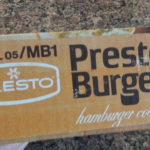
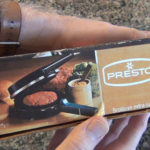
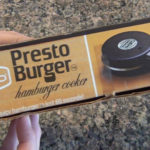
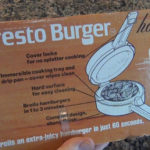
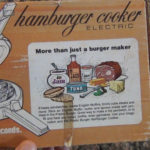
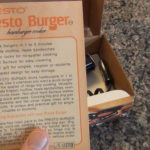
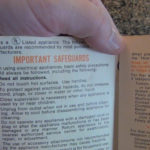
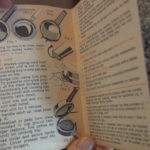
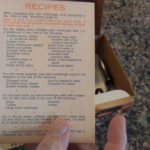
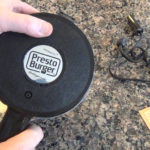
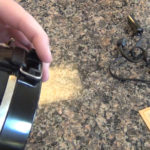
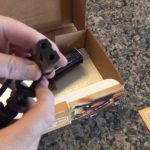
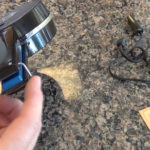
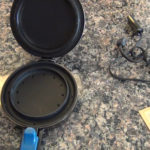
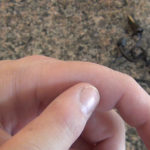
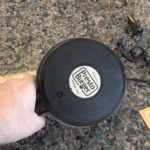
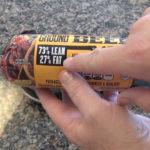
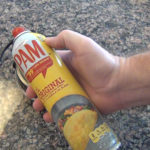
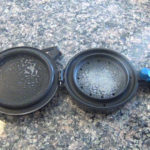
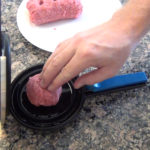
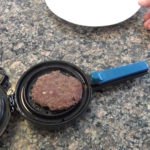
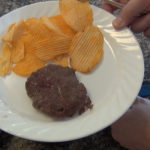
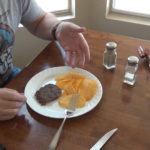
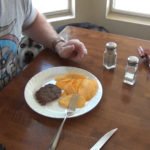
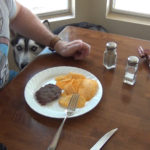
Fun Stuff
ready for reassembly (Day 9)
DAY 1
I have to replace my 16 year old Jeep Grand Cherokee 5.2L V8 engine. In the past I normally pull my motors, tear them down and just replace and rebuild as needed. But that takes a ton of time so for my Jeep I decided to order a fully remanufactured long block from Engine House in Phoenix, AZ. They have a great rating with the BBB and everyone I asked recommended them.
Being this engine swap-out project will take several days I’m going to do this posting a bit different than my older postings. I’m going to just add photos and some progress details to this posting each evening or whenever I get time. You can follow along as I go or just wait until I change the first line from “Job in Progress” to “Job Complete”
Unfortunately this will not be a tutorial on how to order a remanufactured motor and replacing it. That would be a great posting but I’m not up to all the documentation work plus there are plenty of books on that subject already. This posting will be just simple eye-candy and progress blurbs for those interested in what is generally involved in replacing a motor. It’s not that hard and, who knows, you may realize it’s something you could do too someday.
First step is making sure you have the tools to do the job as well as a clean and well lit workshop. I have the tools and a clean shop but poor lighting as you can see in this photo with just the standard garage incandescent light bulbs turned on.

In the below photo you can see just how much of a different twelve T8 32watt fluorescent tubes make in my garage. My neighbor gave me the fluorescent light fixtures and I wanted them installed before I started my engine swap.

Getting power and running conduit for the new lights was a snap being I had installed a 20amp breaker and wiring to my compressor a few years back. I simply changed the single outlet box with a gang box putting the new light switch on the right and the original outlet on the left. The switch was salvage from changing out some switches in my house a few years ago and the wire was leftover from the same job so adding these great lights cost my just a few bucks for the conduit.

Now it’s time to get onto replacing that motor. Here is a quick photo of the motor compartment before starting. Actually I took a dozen photos from all angles as well as close-ups of the wiring and hoses. I will be labeling everything as I disassemble but having photos could come in very handy later when trying to remember the routing of everything.

Here the hood is off as well as the radiator overflow reservoir, battery, battery tray, air intake and air filter box.

My nephew, Andrew, is helping when he can which is a great opportunity for him to learn how to replace a motor. Not too many young people get to learn about engines anymore, which I find strange being we can’t do anything in our lives without them.

The front plastic grill cover is off as well as the top radiator retention bracket and fan cowling.

Gone is the fan belt, fan clutch, fan, alternator, radiator and some linkage to the throttle body.

If you look close at the below side photo you will see 4, maybe more, yellow tie-on labels on some cables and other parts. These are great labels when you’re taking so much off at once. You can tie them to wires, hoses, parts and even poke the string through the side of a Ziploc bag and tie the bag to the part with nuts and bolts in the bag.
This not only keeps everything together but I number each label sequentially and even add some quick notes to the label that maybe important for reassembly like; which length bolts go in which holes, torque values or just a page number in the service manual showing the torque and torque sequence.
I also keep a notebook on the side with each number I use, what the part was and any special details not added to the label like wire routing or a file name of a special photo showing complicated routing or installation sequence details.
This labeling schema gives you a 100% accurate roadmap for your reassembly later, even if days or weeks pass and the parts get shoved all about in your garage.

Now the shop crane is assembled. I used it to get the remanufactured motor out of my truck and onto a “roll-about” engine dolly. I have had this crane for over 10 years but you can buy one at Harbor Freight for under $200, which is less than what I paid 10 years ago
. I store my crane in the back of a shed all disassembled into bits that hang on the back wall on some pegs. Storing a shop crane like this takes up no space at all and it’s ready for work in mere moments.
You can also see parts of my engine stand on the garage floor. I will not need the engine stand until I pull the old motor with the crane at which time I will transfer the motor from the crane directly to the engine stand for further disassembly.

This is the remanufactured 5.2L V8 motor I’m going to be putting in shortly.

DAY 2:
I had to finish building a computer for my sister today so I only had time for 3 hours tonight but here is the progress. The AC is off to one side, no need to open the AC system to pull the motor. 
The power steering pump is off to the other side, no need to disconnect or drain this either. Sweet

My nephew is removing the lower radiator hose but you can also see that the following have been removed: upper radiator hose, AC and alternator bracket, exhaust heat shields and some wiring which has been labeled.

Below is the final photo for the night. The idler tension pulley and bracket have been removed along with the main electrical harness assembly. The throttle body has been removed and it’s wires and hoses labeled.

Tomorrow should be a more productive day. I will try to post another update tomorrow evening.
DAY 3:
Once again I spent most of my day doing something other than working on my Jeep. It was my last day of vacation so I spent it playing video games with my 6yr old son. My nephew did come over after his shift at the movie theater around 7pm. We worked on the Jeep from 8pm to about 11pm.
As you can see in the below photo the top of the engine is ready for pulling. The electrical harnesses are removed and labeled, all vacuum lines and hoses have been removed, and the fuel lines are disconnected as well as the fuel rails and fuel injectors.

We still have some work under the Jeep before the engine is fully ready to be lifted out such as removing the starter, flywheel shield, flywheel to torque convert bolts, exhaust pipes and transmission cooling brackets. I will add a C-clamp to prevent the torque convert from coming out of the transmission.
We can then remove the front engine mounts, slightly lower the engine with the shop crane, support the transmission with a transmission jack and unbolt the transmission from the engine. At this point the engine should slide forward and come up and over the side of the Jeep.
My nephew and I were debating on how best to connect the shop crane to the engine. We didn’t get any help from the Haynes service manual and I also have the official Chrysler Service manual for this 1994 Jeep, which is like 6 inches thick. Neither covers any details on actually pulling the motor with a shop crane. They both say to do it but not how to prep and connect.
Normally this isn’t a big deal. Once you get all the major wiring out of the way you just connect a chain to the back and front of the engine and then connect the shop crane to the chain and pull. The problem with this approach for this vehicle is that the back of the engine is 8 inches back and under the top of the engine compartment, kind of like one sees with a van engine but only 8 inches instead of 30+ inches. These 8 inches are a big deal because if we connect a chain to the back of the motor the angle the chain must take to get to the hook on the shop crane and to clear the fuel system would require it to go through the upper back frame of the engine compartment.

We hence took more stuff off than we would have liked such as the fuel rails and injectors which does give us access to put on a very short chain which should just clear the frame now.
But for fun we are also exploring pulling the engine from the intake manifold using the 4 throttle body bolts. We took a 1/4 inch circular steal plate and punched 4 holes in it using the plasma cutting torch and the old throttle body gasket as a template. In the below photo you can see it looks great.
Tomorrow we can weld a bracket to the top of the circular plate and blow a hole in it for the shop crane hook. Then I have to get some new shorter high strength bolts to bolt this plate to the top of the intake manifold.

I’m not sold on lifting the engine from the intake manifold just yet so if I can get the short chain on from the front to the back of the engine block I will do that instead. Either way the plate will still be quite nice to keep junk from dropping into the intake port.
DAY 4:
A week has passed since I last worked on my Jeep. I was just too busy at work and with other activities like; piano, taekwondo classes and general playing around with my kids.
The next phase of this job requires we raise the vehicle so we can drop the exhaust pipes and remove other components from underneath. Normally one can just disconnect the exhaust pipes at the headers but I knew I had to also replace the catalytic converter (CAT). So in this photo you see I have the back passenger side of the Jeep raised up for access to the exhaust pipes and CAT.

The CAT was quite a bear to get out. After removing the U-clamps on either side of the CAT and some tail pipe hangers it wouldn’t come apart. That was kind of expected so I followed the traditional approach. I fired up my welding torch and heated the junctions cherry red one at a time then pulled my heart out. This didn’t work for me because the joints cooled by the time I could turn off the torch and get into a safe place to pull. It was time for some team work. I got my 18yr old daughter, Veronica, to pull while I heated the joints and it all came apart with easy.

As you can see in the below photo there is nothing in my CAT. That’s not good, you shouldn’t be able to see clean through a CAT. I always passed emission testing but only by a hair so a new CAT will help out come next emission testing cycle.

My 19yr old nephew, Andrew (a.k.a AJ), came over in the afternoon and was able to help for the remainder of the day. It sure is super handy having extra help. My voice is gone today, however, because I spent many hours explaining what all the car parts we took off do and what and why I was going everything.
In this photo you can see the exhaust pipes have been dropped away from the engine and in the background you can see a bit of my transmission jack stand (red & black with the chain) which will be used to support the weight of the transmission once it’s unbolted from the engine.

I get a bit safety crazy sometimes as you can see by the 5 jack stands and transmission jack under the vehicle. I don’t like being under a vehicle unless I know I’m super safe.

Transmission jacks are very handy for such work but one could just carefully support the transmission with blocks or simple jack stands. I really don’t recommend that being these transmission jacks are much safer and they are not expensive. I got this one at Harbor Freight for ~$89 on sale about 4 years ago.

My transmission jack has controller gears built into the head of the unit which you use to adjust the level and angle of the transmission. These controls make easy work when it comes time to realign the transmission with the engine during reassembly.

I didn’t pull the motor by the intake manifold as you can see in the below photos. My Uncle recommended against it and it just didn’t seem like a good idea. I wanted to fabricate a custom bracket out of 1/2 inch thick bar that could be bolted to the back of the block and would be bent up and out toward the front clearing the framing. That didn’t workout because once I got the bar bracket in place I couldn’t get a wrench behind it to install the bolt.
My nephew, Andrew, championed the more traditional idea of just lashing a chain overtop of the intake manifold from the front to the back of the block. Turns out his straight forward idea solved all our problems quite elegantly. My Uncle also recommend just using a chain but I didn’t think there would be enough clearance for the chain unless I removed the intake manifold and valve covers. Turns out I was just wrong.


I don’t pull motors very often and normally prefer to use an engine balancer with my shop crane which was not going to work without my custom bracket approach. If I could have made the bracket idea work I would have been able to pull the motor with the fuel rails and injectors in place. It was a bit more work getting the fuel components off the intake manifold but that’s ok being the simple chain idea made for easy pickings anyway.

The motor is OUT and resting a bit of it’s weight on some jack stands and blocks of wood for the night. I have to get some new longer high straight bolts before I can mount the engine to my engine stand.

Some diagnostics show where my annoying little engine oil leak was coming from all these years. Oil was spewing out of the electrical connector of the oil pressure sending unit. Go figure that, I guess I have to order another part.

And my endless coolant leak was coming from this rusted out coolant plug on the back of the motor between the block and the flywheel.

The next day I work on this project I will be tearing down the engine and starting the reassembly of all the bits onto the new long block.
DAY 5:
Today I got started taking the old engine apart. I didn’t really start until around 7 pm and only worked until 10pm so not too much progress this evening.
I got my new grade 8 bolts with the right length and threads to mount my engine to the engine stand. I figured I could do this myself before my nephew arrived. I was wrong in two ways. One: It takes two people when the engine is hanging sideways on the crane. One person has to hold the engine at an angle where the stand can align with the back of the block. Two: My 1000lb engine stand just couldn’t bear the load.
This 5.2L magnum V8 fully assembled is just too much. It was clearly going to buckle under the weight so we left the crane chained up to take half the load for now.
(Turn your head and cough! Sorry for that but with a photo like this somebody had to say something)
I do like to use these nitrile gloves because they are resistant to oil, fuel and other chemicals. You can’t really tell you’re wearing them and it makes for super fast cleanup when you’re done for the day. Their cheap too; ~$6 for a box of 100.

I’m either going to weld up some kind of cradle support or buy a new 2000lb engine stand. I like the later solution being I got my Harbor Freight flier today with the 2000lb stand on sale for $99 plus the flier came with a 20% discount for one item. I know Harbor Freight stuff can be junk but if you use their stuff only infrequently and with care you can get along fine. In a way their stuff pays for itself if you can do just one job. If you get two or three jobs it’s like printing money compared to the thousands of dollars you can spend on good tools. There are some tools I will not buy at Harbor Freight but those are normally tools I need to work every time and for years and years.
On to other problems, there are alwasy other problems.
I had one bolt on my exhaust manifold that wouldn’t budge even after soaking overnight with penetrating oil. I rounded the head of the bolt off trying to get it out.

What was my solution? MIG weld a big fat 3/4 nut onto the rounded off bolt. AJ started this job by grinded a clean surface on the head.

Then he test fits the 3/4 inch nut.

I manned the MIG welder. If anybody is going to crack my exhaust manifold it might as well be the guy who would have to replace it.

Here is a short video of the welding job.
Job well done! AJ gets the stubborn bolt off with ease.


Alex shows everyone that the exhaust shield is now off. I guess I have to go shopping for a new exhaust manifold bolt. How can anybody do this for a living, I’m always out shopping for parts.

WOW! We finally got some work done. In the below photo you might notice, behind the intake manifold, AJ has removed the sparkplug wires, distributor cap, rotor cap, distributor pickup coil, oil pressure sending unit, EGR valve and the pipe routed from the exhaust manifold to the EGR valve. Here he is removing the exhaust manifolds after a good soaking in penetrating oil.

To my surprise there were no exhaust manifold gaskets. I don’t get this because both my service manuals state you have to use gaskets, but there were none to be found on this engine. I kind of thought this block was 100% factory original being I bought this Jeep like 9 years ago when it had fewer than 70k miles and from the original owner. It shouldn’t have had any major engine work where the exhaust headers would have had to come off. I will have to make some phone calls to Chrysler later to see if this was optional or something.

The engine is starting to trim-out so it won’t be long now.

Well that’s it for tonight. I might not be getting back to this project until next weekend but if you’re following this live you might check in around mid week.
DAY 6:
I have almost nothing for today. It’s Friday and after work I took a nap and then watched a movie. It wasn’t a total waste of a day. My wife put together my new 1 ton engine stand while I was at work (see below). She can cook, clean and assemble an engine stand, sweet! Of course she does have a PhD so she does a lot more than just cook and clean. In fact she will be back teaching this fall, like in one week, so I have to finish the Jeep or I’m going to be taking the bus to work

Best thing about this new stand is it cost me almost nothing. This 1 ton stand was on sell for $99 at Harbor Freight, I had a coupon for another 20% off one item and they also gave me back 100% on my old 1/2 ton stand, which I had for over 10 years, being it was not meeting its 1000lb rating. I swear, people complain about Harbor Freight’s crap and a lot of it is crap but I wouldn’t be able to afford to do half the stuff I do if it weren’t for their cheap tools.
Around 10pm I thought I best mount the engine to the new stand but once again I have to get some new longer high straight bolts. The face plate and standoffs add another inch so my bolts are too short.
Other than that the only update would be that I called Chrysler and they confirmed that the exhaust manifold gaskets are optional on this vehicle and should only be used if there is warping. Wow, I never heard of that before.
DAY 7:
Wow! What a waste of a day. Well that is not entirely true, but still. Alex and I had Taekwondo class in the morning after which we all went out for lunch. That wasn’t bad but then I started my hunt for longer bolts to mount the engine to my new stand. Turns out the auto parts stores I normally buy large grade 8 bolts don’t sell anything larger than 4 inches and I needed 4.5 inches. I drove place to place for about 2 hours before finally trying the True Value hardware store. True Value has just about any size bolt and nut you could want. I don’t know why I always forget about simple hardware stores. I guess I’m so acclimated to the large home improvement department stores I forget that the little Mom & Pop hardware stores still carry all the hard to find stuff.
Then things got worse. Turns out my new engine stand has front legs that splay out and so do the legs on my shop crane. This means my engine stand can’t get close enough to my shop crane in order to mount the engine. The damn legs between the two block each other. I thought I could use my two floor jacks to just jack up the front legs of the shop crane but then the jacks are in the way. Andrew and I then tried to block-up the front legs so we could move the jacks away but as you can see in the below photo there was still noway the legs of the engine stand could squeeze by the blocks.

In these photos it looks like You might be able to move the bricks out to the edges of the shop crane legs and squeak by, but when we tried that the legs were too unstable and would have slid off the bricks when mounting the engine.

Then I remembered I had saved some homemade adjustable welding cart legs I made for an old cart I don’t have anymore. I found the adjustable legs and sure enough they fit the bill. Andrew chopped off about 15 inches from two old leg brackets and we then drilled and bolted the adjustable legs to the shop crane legs. Being these adjustable legs fit on the outside of the shot crane legs they allowed the engine stand legs to squeak by with an inch to spare when raised up.


The adjustable legs could have been a couple of inches longer in height but nothing some bricks on the outer edge couldn’t fix.

Now everything fits!

Once the engine and engine stand was pulled away from the shop crane I just used my air wrench to lower the adjustable legs and move the crane out of the way. These adjustable legs will have to come off right before we put the engine back in the Jeep because these legs will get in the way when we slide the shop crane legs under the Jeep.

There, the engine is ready to be disassembled and this new 1 ton engine stand is having no problems holding this engine.

The only other thing I got done today was cleaning parts in my parts washer. Not really anything to take photos of but you get the idea, all the parts have to be cleaned. When Andrew comes over tomorrow morning we will start breaking down the old motor, cleaning the oil pan, valve covers and intake. Then start on the reassembly with the new long block.
DAY 8:
I’m late posting day 8. Day 8 was actual last Sunday and it’s now Saturday so very late would be a better statement. We did get a lot done. In the below photos you can see we have removed (water pump, thermostat, thermostat housing, main pulley, harmonic balancer and the valve covers).
Now the air intake manifold is off.
The engine rolls over nicely with the engine stand to give easy access to the bottom. Time to remove the oil pan.
The oil pan is now off and here I’m using a seal puller to remove the front crank shaft oil seal from the timing cover.
And the seal is out.
The pipe sticking up in the back is the siphon pipe for the oil pump.
This pipe and screen sit down in the bottom of the oil pan so the pump can suck up oil and push it throughout the engine at about 40~80psi.
When you rebuild or replace a motor you should always put in a new oil pump. They don’t cost much and you don’t want to take everything apart again just to replace an old oil pump.
The oil pump is off.
The motor is right site up again and I have taken off the timing cover. With the timing cover off you can see the timing chain and timing sprockets. The large sprocket is connected to the cam shaft and the small lower sprocket is connected to the main crank shaft.
This is a back view of the motor on the engine stand. It is now all stripped down to a “long block”. This is all the further you need to go in the disassembly because we are swapping this old “long block” with a new remanufactured “long block”.
This is the pile of parts which are all bagged and tagged. I have to spend a day or so cleaning most of these parts before I can start the reassembly.
I have my 20gal parts cleaner running and I have started cleaning the oil pan. All the gaskets on all the parts must get cleaned off and all the bolts and nuts need to be cleaned and brushed. Everything needs a good degreasing.
Here are some tips for parts cleaning.
I use some strong detergent parts cleaner which you can get at an auto parts store. I don’t dilute the detergent but I do soak the detergent jugs in a sink of super hot water for 30 minutes before pouring it into my parts washer. The hot detergent cleans and degreases the parts much better than room temp detergent.
Also, as you see in the below photo, I have added some used anti freeze jugs filled with hot water to help raise the level of the detergent in my parts washer without diluting the detergent’s concentration. This saves money on detergent and the hot water in the jugs helps keep the detergent warm longer.

For super dirty parts like throttle bodies and crusty bolts I soak them overnight in a big can of carburetor cleaner. Carburetor cleaner is very expensive and you have to wear very thick gloves when using it but it can clean parts like nothing else, if you let it soak overnight.
DAY 9:
Another late post, these photos are from last Monday and today is already Saturday. We really didn’t do anything productive on day 9 because all we did was further teardown the motor. Like I said in day 8 we could stop the teardown at the “long block” but Andrew wanted to see the inside, I wanted to see if I could identify why I was burning oil so bad and the engine refurbishing house said they would appreciate it if we completely tore down the block as long as we labeled all the parts with the location they came from.
The first to come off was the heads.

Some carbon and burnt oil deposits on the passenger side pistons.

But on the drivers side piston 7 was a dirty oily mess! Yuck. It looked like the head gasket was blown at the top allowing piston 7 to pressurize the crankcase as well as suck oil from under the intake manifold where the cam and pushrods are located. I’m not an expert at this but I’m thinking this was my oil problem.

Photo of Andrew holding the last piston to come out. Actually we took the pistons out when the bock was upside down so this is more of a photo-op for the scrapbook.

Here AJ shows how easy it is to just pickup a v8 block once is striped down. It isn’t hard to move around at all and that’s a good thing being we have to move this aside and make room for the new “long block”.

The new “long block” comes with fully assembled heads but just for the learning and investigation Andrew takes all the valve and valve springs out of the old heads. We put the valves, springs and retainer clips in separate labeled Ziploc bags. These heads where overdue for service so it’s a good thing they’re being replaced.

Onto the NEW! Andrew and I chained up the new “long block” to the engine balancer which is hooked to the shop crane. I’m steadying the engine and engine balancer with my hand as AJ pumps up the shop crane.

The balancer will make it much easier to align the block with the engine stand.

That’s it for day 9. The new “long block” is on the engine stand and ready for all the old bits to be attached. I still have a lot of parts to clean and I will clean all my tools before starting the assembly. You don’t want to get dirt in a new motor so you MUST clean all your tools and workspace before starting the assembly.

Today is Saturday and Alex and I have Taekwondo testing for our brown belts. Once the testing is over, around 1pm, I will get back to this project and I hope to post day 10 later tonight.
More to come later…
I converted a Harbor Freight utility cart into a multifunctional welding cart. The conversions to the cart make it easier to move about in tight places yet strong enough to support 100lbs of brick and a plate steel top. I added a second smaller chopped up Harbor Freight utility cart as a firebox to catch all the sparks when cutting with the oxygen-acetylene and plasma torches.
Final cart modifications: Large plate steel top for MIG welding, bricks for oxygen-acetylene welding and firebox for plasma cutting.

Converted to oxygen-acetylene welding and plasma cutting:

Converted to MIG welding:

(more…)
How to build a “Trampoline Soaker” for only $26.68

What is a trampoline soaker you ask? Well it’s a name to describe any contraption that sprays water over a trampoline. It’s great fun for the kids on days when it would otherwise be way too hot to play on a trampoline.
I’ve seen this done before in many simple ways but found all examples quite difficult to put up on the trampoline, take down, control direction and change the type of spray. My first few builds were failures in all the above noted difficulties. I needed something much simpler, more functional and still flexible enough so my wife could take it down to spray her plants along the side of the house and then hang it back up on the trampoline.

(more…)
This is a fun post, for me, about our 2004 German made
Schimmel SP189 Konzert Diamond Edition 6’3″ piano. (Man ain’t that a mouth full?) We purchased the piano in May of 2008, but these photos are from Oct. 2008 and March 2009 because I just didn’t get around to taking photos of it for the blog. I guess I was having to much fun enjoying it to take photos or post the lighting design my wife and I came up with for the piano room. So these photos are just to enjoying the beauty of a wonderfully made piano and some tips on piano care and how to create the perfect lighting for a grand piano.

Project: Tool to help teachers draw rule lines for elementary kids to practice writing letters and words.
Requirements: Tool must be easy to use, easy to change markers and increase efficiency of drawing rule lines on white boards.

I found myself in need of a better mouse trap. We had (had
) a very clever mouse. Each night for about a week our “ninja mouse” would take the bait off the trip pan without tripping the trap. I remember once, long ago, my Dad tied some cheese to the pan. I tried that but this mouse was too smart for that. He just ate through the string! Being an Engineer I know I could do one better. A little hot glue a bit of dog food and BAM, you have a ninja proof mouse trap. That night was the mouse’s last night on earth. We don’t normally have mice and we have not seen another since, but I’m ready if any want to try me out again.

Rebuild your 1979 Jeep CJ7 2 barrel carburetor
This is a collection of photos I took when rebuilding a friend’s carburetor. He had two and both where previously rebuilt or reassembled incorrectly.
Start by going to NAPA or other auto parts store and getting a carb rebuild kit ~$20 and a new float ~$12. Make SURE the rebuild kit has not been opened because these get bought for just one broken bit and returned to NAPA for a refund WITH THE PARTS MISSING that you will need. Pictured here is the Choke.

AHAB was “A High Altitude Balloon” project posted on Make Magazine plus original PDF posting. Some novice balloonists with tons of electronic skill devised a payload including cameras, cell phones and GPS equipment to take photos from near space. The GPS data transmitted back indicated they achieved 109,000ft which is just amazing. Photos from near space would have been spectacular. Unfortunately they never found the payload. There GPS transmitter gave out during the descent around 60,000ft. They searched but with no luck.
The call went out for others to help in the search. I was going to be in the area on a vacation to the Pacific Coast a few months later so I got the new projected targets, my GPS and a team to help search. (See our results posted at Make Magazine). The following larger photos are boring snapshots of us at the target areas. Sorry to say we too did not find the payload.
The balloon

Follow this link to my Redneck Pool Heater website to learn how you too can modifying your gas grill into a pool heater.


