
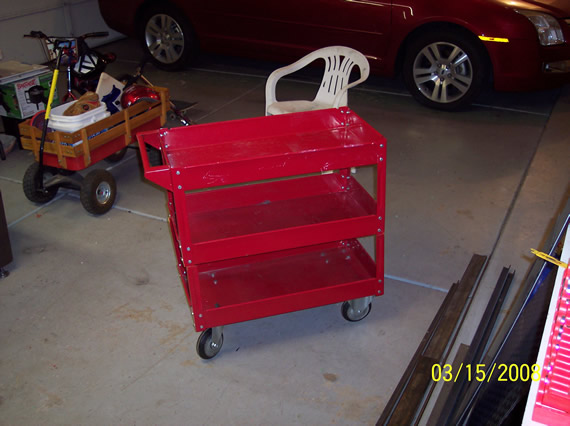
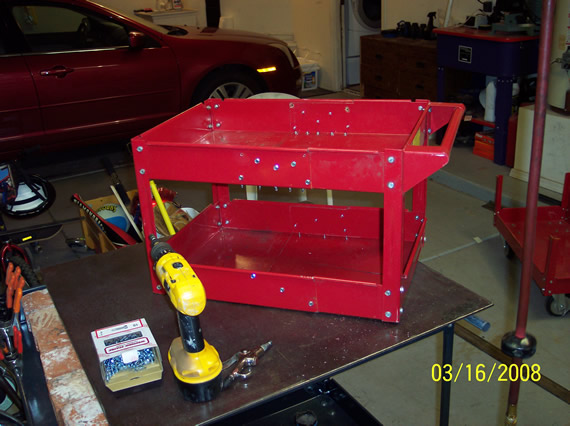
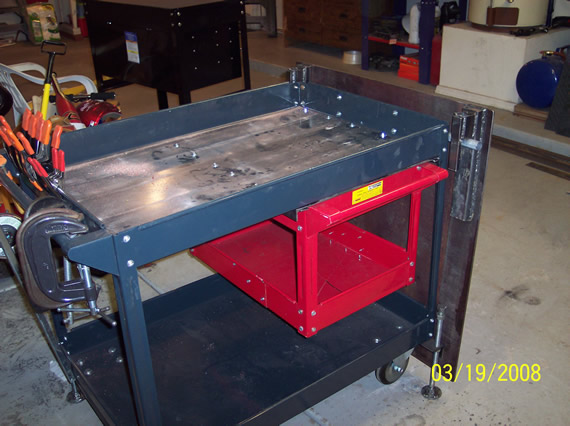
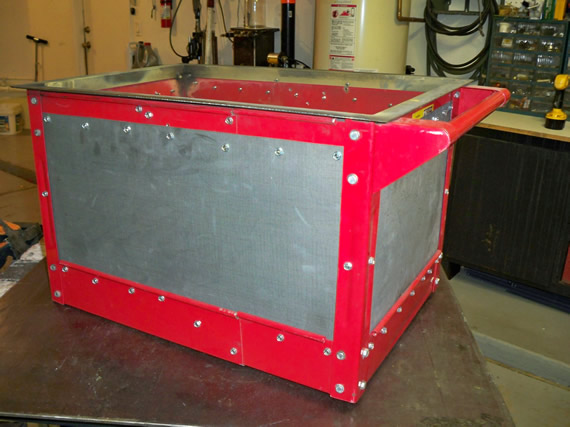
I converted a Harbor Freight utility cart into a multifunctional welding cart. The conversions to the cart make it easier to move about in tight places yet strong enough to support 100lbs of brick and a plate steel top. I added a second smaller chopped up Harbor Freight utility cart as a firebox to catch all the sparks when cutting with the oxygen-acetylene and plasma torches.
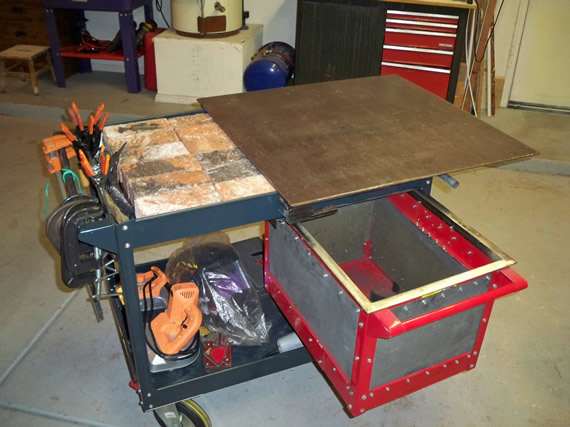
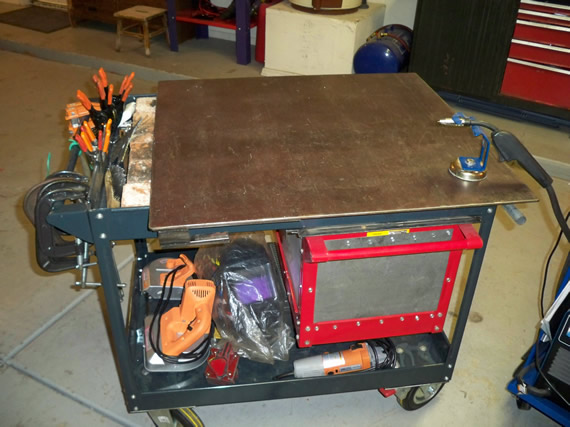
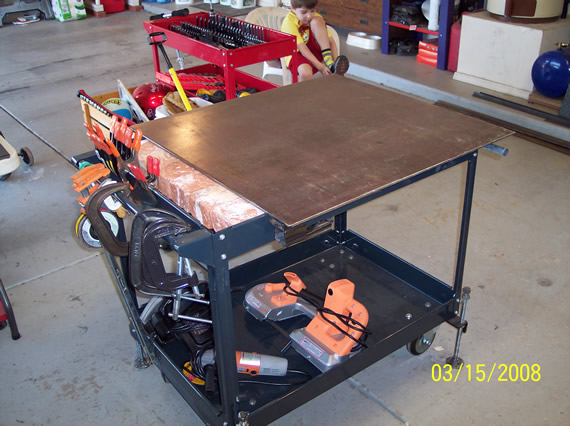
Final cart modifications: Large plate steel top for MIG welding, bricks for oxygen-acetylene welding and firebox for plasma cutting.
Converted to oxygen-acetylene welding and plasma cutting:

Converted to MIG welding:
READ —>:
Links to some build materials:
Large cart converted to welding cart.
Small cart used for firebox.
Heavy duty swivel locking wheels.
Steel sources:
I get new and scrap metal from American Metals Co. in Mesa, AZ and Industrial Metals Supply Co. in Phoenix, AZ. But if you need a small amount of material for a project you can get what you need at just about any home improvement center like Home Depot, Lowes or Ace Hardware but be prepared to pay a lot more at such stores.
Welding tools and supplies:
Harbor Freight Tools
Phoenix Welding Supply
Welding Depot
CyberWeld
Welding Supply
Construction details:
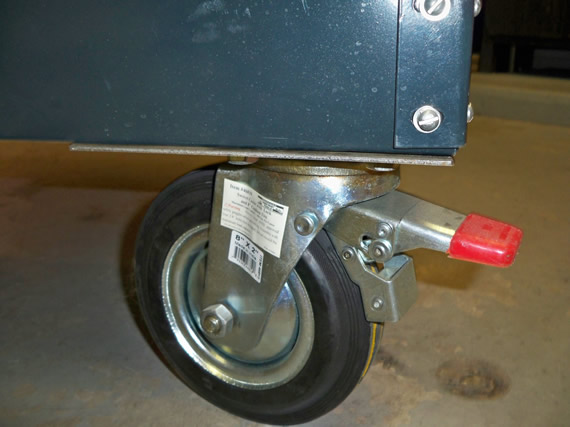
The first modification is to the wheels. You want your cart to move in any direction without having to be a 3-point turn master. Change out the wheels with these 8” x 2” swivel casters with brakes. Yes, you want them to all have brakes because you don’t want to be hunting for a brake when a 100+ lb cart starts moving around. Also, if you have to start pounding on something you really want the cart to be solid.
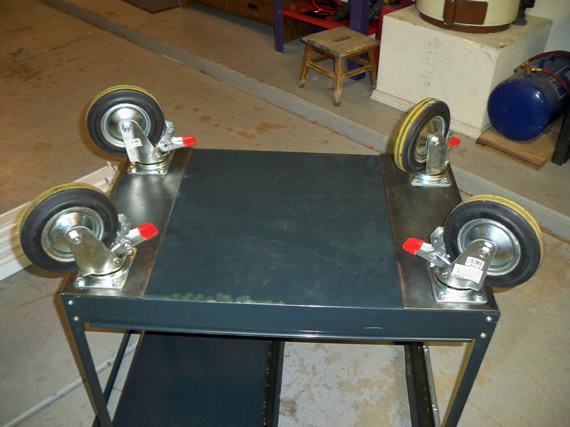
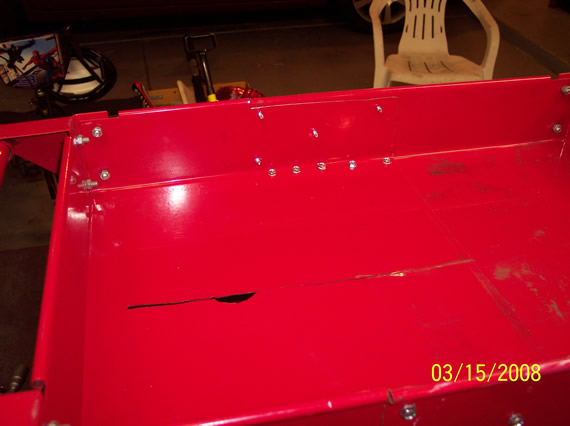
Now you may have wheels that support the load but the thin sheet metal the bottom cart tray is made from will not! Two 24″ x 7″ x 1/8 inch steeel plate will stiffen up the bottom of the cart. You could weld these casters to the plate but being you have to bolt the plate to the cart it’s best to drill and bolt everything together at once.
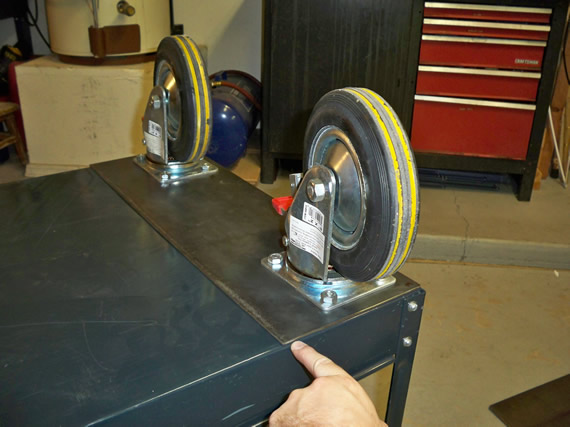
Here I’m pointing at the original wheel bolt holes so as you can see you will need to drill new holes for the larger wheels.
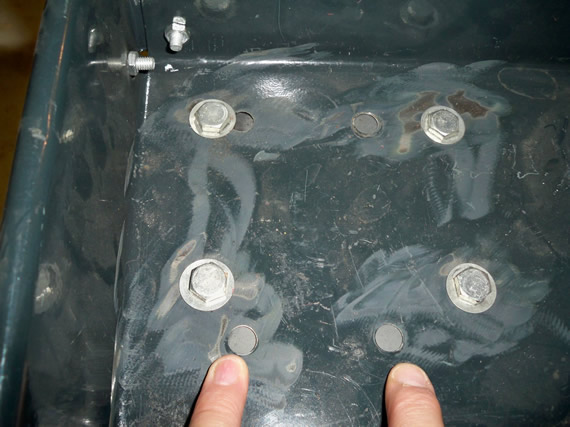
When you drill your new holes make sure you’re close enough to the edges so you can access the brake lever.
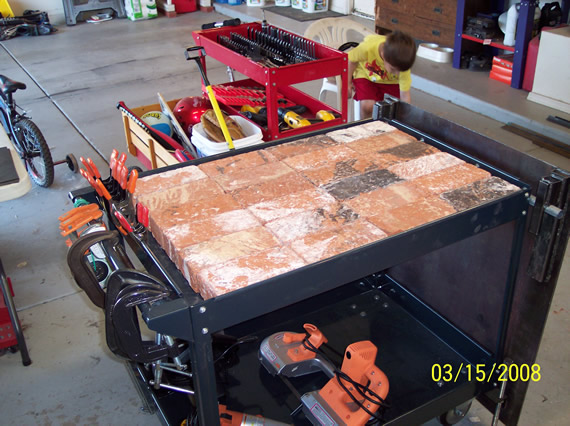
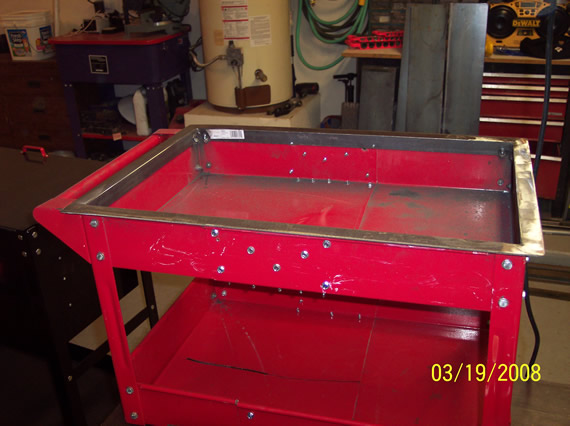
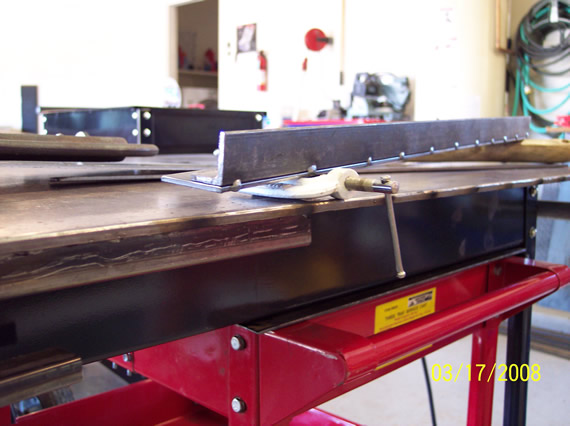
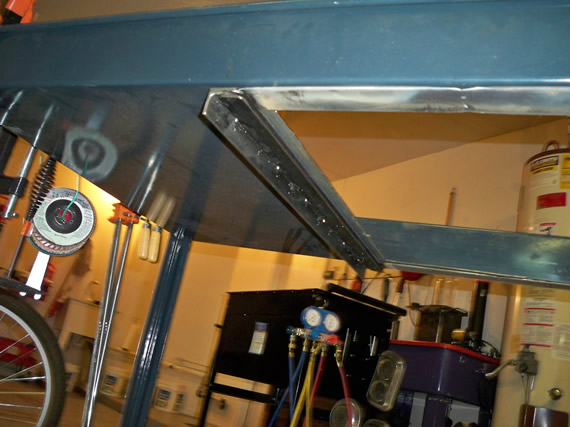
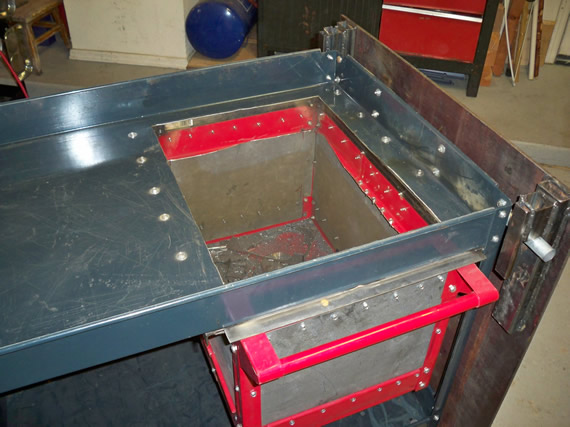
I wanted bricks laid out in the top tray for oxygen-acetylene welding but when I tried standard bricks they were too short to be level with the top and they also deformed the tin tray making a concave layer of bricks. I needed to construct a stiff bed for the bricks so they would lay level. As luck would have, it turns out 1/2″ x 1” tubing stacked crossway raises the brick to exactly level with the top rim of the cart. I cut one set of 6 tubes 33” long and another set of 12 tubes 23” long then cross welded them into a grid. A Harbor Freight handheld band saw and a bench vice makes short work of the cuts.

The recycled chimney brick lay in 4 by 6 if you want to fill the whole bed. I know these are not firebrick but they work for now and I will replace them with firebrick someday, if I ever find a cheap source.
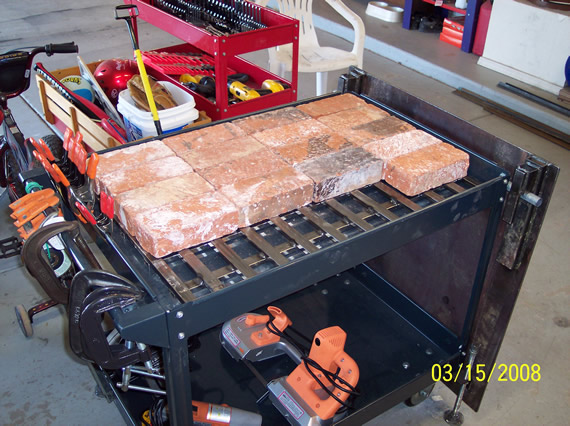
The cart is now ready for oxygen-acetylen welding.
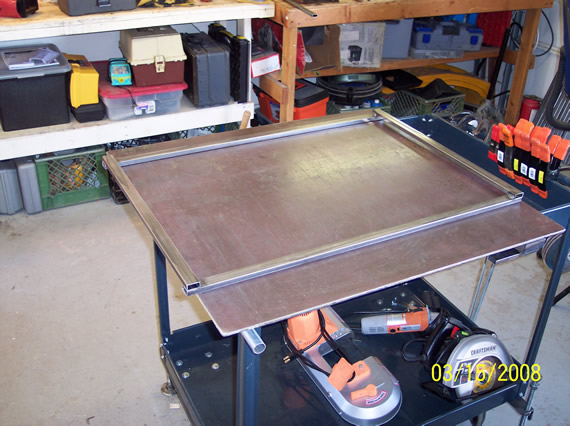
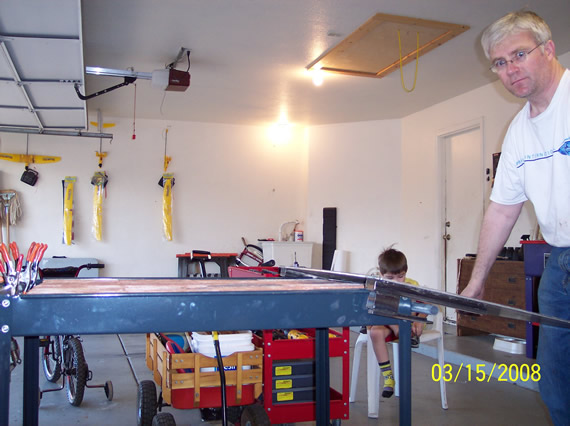
I want this cart to double as my MIG welding cart too, so below you see a large 1/4″ thick 31″ x 33″ steel plate top which hangs from one side of the cart on some makeshift hinges. I got the large plate steel top as scrap from American Metals for $32.00 which is quite cheap. If you call around to metal supply shops asking for scrap to use for a welding bench top you may also get lucky.
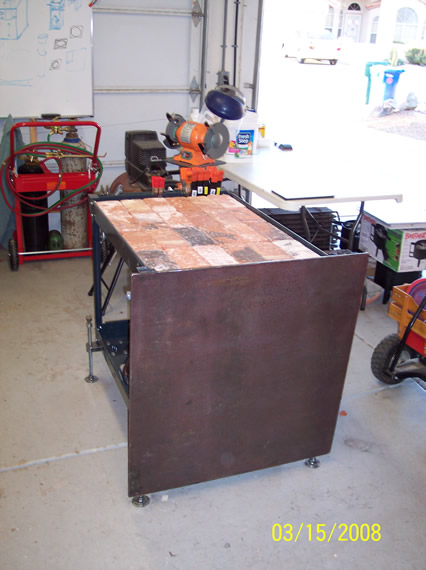
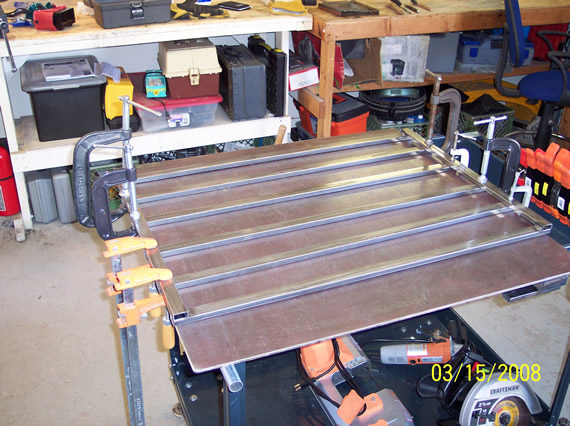
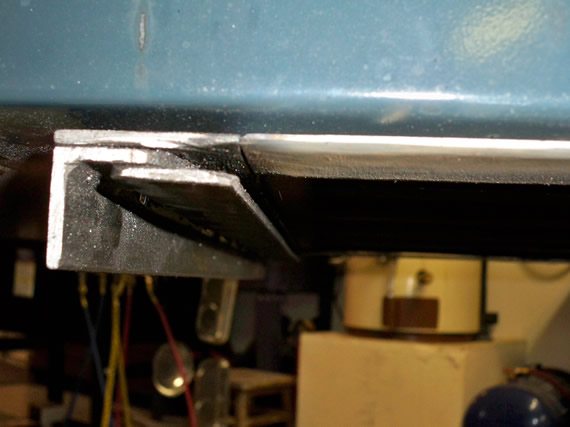
The hinge is constructed of some stacked tubing welded to the underside of the steel plate and a steel electrical conduit pipe bolted to the side of the cart with conduit clamps.
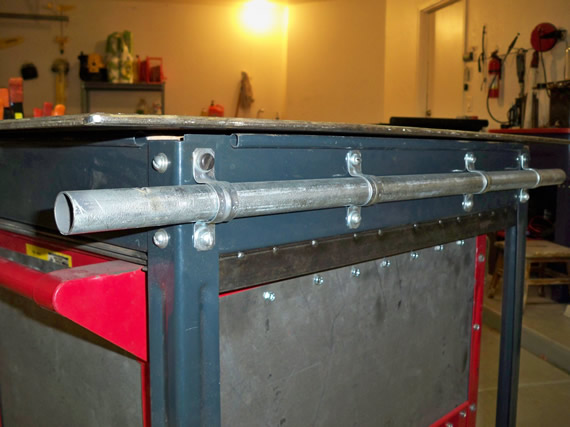
Make sure the stacked tubing is about 1/2” wider than the cart’s top tray and DO NOT weld the tubing to the steel plate in a continuous bead or the plate will warp! Make short tack welds and let it cool frequently. I did it wrong and warped my plate a bit.
With the hinges it’s easy to lift and lower the 80+ lb steel plate top.
Now the cart is able to be used for both oxygen-acetylene and MIG welding, but I need to make one more modification so I can safely cut with my plasma torch in my garage without the worry of stray sparks staring a fire.
I had this old utility cart that I didn’t like so I chopped it up and reassembled it to construct a firebox trap. I don’t recommend using this small cart to make a firebox but it had a handle, was metal and I had the time and tools to do the modifications.
First thing was cut the cart in half just under the middle tray.
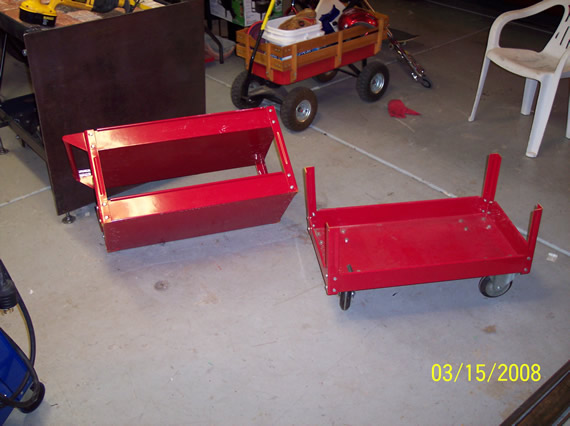
The cart was too long so I chopped it in half so the two ends could slid together to make a shorter box 23″ long.
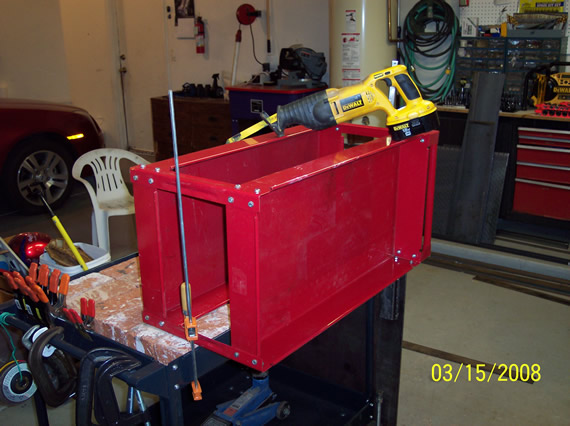
Before they will slide together I cut off about half of both trays’ rolled edging on one side.
It was a tight squeeze so I used my air-nibbler to cut a relief slice down the middle of both trays on one side.
Then I used short self taping metal screws and a screw gun to zip both halves together.
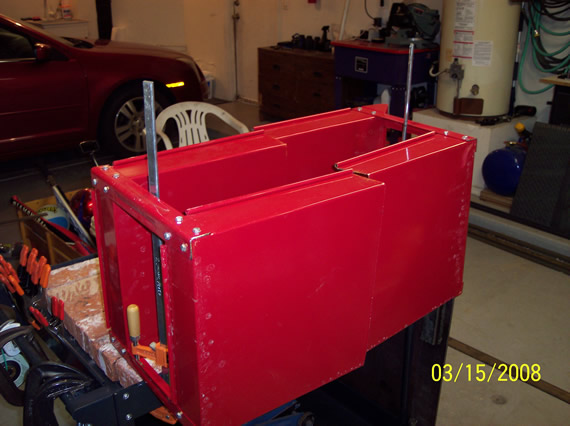
No need to put any screws in the middle being that will be getting cut out later.
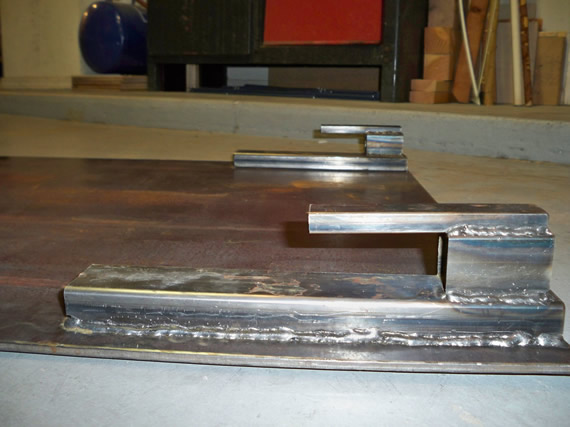
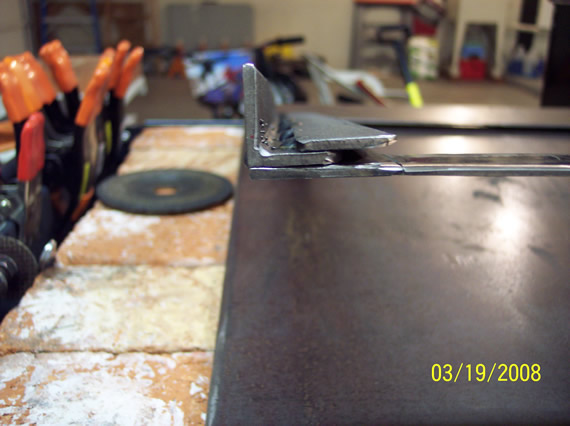
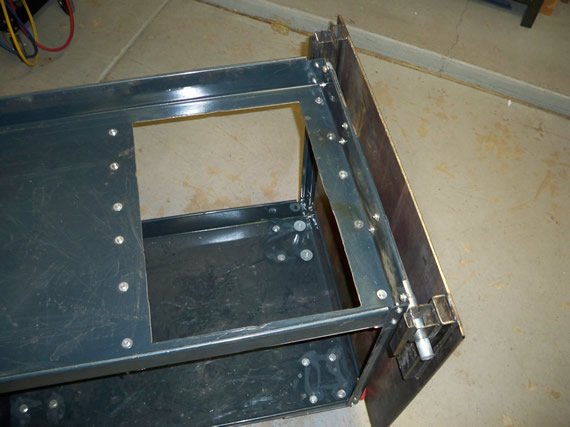
The firebox needs to hang from the bottom of the top cart tray so I welded up a rectangle of angle iron and bolted it to the top of the firebox. I also used my grinder to thin up the top edge of the angle iron so it will slide smoothly in some homemade brackets.
The under side of the top cart tray needs a matching rectangle hanger so the firebox can glide in and out to be emptied or to retrieve any items dropped in the firebox by accident. I constructed this hanger out of a sandwich of angle iron and strap steel.
This is upside-down but shows the final sandwich of angle iron and strap steel. The gap is where the angle iron bolted to the top of the firebox will slide.
Once again this is upside-down but shows the final hanger.
This is just a photo of the hanger bolted to the underside of the top cart tray. Notice I rounded all the inside edges before I welded the parts so it would be easy to align and insert the firebox.
Now I have the makings for a firebox / drawer.

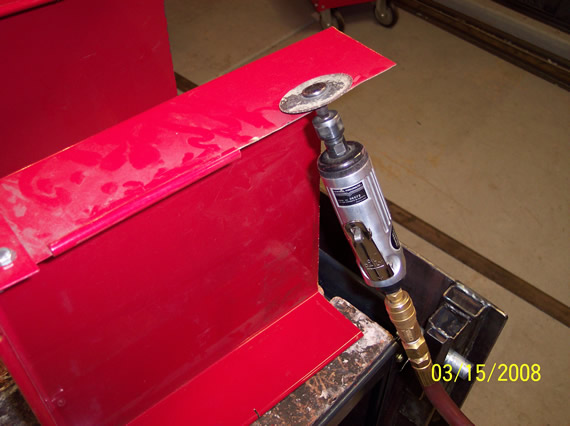
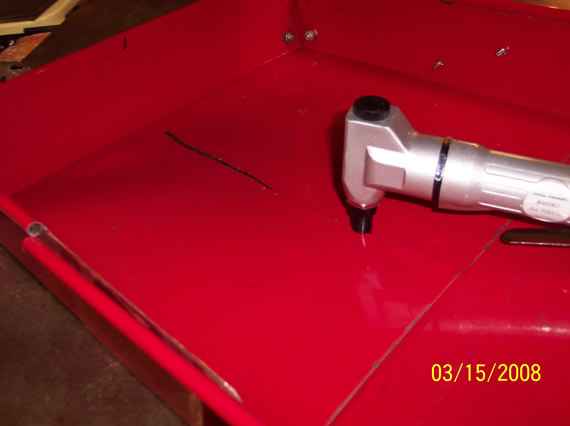
Time to use the air-nibbler again to cut out the bottom of the cart tray.
View from the bottom showing the hanger and new hole.
The firebox needs to be fully contained. I cut some tin and used more metal screws to zip on some sides. The tin goes on the inside of the low tray and on the outside of the upper tray. You have to cut the tin just right so that all edges overlap leaving no holes or gaps where sparks could escape.
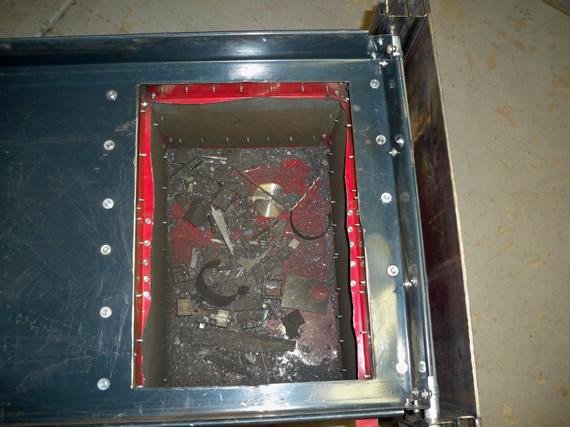
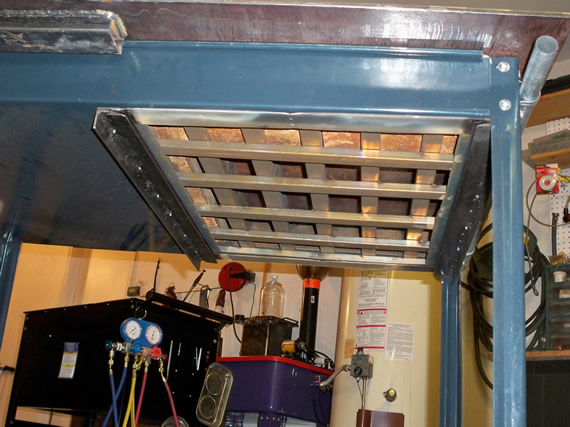
Finally just cut the bottom of the upper tray so all the slag and sparks can fall to the bottom of the firebox. You can see I have already been making good use of my firebox (fire trap).

Some photos of the firebox hanging in place.
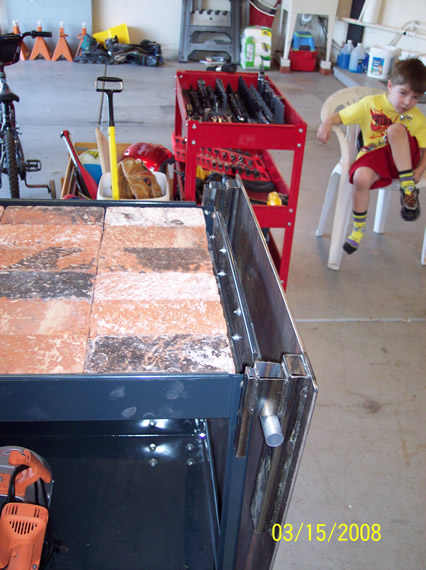
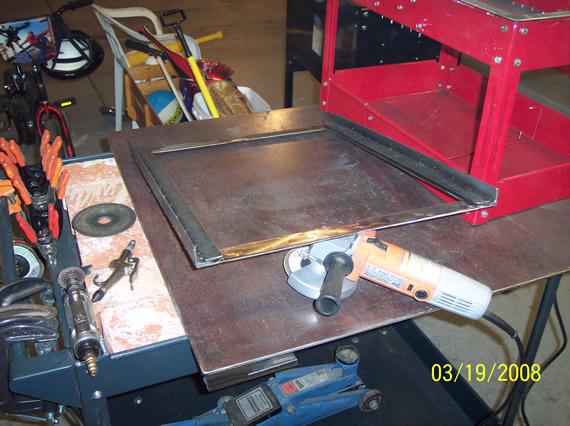
Of course to cut metal you need a level surface made from some sacrificial material. I constructed a 16” x 16” grate from 1/8” thick by 2.5” wide strap steel lightly tacked at the edges.
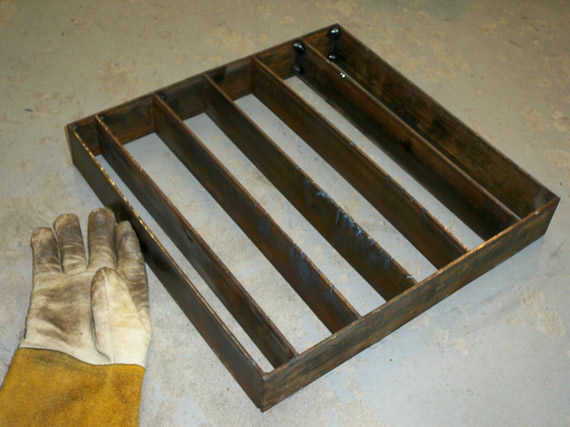
You could make this grate the full length of the cart but I chose to only use one corner removing only 8 bricks.
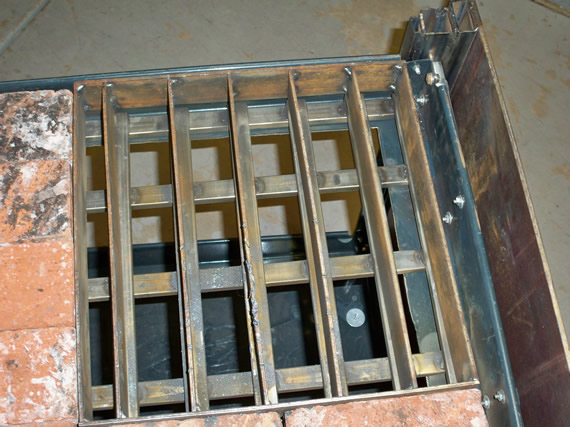
Here is a view from the bottom showing how the tubing and grate spans across the opening to the firebox.
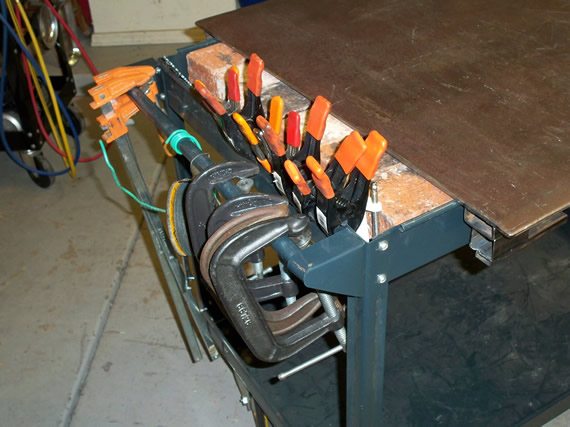
One last tip: the cart handle comes in very handy for hanging all your clamps and there is a small 2 inch gap between the brick and the tray edge on this end for storing your metal brushes, markers and other such small welding supplies.

Links for Beginners in Electronics }:-)
Archives
- April 2017 (1)
- March 2017 (3)
- December 2016 (1)
- November 2016 (3)
- October 2016 (2)
- September 2016 (2)
- August 2016 (4)
- June 2016 (1)
- May 2016 (6)
- April 2016 (1)
- March 2016 (3)
- February 2016 (4)
- January 2016 (3)
- December 2015 (1)
- November 2015 (5)
- September 2015 (1)
- July 2015 (2)
- June 2015 (6)
- March 2015 (1)
- January 2015 (2)
- December 2014 (2)
- November 2014 (4)
- October 2014 (2)
- May 2014 (1)
- March 2014 (5)
- February 2014 (3)
- January 2014 (1)
- September 2013 (2)
- August 2013 (1)
- July 2013 (4)
- June 2013 (3)
- May 2013 (2)
- April 2013 (1)
- March 2013 (3)
- February 2013 (2)
- January 2013 (2)
- December 2012 (1)
- November 2012 (8)
- October 2012 (5)
- September 2012 (1)
- August 2012 (1)
- July 2012 (2)
- May 2012 (2)
- April 2012 (1)
- March 2012 (3)
- February 2012 (2)
- December 2011 (2)
- November 2011 (4)
- October 2011 (1)
- September 2011 (1)
- August 2011 (2)
- May 2011 (2)
- April 2011 (2)
- March 2011 (2)
- February 2011 (2)
- January 2011 (1)
- December 2010 (2)
- November 2010 (2)
- July 2010 (3)
- June 2010 (2)
- April 2010 (1)
- March 2010 (1)
- February 2010 (2)
- January 2010 (1)
- December 2009 (2)
- October 2009 (4)
- March 2009 (1)
- December 2008 (1)
- November 2008 (1)
- August 2008 (1)
- April 2008 (1)
- March 2008 (1)
- February 2008 (1)
- June 2007 (1)
- November 2005 (1)
- April 2005 (1)