
DAY 1
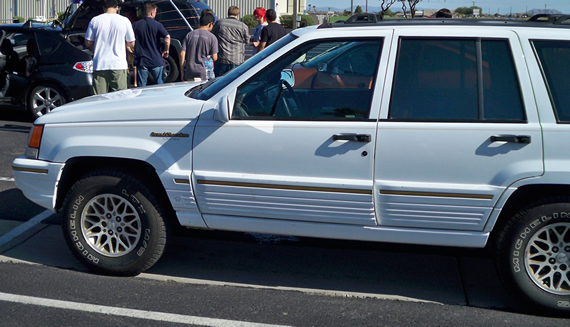
I have to replace my 16 year old Jeep Grand Cherokee 5.2L V8 engine. It no longer passes emission testing and smokes like a mosquito fogger!
Being this engine swap-out project will take several days I’m going to post each day’s progress below with a DAY Number heading marking each day’s work. Unfortunately this will not be a full tutorial but rather just some eye-candy photos and progress blurbs. You will learn what is “generally” involved in replacing a motor and you may realize it is something you could do someday instead of junking out a nice vehicle and taking on 5 to 6 years of new car payments.
In the past I normally pull my motors, tear them down and replace and rebuild as need be. But that takes a ton of time so for my Jeep I decided to order a fully remanufactured “long block” from Engine House in Phoenix, AZ. They have a great rating with the BBB and everyone I asked recommended them.
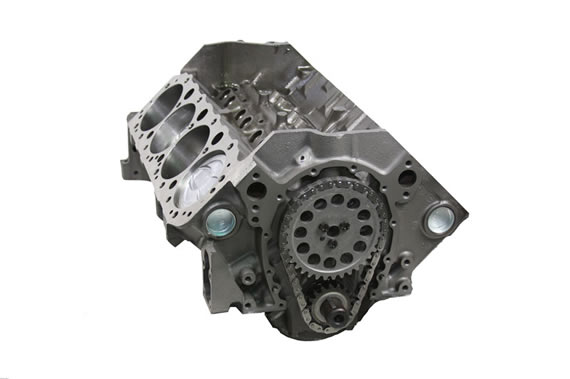
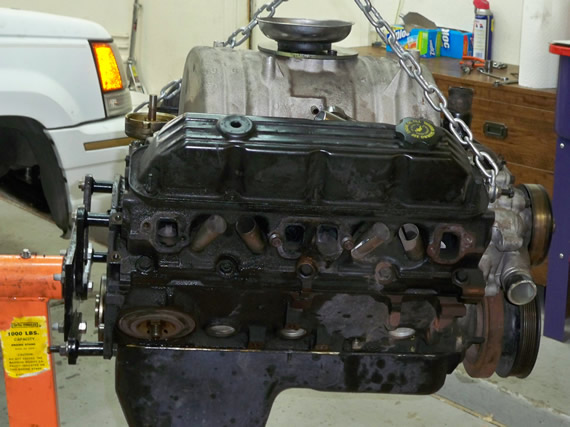
Below is a photo of a remanufactured “short block” which does not have cylinder heads installed. With a short block you would have to use your old heads or get new cylinder heads and install them yourself.
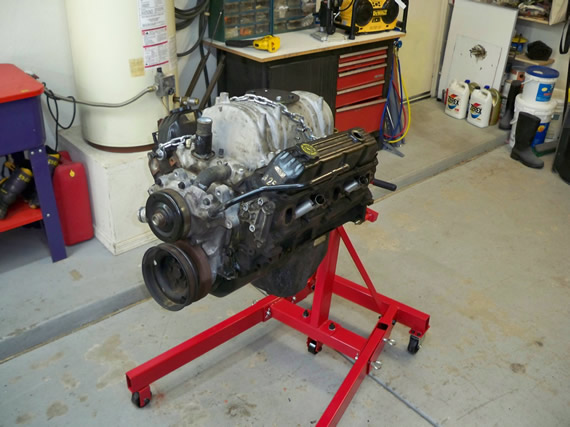
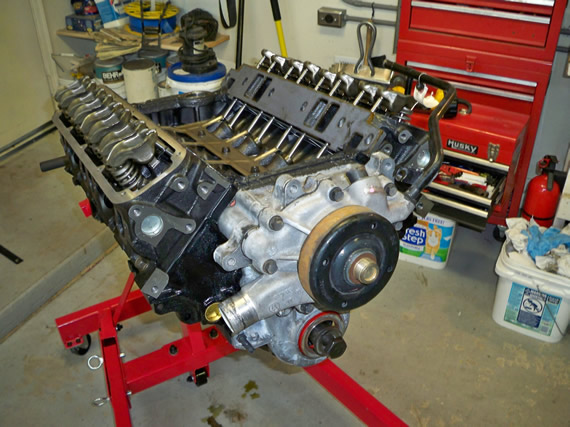
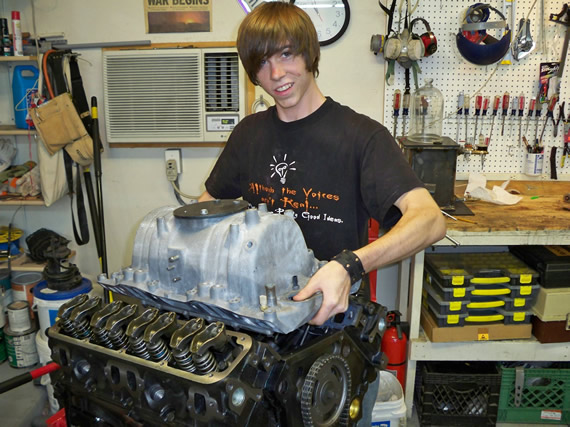
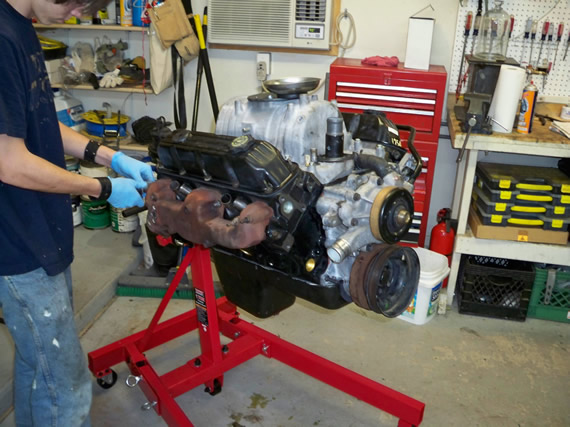
I chose to use a new “long block” like seen below which has new cylinder heads already installed.
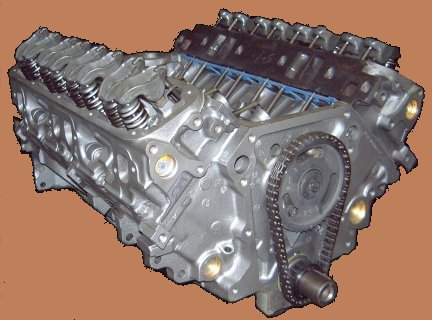
If you need new cylinder heads its cheaper to just buy a long block, plus its a big time saver not having to put the cylinder heads on yourself.
READ —>:
A project like this, done yourself and done right, will cost about $3,000 for the remanufactured motor, worn out parts, sealants and fluids. The remanufactured engine should come with all the gaskets you need for the complete replacement, but you should have some engine assembly silicone sealant, thread sealant and thread lock tight on hand.
DO NOT trade in your old engine until you have fully assembled and tested your replacement engine. You may find you need a bolt, stud, adapter or even an oil filter plate from the old block in order to assemble the new engine, so KEEP that old engine until the job is done!
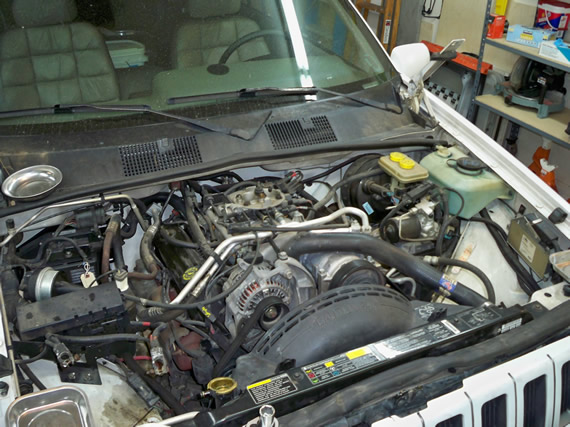
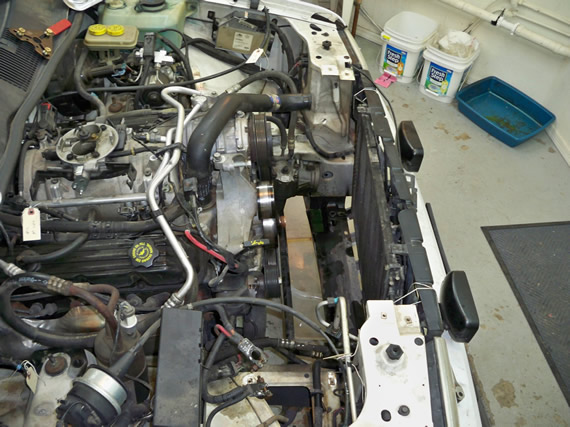
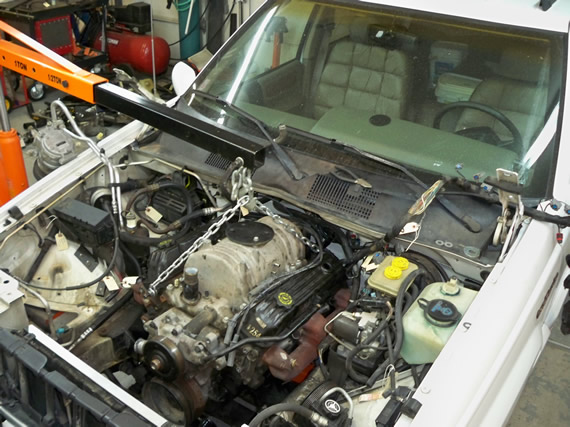
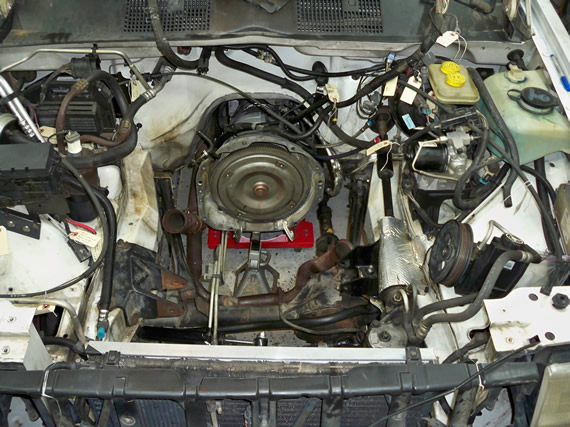
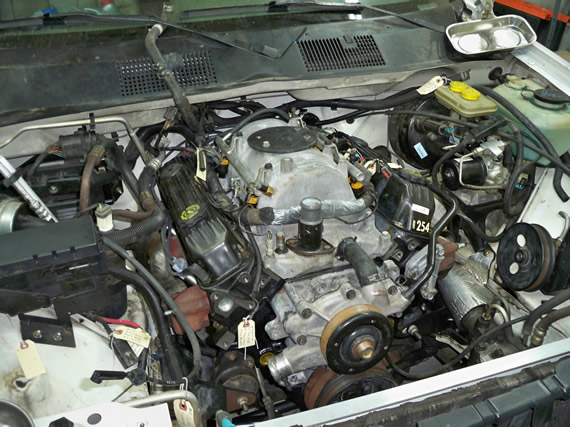
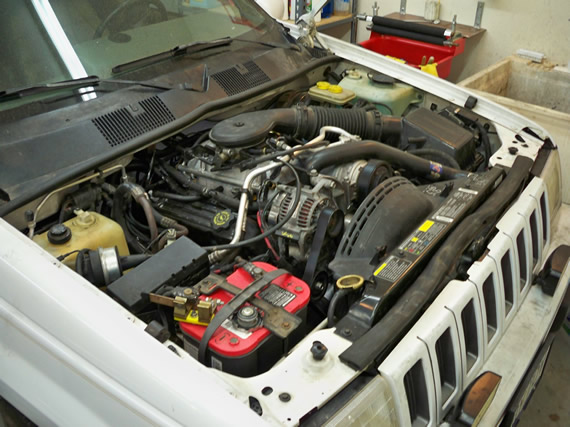
Let’s get to replacing the engine. Here is a quick photo of the motor compartment before starting. Actually I took a dozen photos from all angles as well as close-ups of the wiring and hoses. I will be labeling everything as I disassemble but having tons of photos comes in very handy later on when trying to remember the routing of everything.
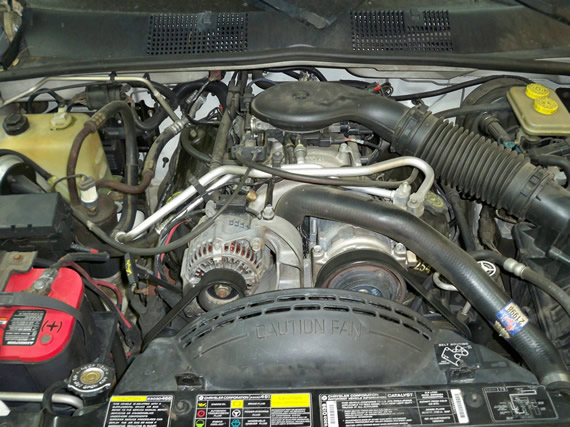
In the below photo the hood is off as well as the radiator overflow reservoir, battery, battery tray, air intake and air filter box.
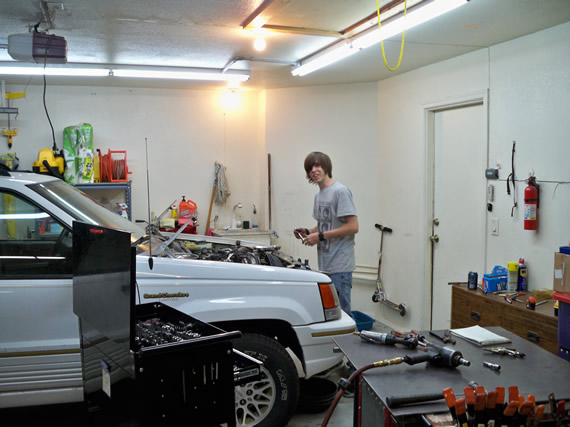
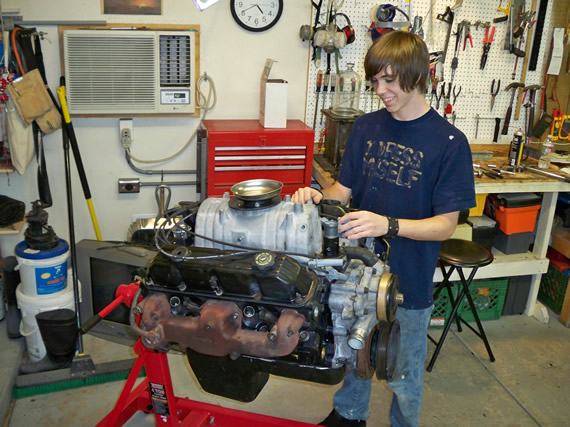
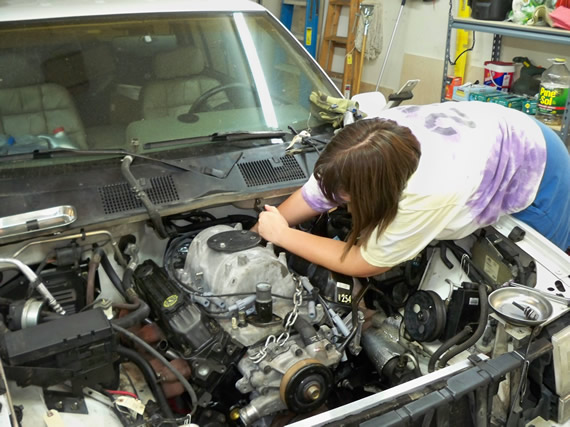
My nephew, Andrew, is helping when he can which is a great opportunity for him to learn how to replace a motor. Not too many young people get to learn about engines anymore, which I find strange being we can’t do anything in our lives without vehicles anymore.
The front plastic grill cover is off as well as the top radiator retention bracket and fan cowling.
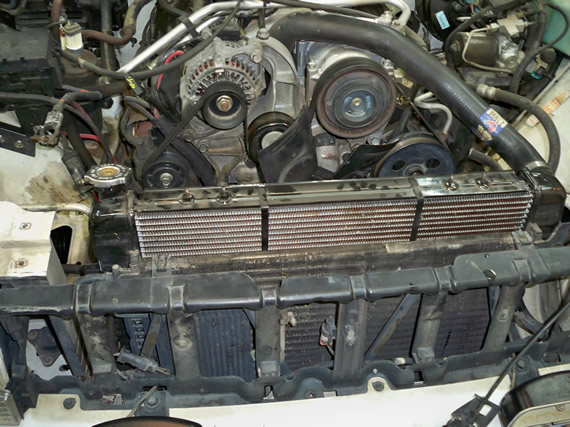
Gone is the fan belt, fan clutch, fan, alternator, radiator and some linkage to the throttle body.
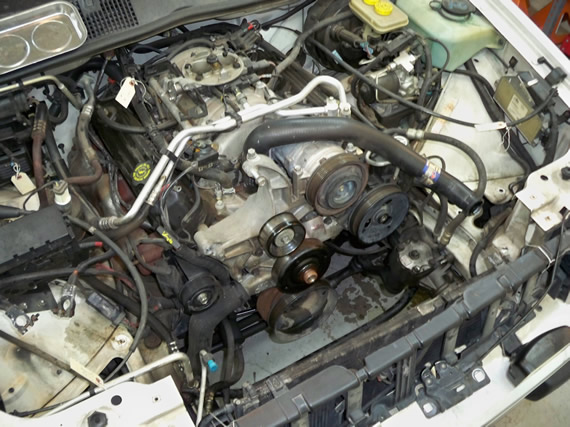
If you look close at the below side photo you will see 4, maybe more, yellow tie-on labels on some cables and other parts. These are great labels when you’re taking so much off at once. You can tie them to wires, hoses, parts and even poke the string through the side of a Ziploc bag and tie the bag to the part with nuts and bolts in the bag.
This not only keeps everything together but I number each label sequentially and even added some quick notes to the label that maybe important for reassembly like; which length bolts go in which holes, torque values or just a page number in the service manual showing the torque and torque sequence.
I also keep a notebook on the side with each number I used, what the part was and any special details not on the label like wire routing or a file name of a special photo showing complicated routing or installation sequence details.
Take your time and don’t get in a rush with the disassembly! Good labeling and documentation will give you a 100% accurate roadmap for your reassembly later, even if days or weeks pass and the parts get shoved all about in your garage.
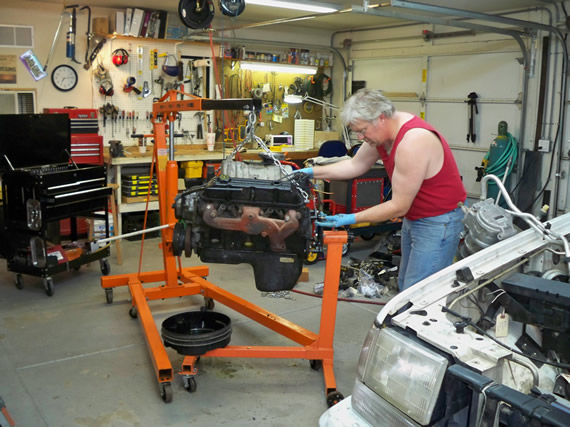
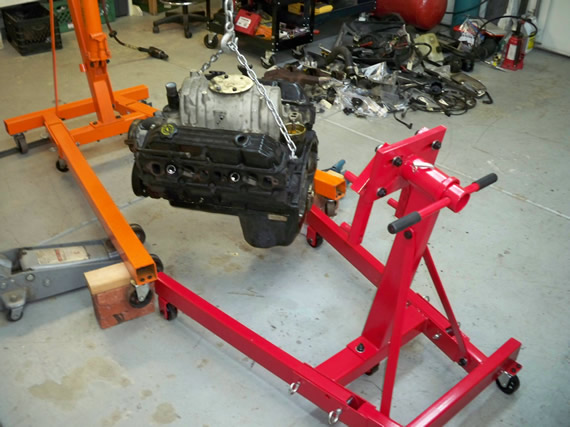
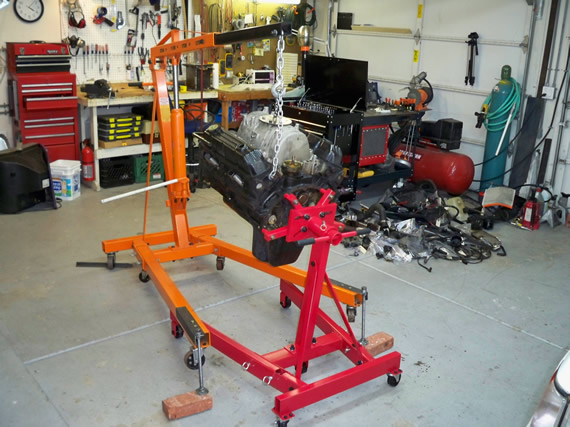
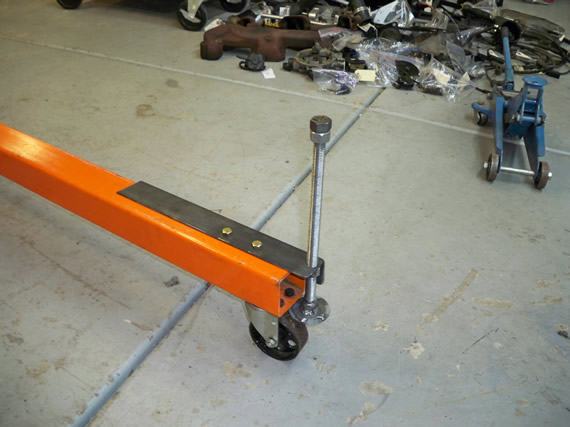
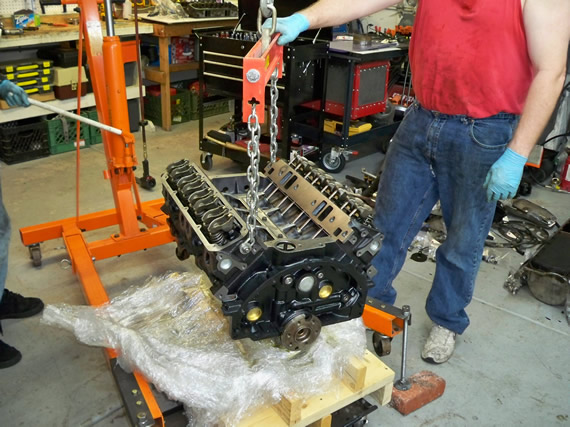
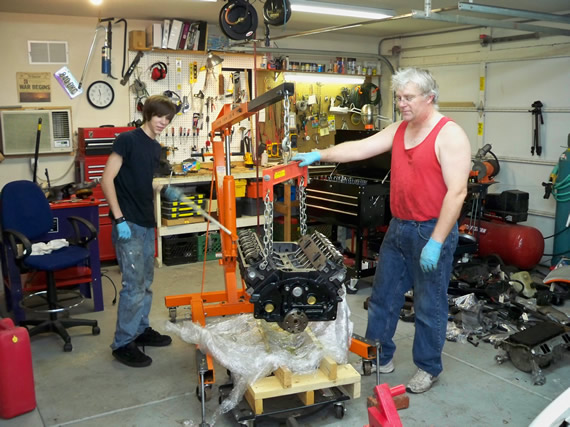
I assembled the shop crane at this point because I used it to get the remanufactured motor out of my truck and onto a “roll-about” engine dolly. I have had this crane for over 10 years but you can buy one at Harbor Freight for under $200, which is less than what I paid 10 years ago :( . I store my crane in the back of a shed all disassembled into bits that hang on the back wall on some pegs. Storing a shop crane like this takes up no space at all and it’s ready for work in mere moments.
You can also see parts of my engine stand on the garage floor. I will not need the engine stand until I pull the old motor with the crane at which time I will transfer the motor from the crane directly to the engine stand for further engine disassembly.
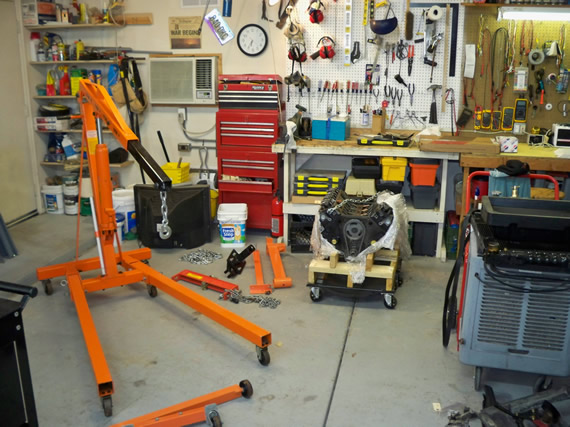
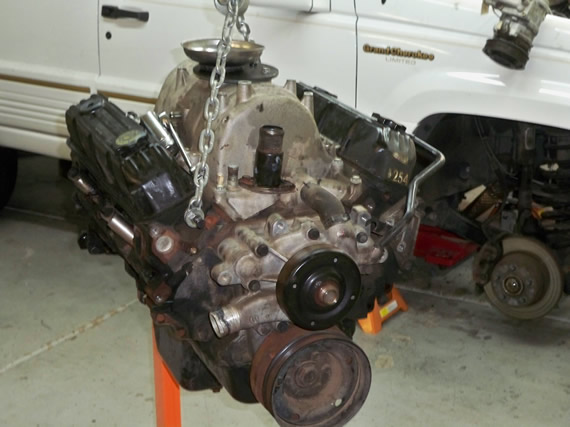
This is the remanufactured 5.2L V8 motor I’m going to be putting in shortly.

DAY 2:
I had to finish building a computer for my sister today so I only had time for 3 hours tonight but here is the progress. The AC is off to one side, no need to open the AC system to pull the motor.
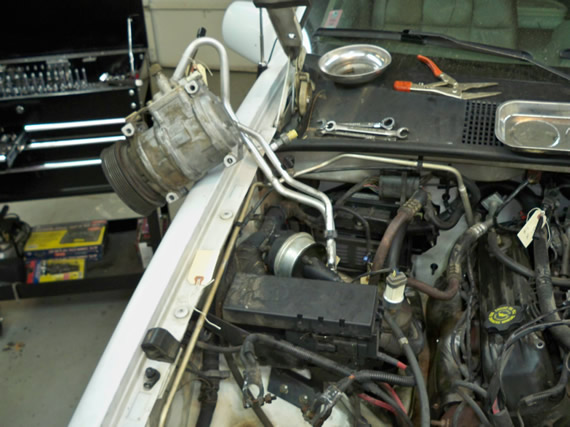
The power steering pump is off to the other side, no need to disconnect or drain this either. Sweet :)
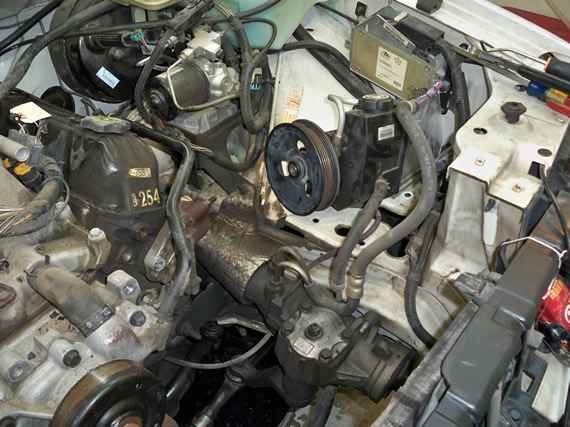
My nephew is removing the lower radiator hose but you can also see that the following have been removed: upper radiator hose, AC and alternator bracket, exhaust heat shields and some wiring which has been labeled.
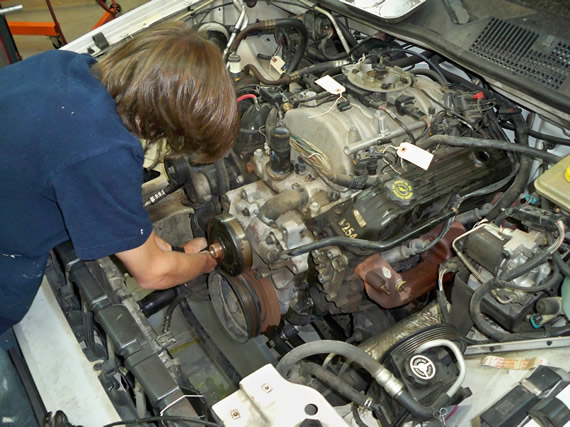
Below is the final photo for the night. The idler tension pulley and bracket have been removed along with the main power harness assembly from the battery to the starter and alternator. The throttle body has been removed and it’s wires and hoses labeled.
Tomorrow should be a more productive day. I will try to post another update tomorrow evening.
DAY 3:
Once again I spent most of my day doing something other than working on my Jeep. It was my last day of vacation so I spent it playing video games with my 6yr old son. My nephew did come over after his shift at the movie theater around 7pm. We worked on the Jeep from 8pm to about 11pm.
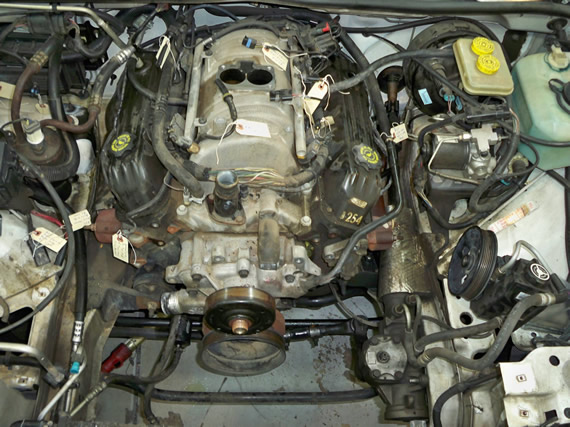
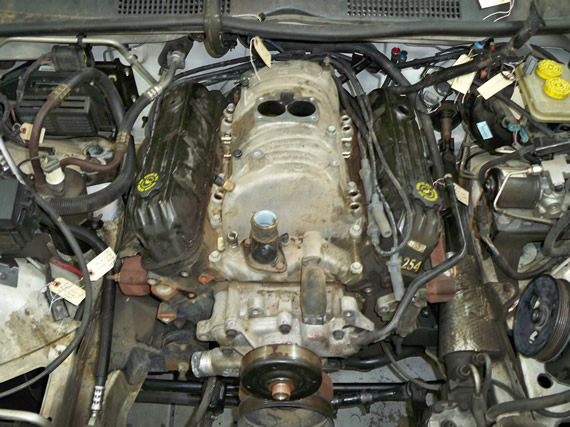
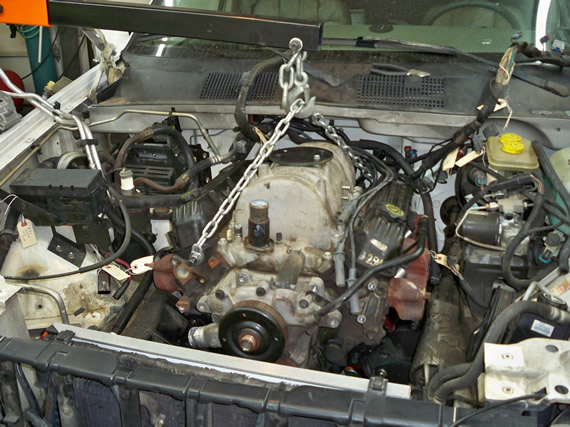
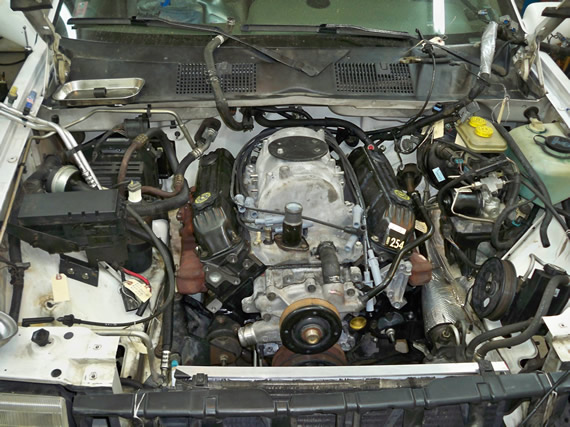
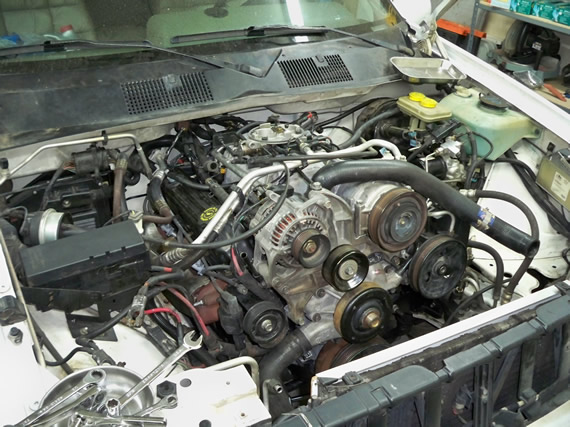
As you can see in the below photo the top of the engine is ready for pulling. The main electrical control harness is removed and labeled, all vacuum lines and hoses have been removed, and the fuel lines are disconnected as well as the fuel rails and fuel injectors.
We still have some work under the Jeep before the engine is fully ready to be lifted out such as removing the starter, flywheel shield, flywheel to torque convert bolts, exhaust pipes and transmission cooling brackets. I will add a C-clamp to prevent the torque convert from coming out of the transmission.
We can then remove the front engine mounts, slightly lower the engine with the shop crane, support the transmission with a transmission jack and unbolt the transmission from the engine. At this point the engine should slide forward and come up and over the side of the Jeep.
My nephew and I were debating on how best to connect the shop crane to the engine. We didn’t get any help from the Haynes service manual and I also have the official Chrysler Service manual for this 1994 Jeep, which is like 6 inches thick. Neither covers any details on actually pulling the motor with a shop crane. They both say to do it but not how to prep and connect.
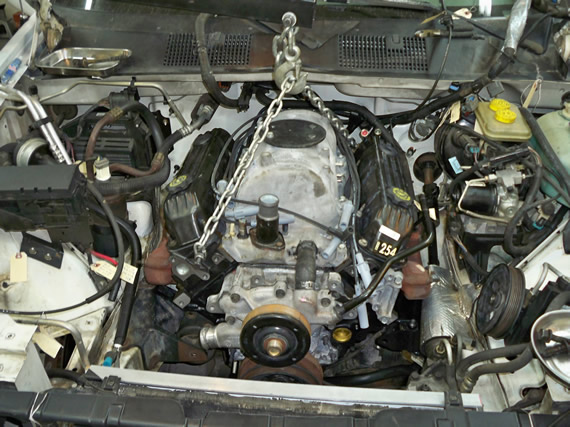
Normally this isn’t a big deal. Once you get all the major wiring out of the way you just connect a chain to the back and front of the engine and then connect the shop crane to the chain and pull. The problem with this approach for this vehicle is that the back of the engine is 8 inches back and under the top of the engine compartment, kind of like one sees with a van engine but only 8 inches instead of 30+ inches. These 8 inches are a big deal because if we connect a chain to the back of the motor the angle the chain must take to get to the hook on the shop crane and to clear the fuel system would require it to go through the upper back frame of the engine compartment.
We hence took more stuff off than we would have liked such as the fuel rails and injectors. Doing this extra disassembly should give us access to put on a very short chain which would just clear the frame.
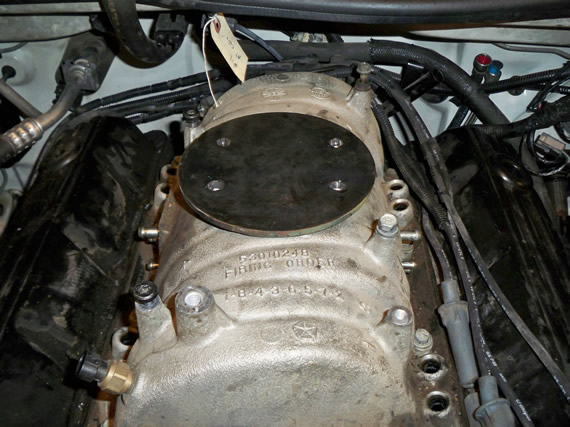
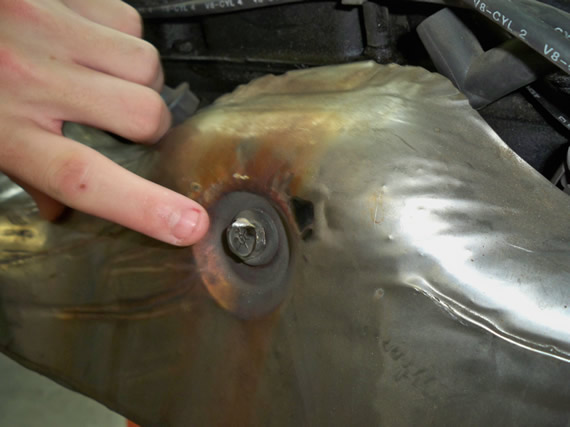
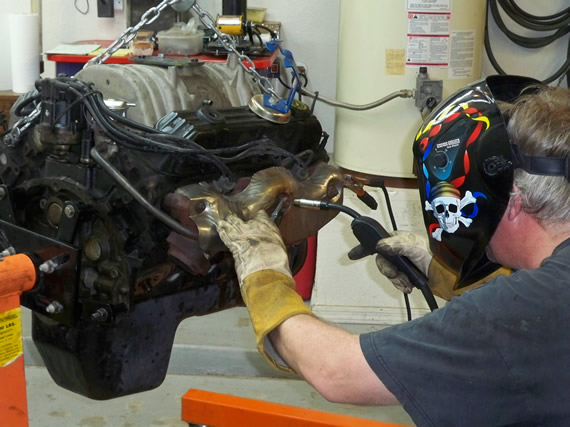
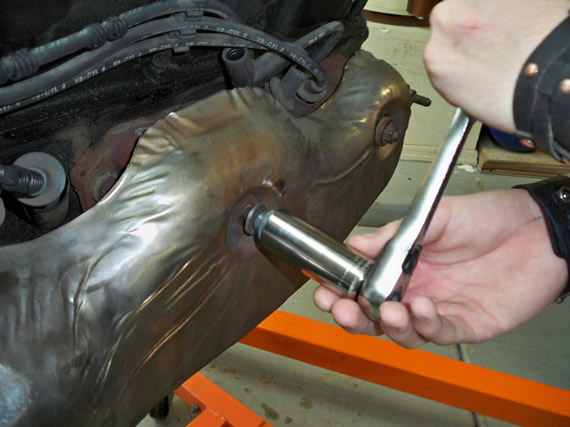
For fun we are also exploring pulling the engine from the intake manifold using the 4 throttle body bolts. We took a 1/4 inch circular steal plate and punched 4 holes in it using the plasma cutting torch and the old throttle body gasket as a template. In the below photo you can see it looks great.
Tomorrow we can weld a bracket to the top of the circular plate and blow a hole in it for the shop crane hook. Then I have to get some new shorter high strength bolts to bolt this plate to the top of the intake manifold.
I’m not sold on lifting the engine from the intake manifold just yet so if I can get the short chain on from the front to the back of the engine block I will do that instead. Either way the plate will still be quite nice to keep junk from dropping into the intake port.
DAY 4:
A week has passed since I last worked on my Jeep. I was just too busy with other activities like; piano, taekwondo classes and general playing around with my kids.
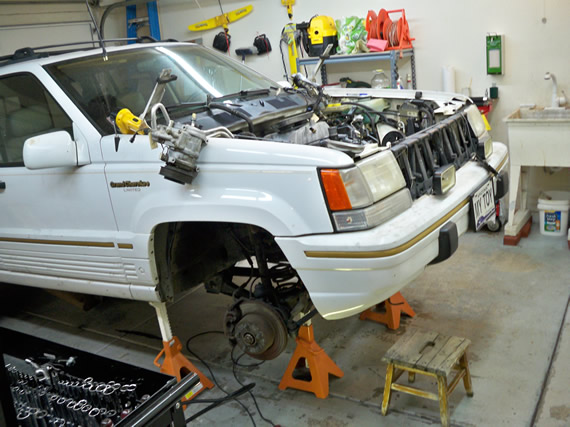
The next phase of this job requires we raise the vehicle so we can drop the exhaust pipes and remove other components from underneath. Normally one can just disconnect the exhaust pipes at the exhaust headers but I knew I had to also replace the catalytic converter (CAT). So in this photo you see I have the back passenger side of the Jeep raised up for access to the exhaust pipes and CAT.

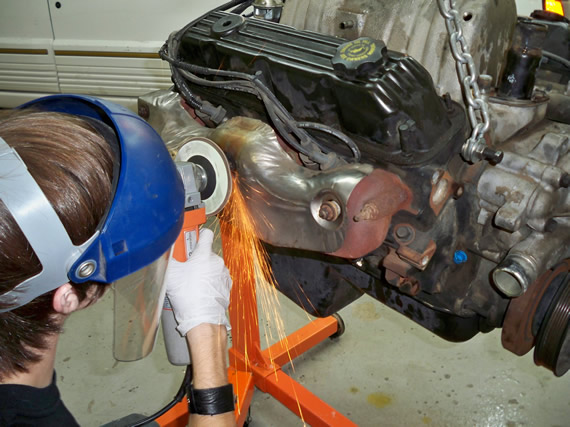
The CAT was quite a bear to get out. After removing the U-clamps on either side of the CAT and some tail pipe hangers it wouldn’t come apart. That was kind of expected so I followed the traditional approach. I fired up my welding torch and heated the junctions cherry red one at a time then pulled my heart out. This didn’t work for me because the joints cooled by the time I could turn off the torch and get into a safe place to pull. It was time for some team work. I got my 18yr old daughter, Veronica, to pull while I heated the joints and it all came apart easy.
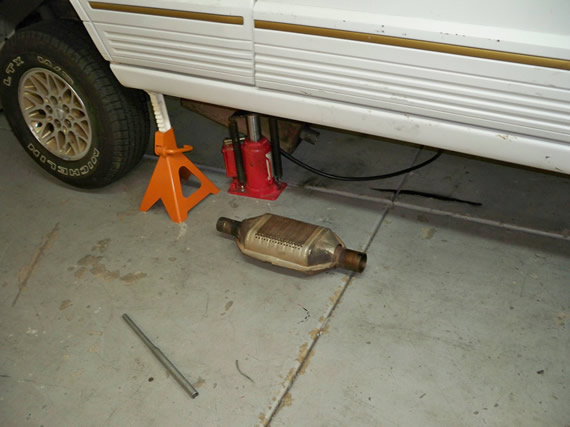
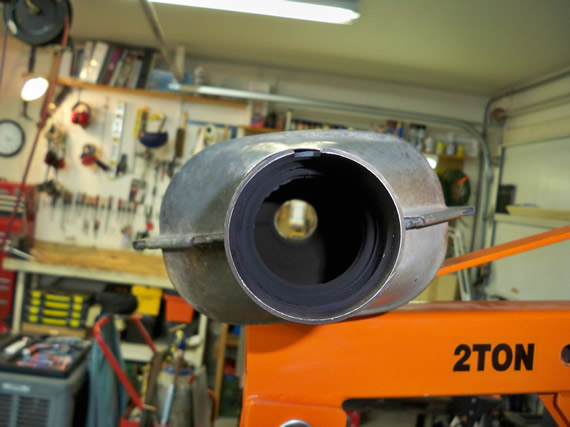
As you can see in the below photo there is nothing in my old CAT. That’s not good, you shouldn’t be able to see clean through a CAT. I last passed emission testing by only a hair so a new CAT will help come next emission testing cycle.
My 19yr old nephew, Andrew (a.k.a AJ), came over in the afternoon and was able to help for the remainder of the day. It sure is super handy having extra help. My voice is gone today because I spent many hours explaining what all the car parts we took off do and what and why I was going everything.
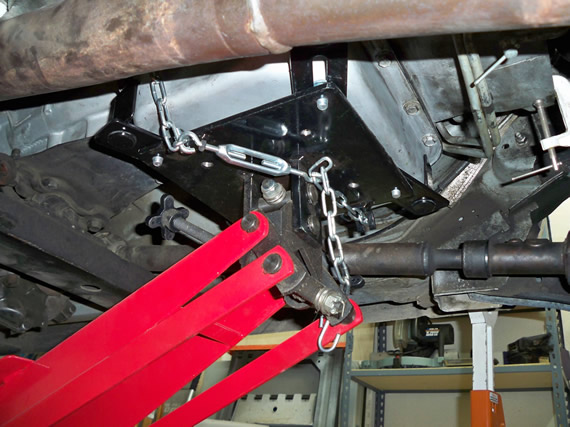
In this photo you can see the exhaust pipes have been dropped away from the engine and in the background you can see a bit of my transmission jack stand (red & black with the chain) which will be used to support the weight of the transmission once it’s unbolted from the engine.
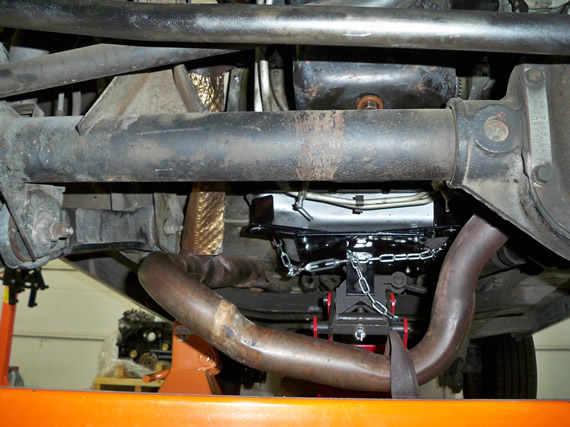
I get a bit safety crazy sometimes as you can see by the 5 jack stands and transmission jack under the vehicle. I don’t like being under a vehicle unless I know I’m super safe.
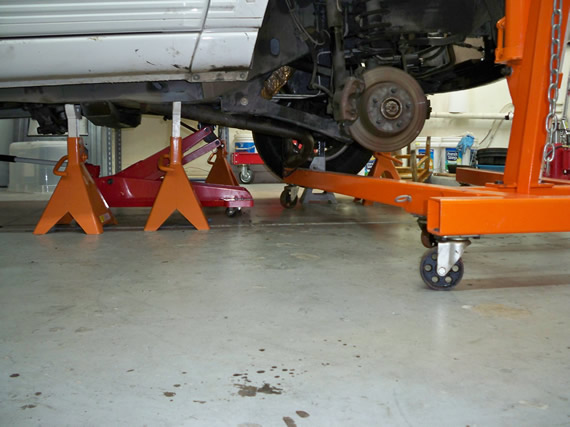
Transmission jacks are very handy for such work but one could just carefully support the transmission with blocks or simple jack stands. I really don’t recommend that being these transmission jacks are much safer and they are not expensive. I got this one at Harbor Freight for ~$89 on sale about 4 years ago.
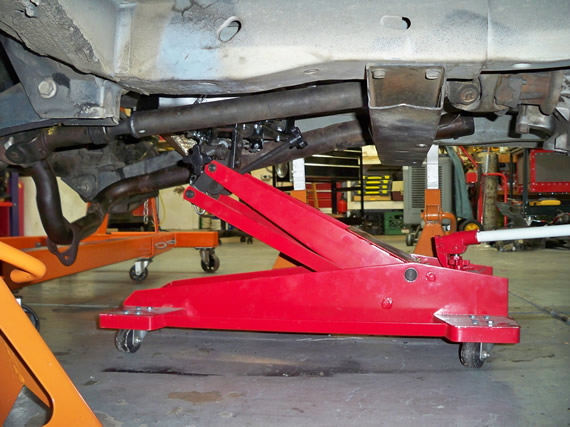
My transmission jack has controller gears built into the head of the unit which you use to adjust the level and angle of the transmission. These controls make easy work when it comes time to realign the transmission with the engine during reassembly.
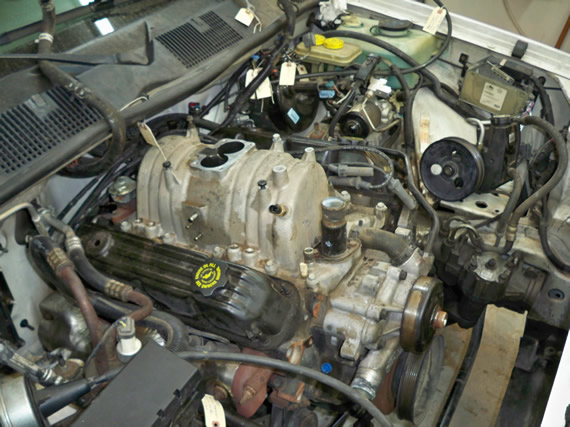
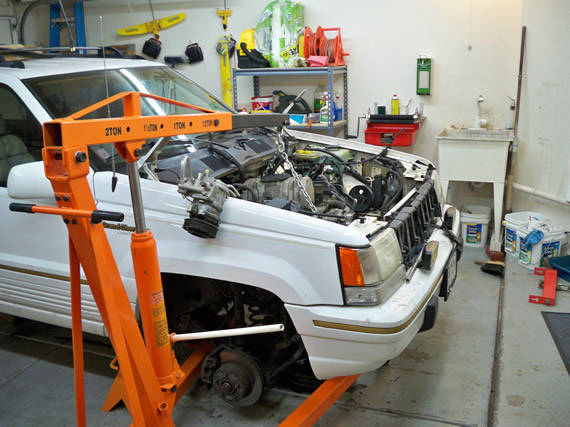
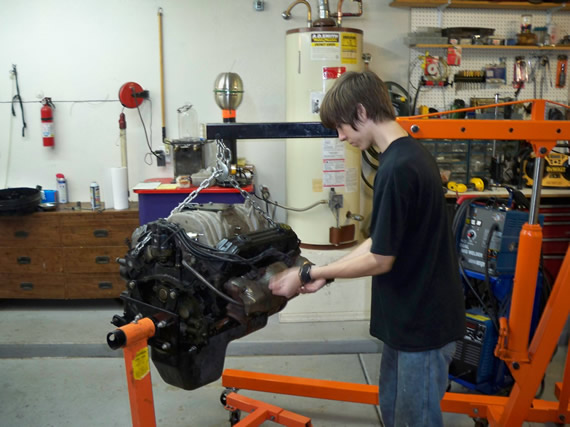
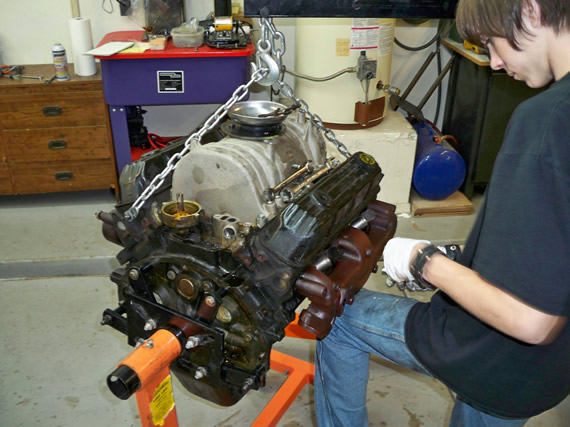
I didn’t pull the motor by the intake manifold as you can see in the below photos. My Uncle recommended against it and it just didn’t seem like a good idea.
I wanted to fabricate a custom bracket out of 1/2 inch thick bar that could be bolted to the back of the block and would be bent up and out toward the front clearing the framing. That didn’t workout because once I got the bar bracket in place I couldn’t get a wrench behind it to install the bolt. :(
My nephew, Andrew, championed the more traditional idea of just lashing a chain overtop of the intake manifold from the front to the back of the block. Turns out his straight forward idea solved all our problems quite elegantly. My Uncle also recommend just using a chain but I didn’t think there would be enough clearance for the chain unless I removed the intake manifold. Turns out I was just wrong.
I don’t pull motors very often and normally prefer to use an engine balancer with my shop crane which was not going to work without my custom bracket approach. If I could have made the bracket idea work I would have been able to pull the motor with the fuel rails and injectors in place. It was a bit more work getting the fuel components off but that’s ok being the simple chain idea made for easy pickings.
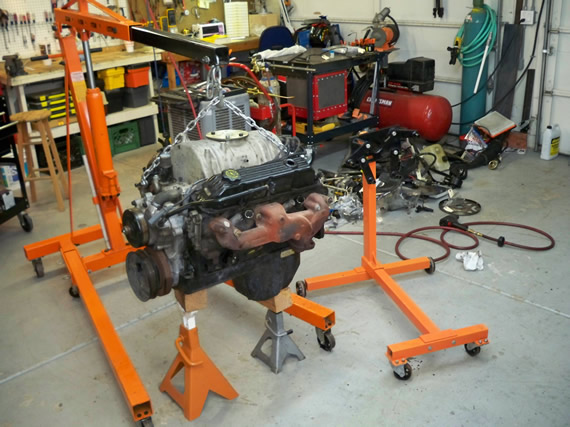
The motor is OUT and resting a bit of it’s weight on some jack stands and blocks of wood for the night. I have to get some new longer high straight bolts before I can mount the engine to my engine stand you see to the right.
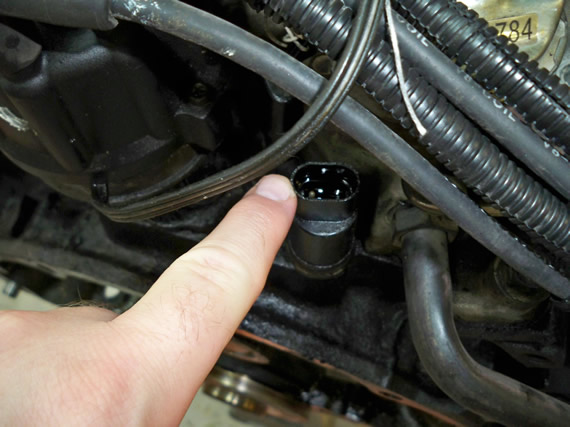
Some diagnostics show where my annoying little engine oil leak was coming from all these years. Oil was spewing out of the electrical connector of the oil pressure sending unit. Go figure that, I guess I have to order another part. :(
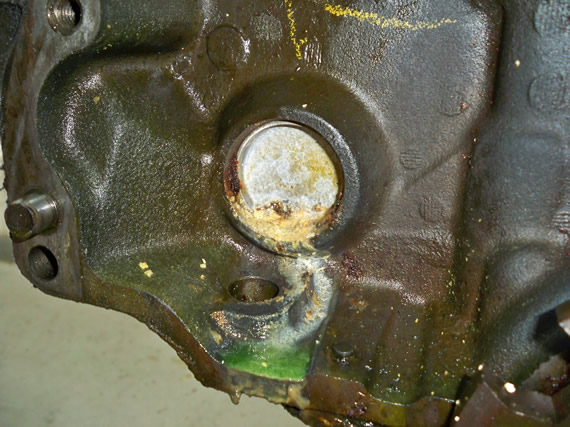
And my endless coolant leak was coming from this rusted out coolant plug on the back of the motor between the block and the flywheel.
Tomorrow I will work on tearing down the engine and starting the reassembly of all the bits onto the new long block.
DAY 5:
Today I got started taking the old engine apart. I didn’t really start until around 7 pm and only worked until 10pm so not too much progress this evening.
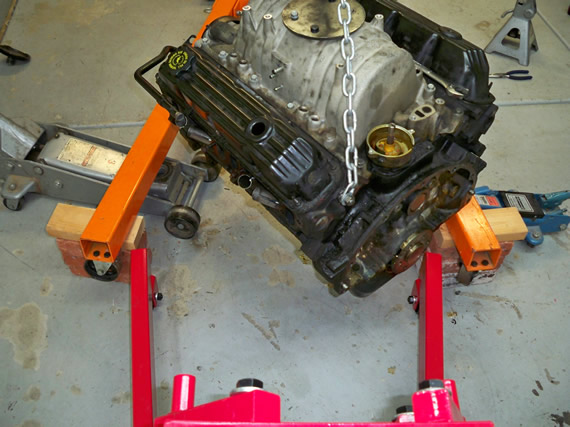
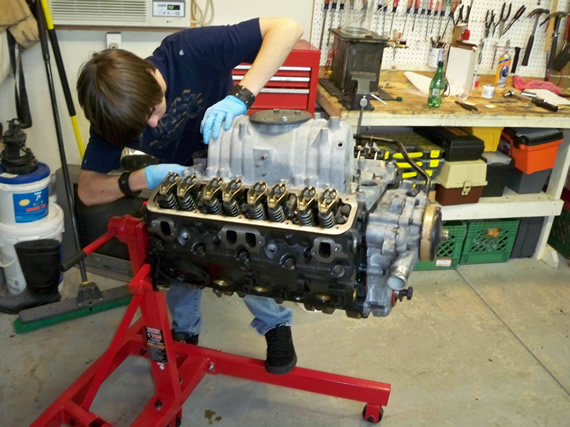
I got my new grade 8 bolts with the right length and threads to mount my engine to the engine stand. I figured I could do this myself before my nephew arrived. I was wrong in two ways. 1: It takes two people when the engine is hanging sideways on the crane. One person has to hold the engine at an angle while a second person bolts up the engine stand to the back of the engine. 2: My 1000lb engine stand just couldn’t bear the load.
This 5.2L magnum V8 fully assembled is just too much. My little orange engine stand was clearly going to buckle under the weight so we left the crane chained up to take half the load for now.
Turn your head and cough! Sorry for that but with a photo like this somebody had to say something. :)
I do like to use these nitrile gloves because they are resistant to oil, fuel and other chemicals. You can’t really tell you’re wearing them and it makes for super fast cleanup when you’re done for the day. Their cheap too; ~$6 for a box of 100.
I’m either going to weld up some kind of cradle support or buy a new 2000lb engine stand. I like the later solution being I got my Harbor Freight flier today which had the 2000lb engine stand on sale for $99 , plus the flier came with a 20% discount for one item. I know Harbor Freight stuff can be junk but if you use their stuff only infrequently and with care you can get along fine. In a way their stuff pays for itself if you can do just one job. If you get two or three jobs it’s like printing money compared to the thousands of dollars you can spend on good tools. There are some tools I will not buy at Harbor Freight but those are normally tools I need to work every time and for years and years.
On to other problems, there are alwasy other problems. :( I had one bolt on my exhaust manifold that wouldn’t budge even after soaking overnight with penetrating oil. I rounded the bolt’s head off trying to get it out.
What was my solution? MIG weld a big fat 3/4 nut onto the rounded off bolt. AJ started this job by grinded a clean surface on the head.
Then he test fits an old rusted up junk 3/4 inch nut.

I manned the MIG welder. If anybody is going to crack or warp my exhaust manifold it might as well be the guy who would have to replace it.
Here is a short video of the welding job.
Job well done! AJ gets the stubborn bolt off with ease.
My 6yr old son Alex shows everyone that the exhaust shield is now off. I guess I have to go shopping for a new exhaust manifold bolt. How can anybody do this for a living, I’m always out shopping for parts. :(

WOW! We finally got some work done. In the below photo you might notice, behind the intake manifold, AJ has removed the sparkplug wires, distributor cap, rotor cap, distributor pickup coil, oil pressure sending unit, EGR valve and the pipe routed from the exhaust manifold to the EGR valve. Here he is removing the exhaust manifolds after a good soaking in penetrating oil.
To my surprise there were no exhaust manifold gaskets. I don’t get this because both my service manuals state you have to use gaskets, but there were none to be found on this engine. I kind of thought this block was 100% factory original being I bought this Jeep like 9 years ago when it had fewer than 70k miles and from the original owner. It shouldn’t have had any major engine work where the exhaust headers would have had to come off. I will have to make some phone calls to Chrysler later to see if this is optional or something.
The engine is starting to trim-out so it won’t be long now.
Well that’s it for tonight. I might not be getting back to this project until next weekend but if you’re following this live you might check in around mid week.
DAY 6:
I have almost nothing for today. It’s Friday and after work I took a nap and then watched a movie. It wasn’t a total waste of a day. My wife put together my new 1 ton engine stand while I was at work (see below). She can cook, clean and assemble an engine stand, sweet! Of course she does have a PhD so she does a lot more than just cook and clean. In fact she will be back teaching this fall, like in one week, so I have to finish the Jeep or I’m going to be taking the bus to work :(

Best thing about this new stand is it cost me almost nothing. This 1 ton stand was on sell for $99 at Harbor Freight, I had a coupon for another 20% off one item and they also gave me back 100% on my old 1/2 ton stand, which I had for over 10 years, being it was not meeting its 1000lb rating. I swear, people complain about Harbor Freight’s crap and a lot of it is crap but I wouldn’t be able to afford to do half the stuff I do if it weren’t for their cheap tools.
Around 10pm I thought I best mount the engine to the new stand but once again I have to get some new even longer high straight bolts. The face plate and standoffs add another inch so my old bolts are too short.
Other than that the only update would be that I called Chrysler and they confirmed that the exhaust manifold gaskets are optional on this vehicle and should only be used if there is warping. Wow, I never heard of that before.
DAY 7:
Wow! What a waste of a day. Well that is not entirely true, but still. Alex and I had Taekwondo class in the morning after which we all went out for lunch. That wasn’t bad but then I started my hunt for longer bolts to mount the engine to my new stand. Turns out the auto parts stores I normally buy large grade 8 bolts don’t sell anything larger than 4 inches and I needed 4.5 inches. I drove place to place for about 2 hours before finally trying the True Value hardware store. True Value has just about any size bolt and nut you could want. I don’t know why I always forget about simple hardware stores. I guess I’m so acclimated to the large home improvement department stores I forget that the little Mom & Pop hardware stores still carry all the hard to find stuff.
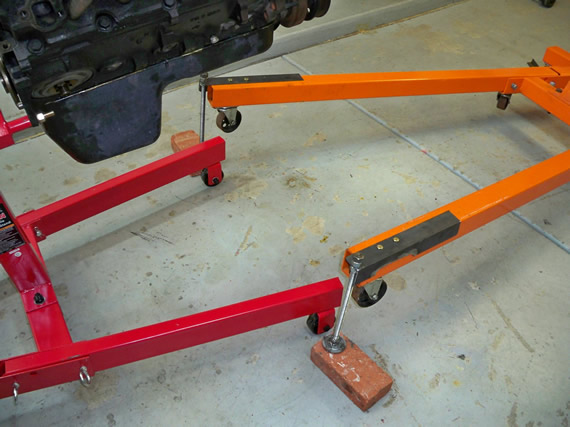
Then things got worse. Turns out my new engine stand has front legs that splay out and so do the legs on my shop crane. This means my engine stand can’t get close enough to my shop crane in order to mount the engine. The damn legs between the two block each other. I thought I could use my two floor jacks to just jack up the front legs of the shop crane but then the jacks are in the way. Andrew and I then tried to block-up the front legs so we could move the jacks away but as you can see in the below photo there was still noway the legs of the engine stand could squeeze by the blocks.
In these photos it looks like You might be able to move the bricks out to the edges of the shop crane legs and squeak by, but when we tried that the legs were too unstable and would have slid off the bricks when mounting the engine.
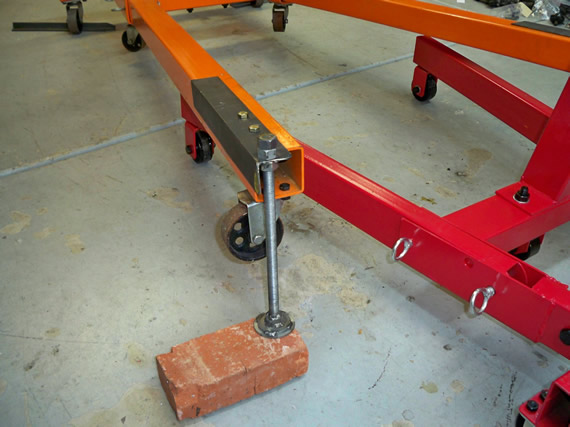
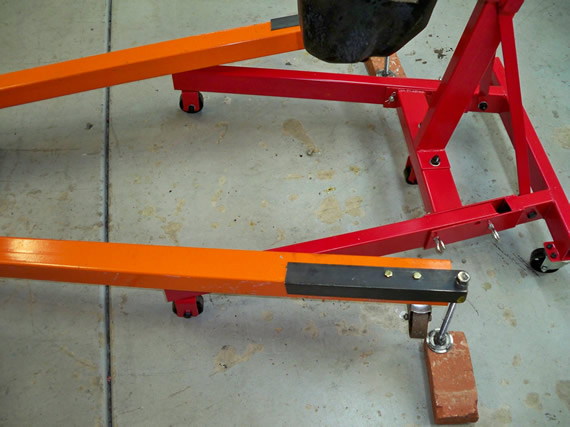
Then I remembered I had saved some homemade adjustable welding cart legs I made for an old cart I don’t have anymore. I found the adjustable legs and sure enough they fit the bill. Andrew chopped off about 15 inches from the two old leg brackets and we then drilled and bolted the adjustable legs to the shop crane legs. Being these adjustable legs fit on the outside of the shot crane legs they allowed the engine stand legs to squeak by with an inch to spare.
The adjustable legs could have been a couple of inches longer in height but nothing some bricks on the outer edge couldn’t fix.
Now everything fits!
Once the engine and engine stand was pulled away from the shop crane I just used my air wrench to lower the adjustable legs and move the crane out of the way. These adjustable legs will have to come off right before we put the engine back in the Jeep because these threaded rods will get in the way when we slide the shop crane legs under the Jeep.
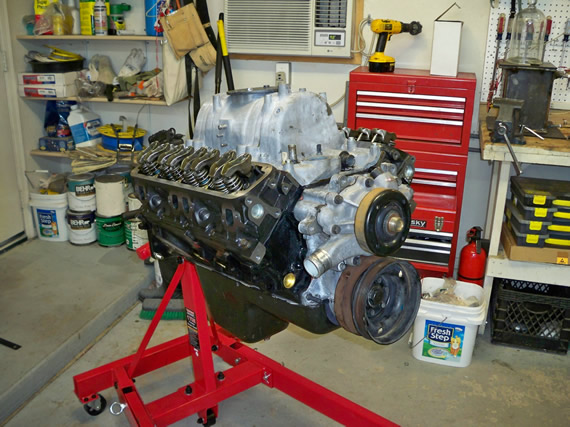
There, the engine is ready to be disassembled. This new 1 ton engine stand is having no problems holding up this big engine.
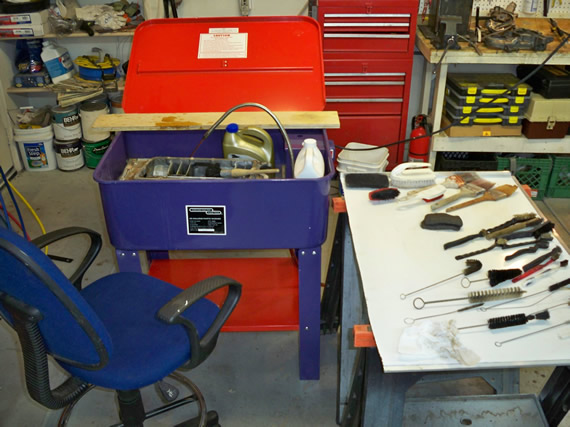
The only other thing I got done today was cleaning parts in my parts washer. Not really anything to take photos of but you get the idea, all the parts have to be cleaned. When Andrew comes over tomorrow morning we will start breaking down the old motor, cleaning the oil pan, valve covers and intake. Then start on the reassembly with the new long block.
DAY 8:
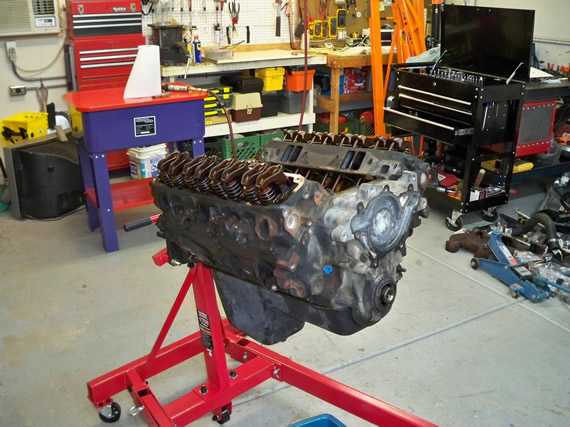
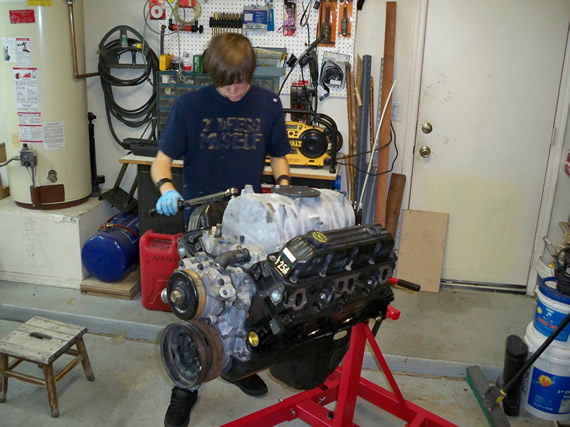
I’m late posting day 8. Day 8 was actual last Sunday and it’s now Saturday so very late would be a better statement. We did get a lot done. In the below photos you can see we have removed (water pump, thermostat, thermostat housing, main pulley, harmonic balancer and the valve covers).

Now the air intake manifold is off.
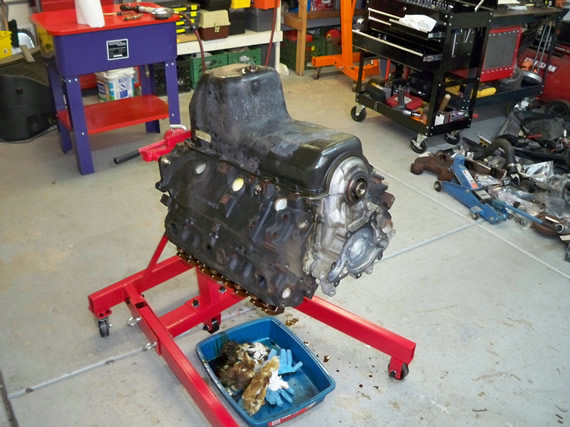
The engine rolls over nicely with the engine stand to give easy access to the bottom. Time to remove the oil pan.
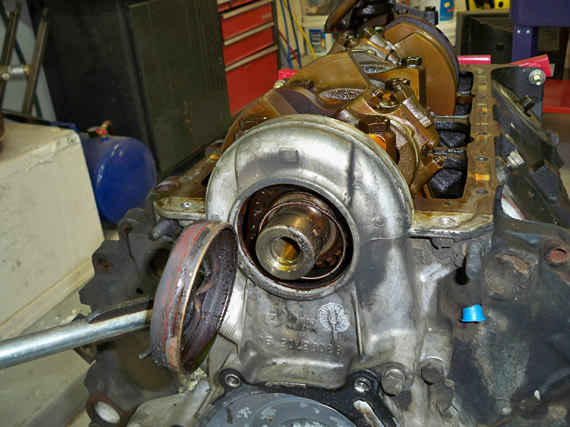
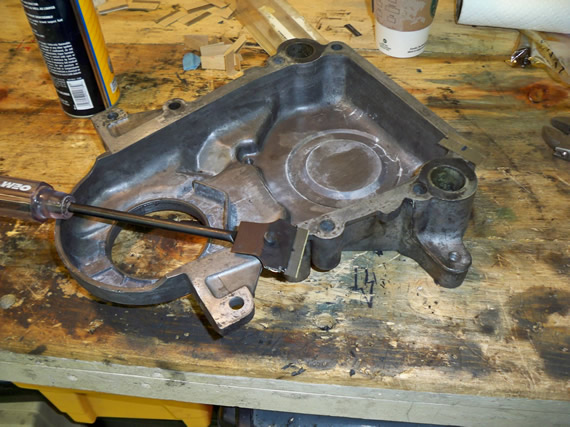
The oil pan is now off and here I’m using a seal puller to remove the front crank shaft oil seal from the timing cover.
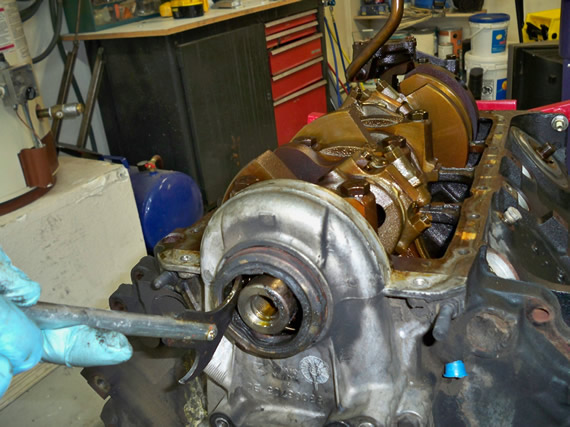
And the seal is out.
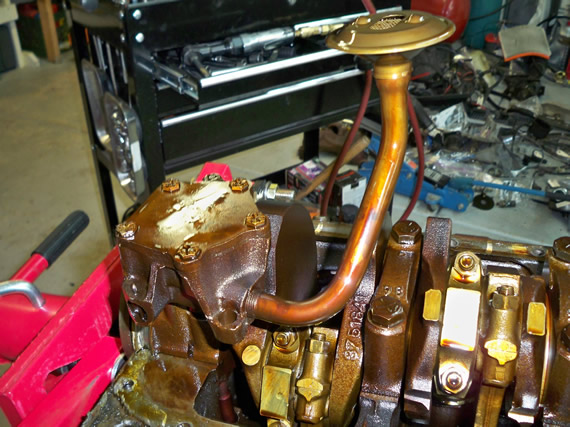
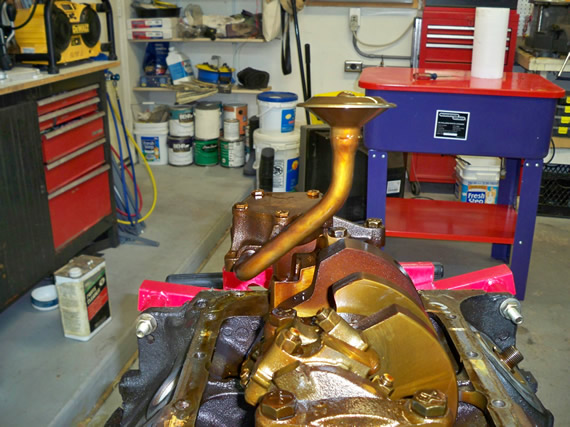
The pipe sticking up in the back is the siphon pipe for the oil pump.
This pipe and screen sit down in the bottom of the oil pan so the pump can suck up oil and push it throughout the engine at about 40~80psi.
When you rebuild or replace a motor you should always put in a new oil pump. They don’t cost much and you don’t want to take everything apart again just to replace an old oil pump. A new oil pump normally comes with the long block anyway but if not then order one from the dealer; no auto parts store parts PLEASE!
The oil pump is off. It was mounted to the rear crank shaft bracket. A small shaft comes down to the oil pump from the cam shaft through the rear crank shaft bracket.. A gear on the cam turns this oil pump shaft that in turn turns the oil pump. The top of this same shaft connects to the distributor and maintains your engine spark plug firing timing in synchronisation with your cam shaft. Sorry, that might be getting a bit too deep for this blog posting.
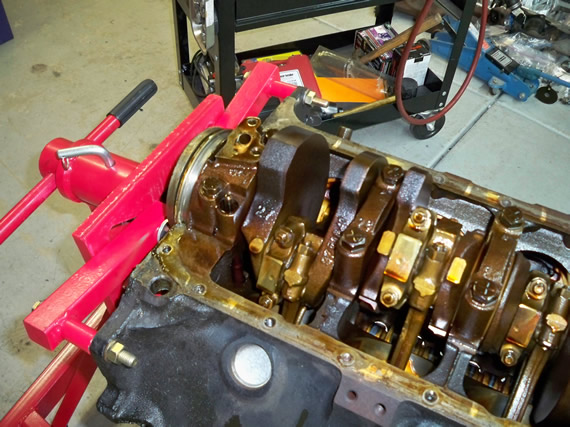
The motor is right site up again and I have taken off the timing cover. With the timing cover off you can see the timing chain and timing sprockets. The large sprocket is connected to the cam shaft and the small lower sprocket is connected to the main crank shaft. This chain keeps the cam shaft and crank shaft in exact synchronisation.
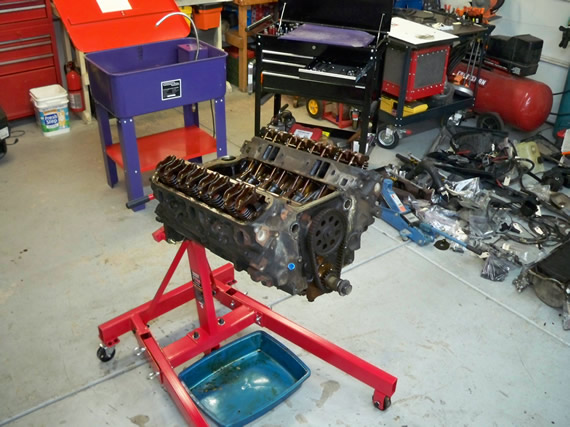
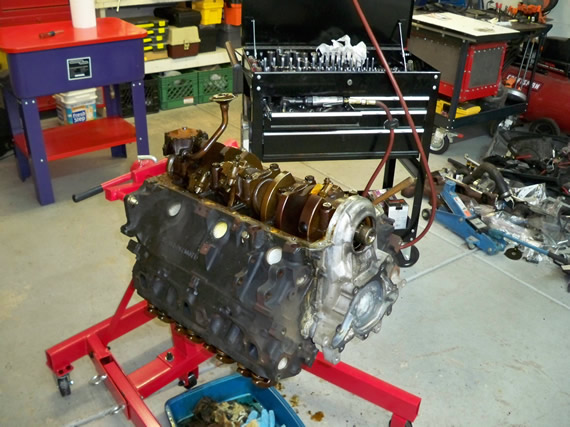
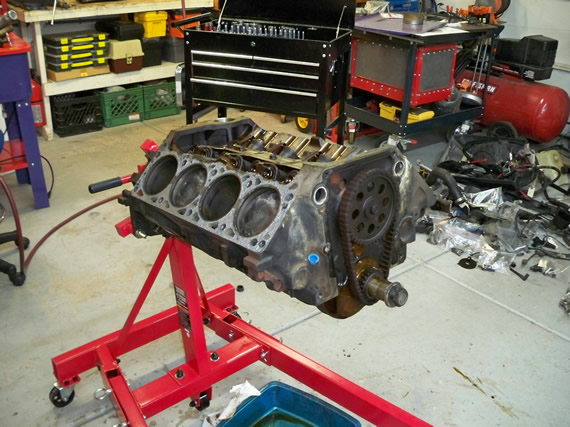
This is a back view of the motor on the engine stand. It is now all stripped down to a “long block”. This is all the further you need to go in the disassembly because we are swapping this old “long block” with a new remanufactured “long block”.
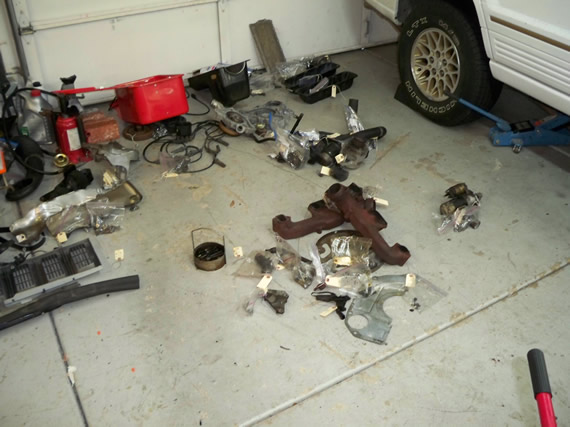
This is the pile of parts which are all bagged and tagged. I have to spend a day or so cleaning most of these parts before I can start the reassembly.
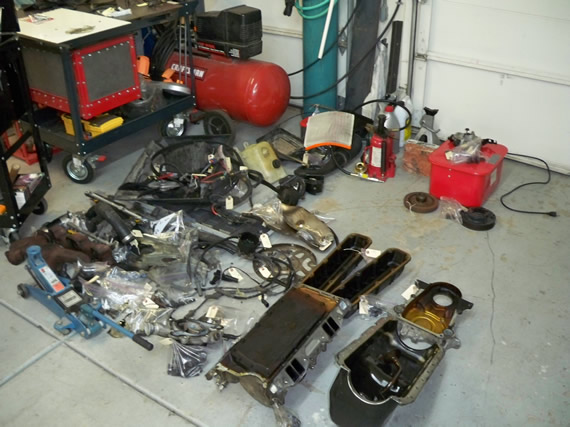
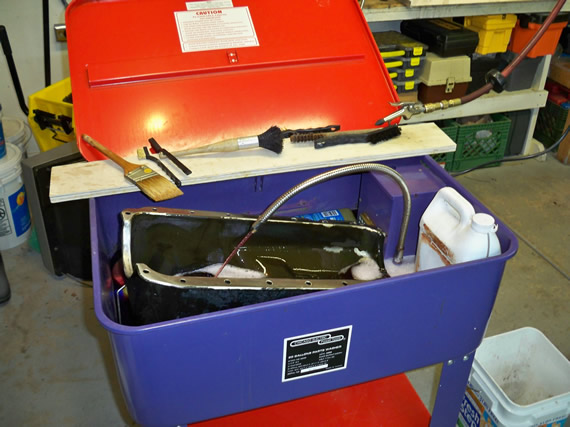
I have my 20gal parts cleaner running and I have started cleaning the oil pan. All the gaskets on all the parts must get cleaned off and all the bolts and nuts need to be cleaned and brushed. Everything needs a good degreasing.
Here are some tips for parts cleaning.
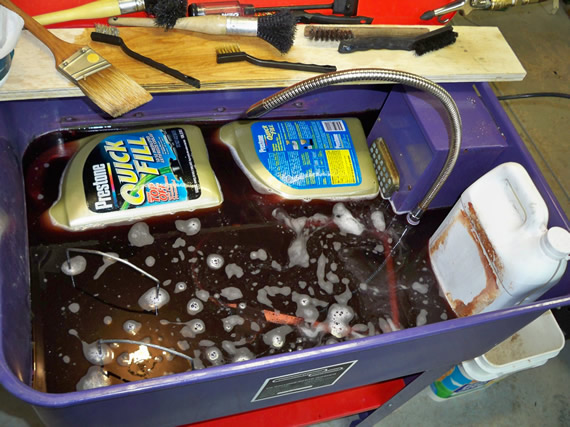
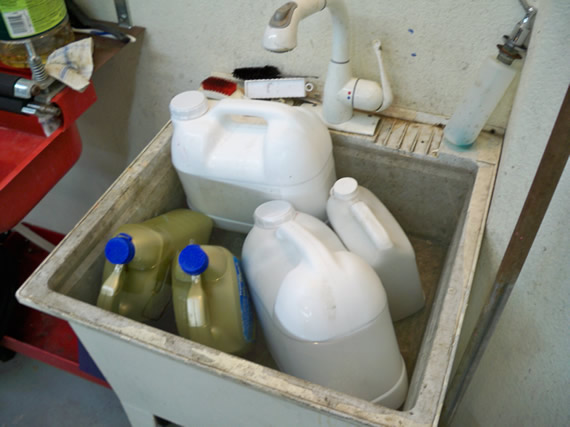
I use some strong detergent parts cleaner which you can get at an auto parts store. I don’t dilute the detergent but I do soak the detergent jugs in a sink of super hot water for 30 minutes before pouring it into my parts washer. The hot detergent cleans and degreases the parts much better than room temp detergent.
Also, as you see in the below photo, I have added some used anti freeze jugs filled with hot water to help raise the level of the detergent in my parts washer without diluting the detergent’s concentration. This saves money on detergent and the hot water in the jugs help keep the detergent warm longer.
For super dirty parts like throttle bodies and crusty bolts I soak them overnight in a big can of carburetor cleaner. Carburetor cleaner is very expensive and you have to wear very thick gloves when using it but it can clean parts like nothing else, if you let it soak overnight.
DAY 9:
Another late post, these photos are from last Monday and today is already Saturday again! We really didn’t do anything productive on day 9 because all we did was further teardown the motor. Like I said in day 8 we could stop the teardown at the “long block” but Andrew wanted to see the inside, I wanted to see if I could identify why I was burning oil so bad and the engine refurbishing house said they would appreciate it if we completely tore down the block as long as we labeled all the parts with the location they came from.
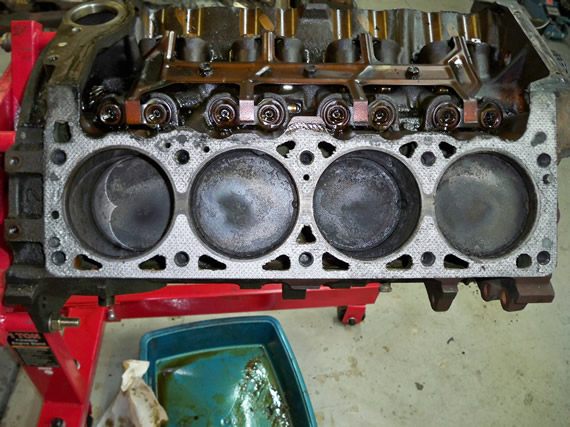
The first to come off was the heads.
There is some carbon and burnt oil deposits on the passenger side pistons.
But on the drivers side piston 7 was a dirty oily mess! Yuck. It looked like the head gasket was blown at the top allowing piston 7 to pressurize the crankcase as well as suck oil from under the intake manifold where the cam and pushrods are located. I’m not an expert at this but I’m thinking this was my oil problem.
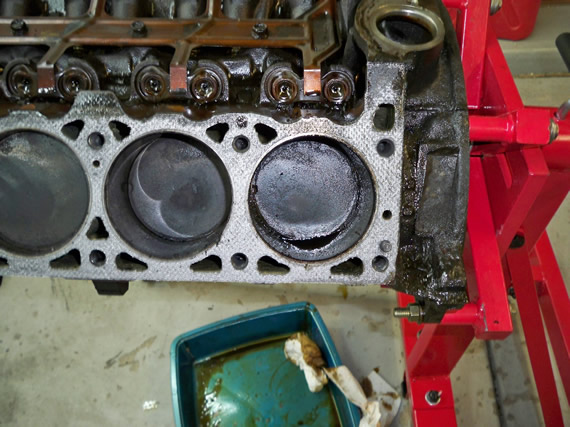
Photo of Andrew holding the last piston to come out. Actually we took the pistons out when the bock was upside down so this is more of a photo-op for the scrapbook.
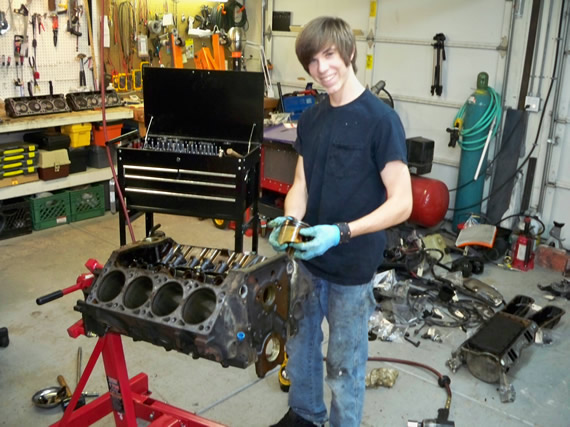
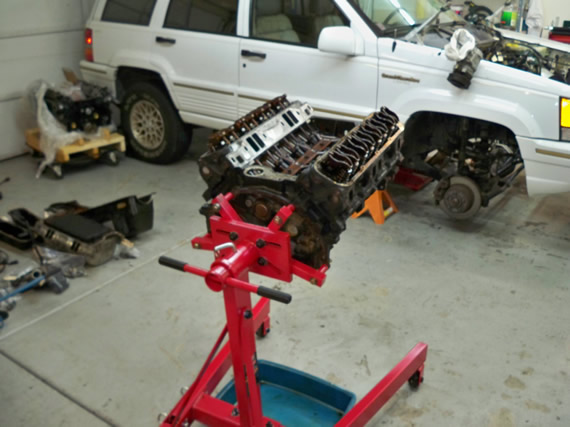
Here AJ shows how easy it is to just pickup a v8 block once it is striped down. It isn’t hard to move around at all and that’s a good thing being we have to move this aside and make room for the new “long block”.

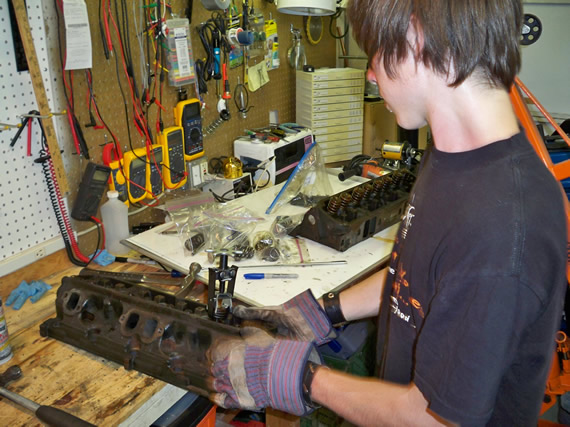
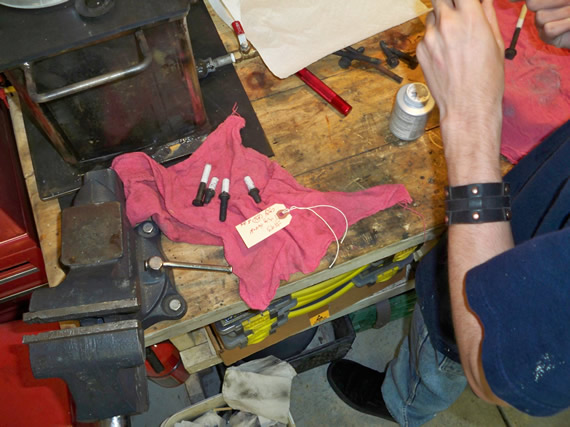
The new “long block” comes with fully assembled heads but just for the learning and investigation Andrew takes all the valve and valve springs out of the old heads. We put the valves, springs and retainer clips in separate labeled Ziploc bags. These heads where overdue for service so it’s a good thing they’re being replaced.
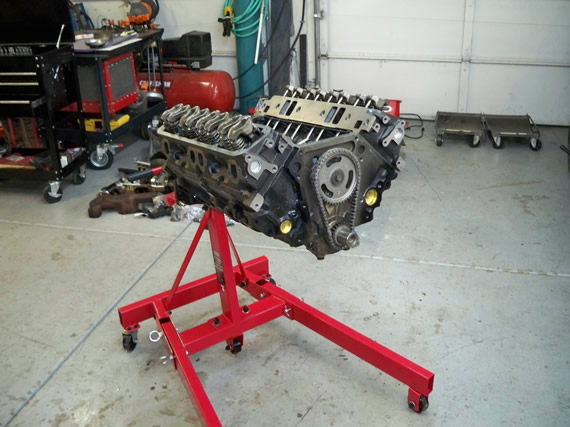
Onto the NEW! Andrew and I chained up the new “long block” to the engine balancer which is hooked to the shop crane. I’m steadying the engine and engine balancer with my hand as AJ pumps up the shop crane.
The balancer will make it much easier to align the block with the engine stand.
That’s it for day 9. The new “long block” is on the engine stand and ready for all the old bits to be attached. I still have a lot of parts to clean and I will clean all my tools before starting the assembly. You don’t want to get dirt in a new motor so you MUST clean all your tools and workspace before starting the assembly.
Today is Saturday and Alex and I have Taekwondo testing for our brown belts. Once the testing is over, around 1pm, I will get back to this project and I hope to post day 10 later tonight.
DAY 10:
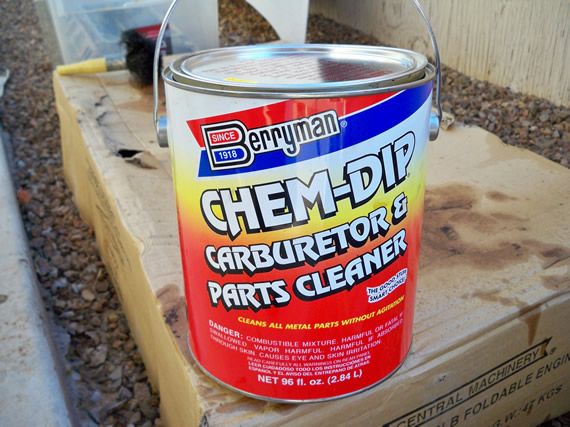
For cleaning the really crusted parts I soak them over night in “Chem-Dip”. This is a Carburetor and parts cleaner that comes in 1 gal cans. This stuff is not cheap being each can costs $25. I had to soak some big parts so I needed 4 cans. There goes another $100, but you can reuse it for years.
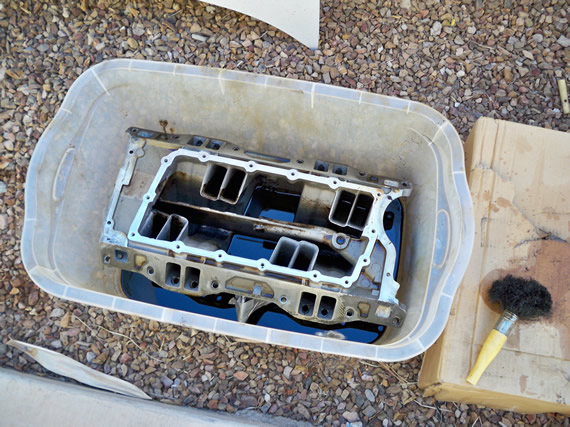
I soak stuff in large plastic tubs keeping groups of bolts for the water pump, timing cover, exhaust and such in separate baskets.
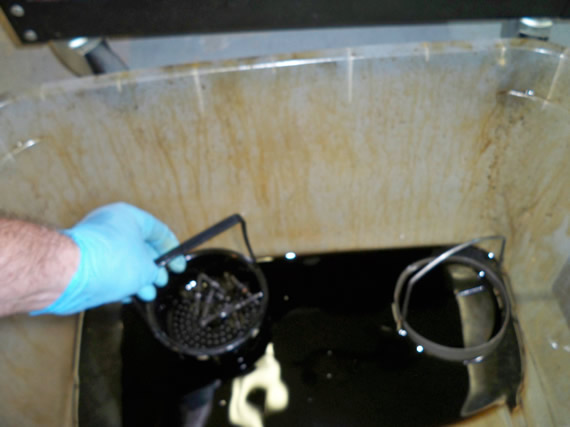
Here I’m using Chem-Dip to soak and clean the intake manifold. What a crusted up mess! I had to use all different size hose brushes to clean out all the EGR galleys, fuel ports and you name it. This must be the most complicated intake manifold I have ever worked on.
After the Chem-Dip and for all general dirty and oily parts I clean things in my parts washer with a concentrated parts cleaning detergent from AutoZone.
The detergent works much better if it’s hot so I soak the jugs of detergent in a sink of 125F tap water. This brings the temp of the detergent up to ~120F without diluting it. If it cools off when using it just drain it back into the jugs and repeat the heating process. The hot detergent saves a ton of time and a lot of scrubbing.
This detergent is not a solvent but still the fumes are nauseating so wear a respirator and thick gloves.

Now that all the parts are clean it is time to scrap all the old gasket material off. It turns out this was the most time consuming job. I had to use about 100 razorblades and work about 1/4 inch at a time on the aluminum parts. The old gasket material was baked into the aluminum and I had to work very slowly with very sharp blades to prevent scratching the mating surfaces. The steel and cast-iron parts were much easier being you could just use a wire brush.
This is the pile of parts to clean. In this photo we have about 1/2 cleaned up. Remember to keep the labels and baggies tied to the parts after cleaning.
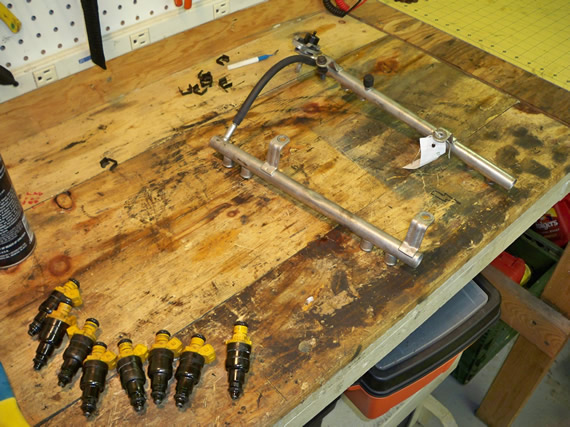
I took off each fuel injector, cleaned and added new upper and lower o-rings with a bit of clean motor oil for lubricant.
I put a thin film of engine assembly silicon sealant on the water pump before sticking the gasket to the part. This helps hold the gasket in place during assembly. Do not add silicon sealant to both sides or you’re never going to get the parts apart in the future. But if you have some pitted or scratched areas on the mating surfaces you could put a thin layer down in those areas to insure the gasket does not leak.
Here the timing cover gasket is stuck to the timing cover and a clamp just to keep the gasket in place while the silicon sets up a bit.
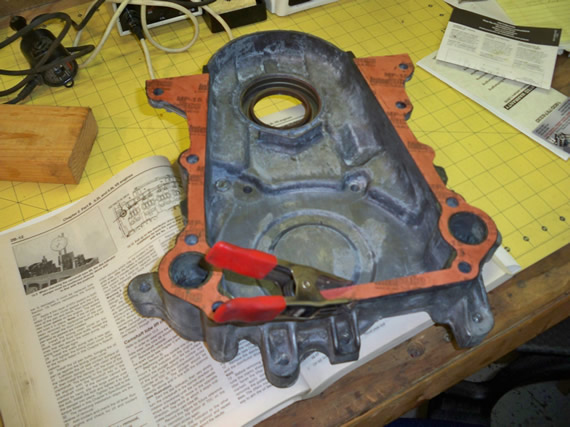
Follow your manual carefully during the assembly process so you know what torques to use and in what sequence. You will be instructed to put thread sealant or thread lock on curtain bolts. In this photo we put thread sealant on the bolts for the timing cover and water pump. The book didn’t say this was necessary but I could tell by looking at the parts that the bolts would be in the water jacket or exposed to oil galleys so I knew to add some thread sealant.
In this photo the timing cover, front main oil seal and water pump is now on.
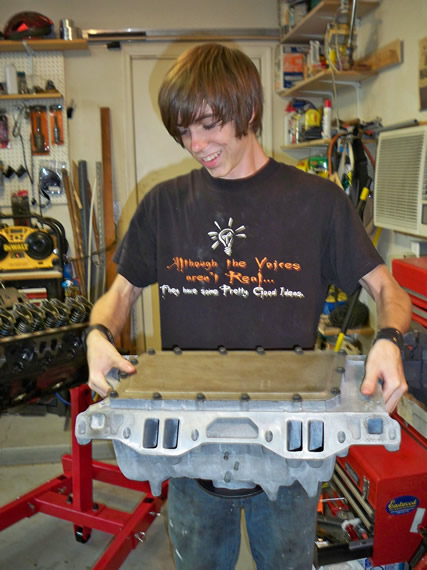
Andrew is holding the intake manifold, upside down, showing the newly assembled plenum pan and gasket. For this engine you MUST use new bolts for the intake plenum pan or you risk the old bolts vibrating out and dropping into the cam! I think I paid ~$5 for new OEM bolts from the dealer.
Andrew is test fitting the intake manifold, but after the test fit we had to add all the gaskets and silicon sealant. You MUST follow the manual carefully here so you get the sealant in the right spots and torque everything down correctly.
Andrew is installing the distributor. At this point make sure your engine is in the compression cycle at top dead center on number 1 cylinder and the distributor timing gear is in the correct place so the distributor rotor will be pointing at the number 1 spark plug in the distributor cap. Just follow the book on how to set the distributor timing gear and everything will workout just fine. Of course newer engines don’t have distributors so you will have to follow your service manual for any engine assembly timing procedures.
The harmonic balancer and main pulley is now on.
I put on the water pump to intake manifold bypass hose and Andrew torques down the valve covers to spec.
In this photo I have put on the water pump to heater core bypass pipe and the radiator raiser pipe on the intake manifold. Andrew is putting on the exhaust manifolds and sparkplug boot shields.
Nice job Andrew! The sparkplug wires, EGR and new valve cover grommets are now installed.
That’s it for today and the Engine is ready to be craned back into the Jeep for final assembly!
DAY 11 (last day!):
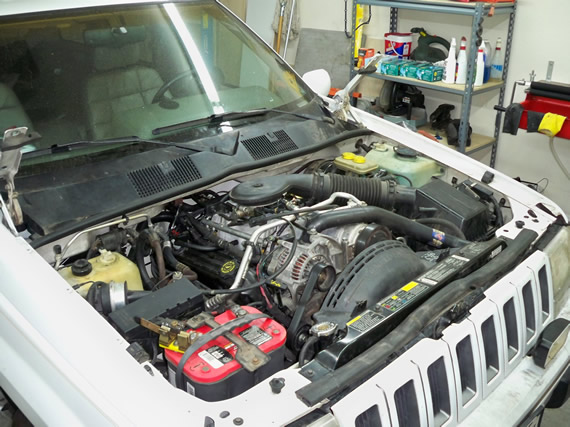
It is time to put the engine back in the Jeep. This is the engine compartment the motor has to go back into.
My teenage assistant had to go back to college this week so my wife stepped in as a substitute assistant and helped lower the engine safely into place.
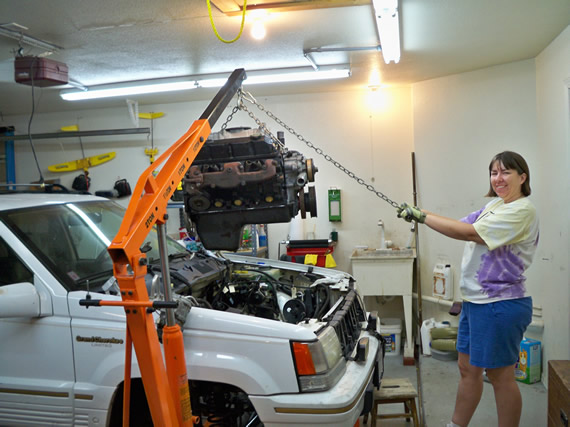
While Pam steadies the engine on the crane I bolt up the transmission to the engine from underneath.
The transmission is bolted to the engine and the engine mounts are on. Pam is helping unbolt the chain which was used to lift the motor from the back end of the engine. She has smaller hands which help when the engine is crammed up against the fire wall like in my Jeep.
The engine is in and we are ready to reconnect all the wires, hoses, pumps and every thing else. :) We had taken detailed and numbered notes when disassembling and we labeled all our parts and wires so we simply follow our documentation in reverse. Easy peasy lemon squeeze. :)
First thing is to jack the Jeep up and connect the exhaust, starter and other parts that go on underneath.
Once the underneath work is done you lower the vehicle down and onto its tires. Then start the top assembly work. In this photo the fuel rail and injectors are on as well as the main control wire harness, exhaust heat shields and some mounting brackets.
Halfway done! Now we have on the throttle body, AC, alternator, power steering pump, idlers and some radiator hoses.
The job is all done, except the hood. Time fire up this beast and see how we did.
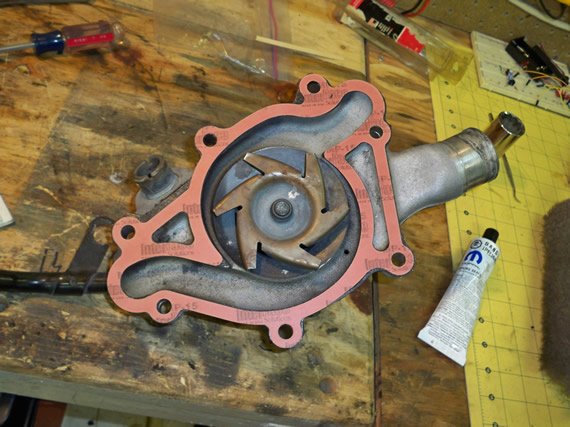
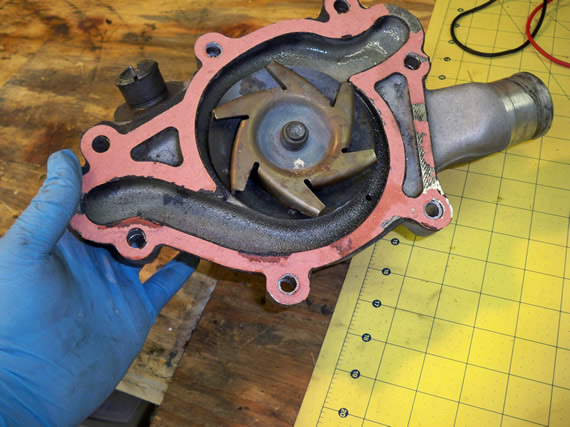
Not so good. I made one very poor decision along the way. I chose to use the 16 year old water pump during the rebuild. Dumb, dumb, dumb! What was I thinking?! I was thinking if it lasted 16 years it must be bullet proof. Well the weak point in water pumps are the bearings. This photo shows the backside of the old pump where you can see the impeller that pushes the water, coolant, around the engine. The impeller and its shaft are on bearings and the bearing seals had failed and the pump was leaking coolant through the bearings. This shows up as coolant leaking out of the front of the water pump at what is called a weep hole. If you see any coolant leaking from the weep hole in a water pump you have to replace the pump because the bearings will not last long if they are being washed in hot coolant.
I had to take off just enough parts to gain access to the water pump again and put on a new OEM pump from the dealer; no AutoZone junk here! There goes another $160. Well it’s still cheaper than a new 4×4 Jeep Grand Cherokee by a long, long ways.

Now I’m done, again, and ready for another test.
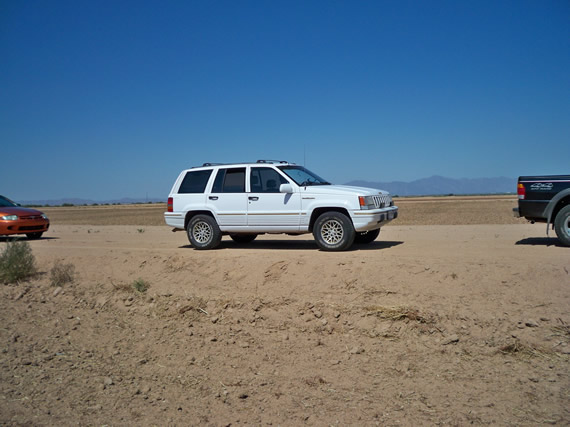
It lives! I finished my Jeep just in time to take it 300 miles across the deserts of Arizona chasing down a high altitude balloon payload launched by a group of electronics hackers I was helping. We found the balloon payload and the Jeep worked marvelously. As of today I already have 600 miles on my new engine and have even completed the 500 mile break-in oil change. Check back in 16 years for take II. Hehee. :)
Thanks for following along! I hope you enjoyed the journey and learned a little about what is
involved in swapping out an old engine with a remanufactured long block.
THE END!

Links for Beginners in Electronics }:-)
Archives
- April 2017 (1)
- March 2017 (3)
- December 2016 (1)
- November 2016 (3)
- October 2016 (2)
- September 2016 (2)
- August 2016 (4)
- June 2016 (1)
- May 2016 (6)
- April 2016 (1)
- March 2016 (3)
- February 2016 (4)
- January 2016 (3)
- December 2015 (1)
- November 2015 (5)
- September 2015 (1)
- July 2015 (2)
- June 2015 (6)
- March 2015 (1)
- January 2015 (2)
- December 2014 (2)
- November 2014 (4)
- October 2014 (2)
- May 2014 (1)
- March 2014 (5)
- February 2014 (3)
- January 2014 (1)
- September 2013 (2)
- August 2013 (1)
- July 2013 (4)
- June 2013 (3)
- May 2013 (2)
- April 2013 (1)
- March 2013 (3)
- February 2013 (2)
- January 2013 (2)
- December 2012 (1)
- November 2012 (8)
- October 2012 (5)
- September 2012 (1)
- August 2012 (1)
- July 2012 (2)
- May 2012 (2)
- April 2012 (1)
- March 2012 (3)
- February 2012 (2)
- December 2011 (2)
- November 2011 (4)
- October 2011 (1)
- September 2011 (1)
- August 2011 (2)
- May 2011 (2)
- April 2011 (2)
- March 2011 (2)
- February 2011 (2)
- January 2011 (1)
- December 2010 (2)
- November 2010 (2)
- July 2010 (3)
- June 2010 (2)
- April 2010 (1)
- March 2010 (1)
- February 2010 (2)
- January 2010 (1)
- December 2009 (2)
- October 2009 (4)
- March 2009 (1)
- December 2008 (1)
- November 2008 (1)
- August 2008 (1)
- April 2008 (1)
- March 2008 (1)
- February 2008 (1)
- June 2007 (1)
- November 2005 (1)
- April 2005 (1)