
I updated my tech bench with 4 shelves and 32 outlets! In the past I stacked my tech gear like it was in a Dr. Seuss book and I shared 1 outlet for all my gear. I finally got sick of the mess and inconvenience.
This video is showing my wiring install and shelving choices. I do cover reasons I picked curtain solutions and at the end is a tour of all my tech gear.
Below, behind me in the photo, is what my tech bench looked like in the past. What a mess! Very difficult to use or power anything.

The starting point of the video was when the shelf brackets were installed and so were 2 of the 3 junction boxes.
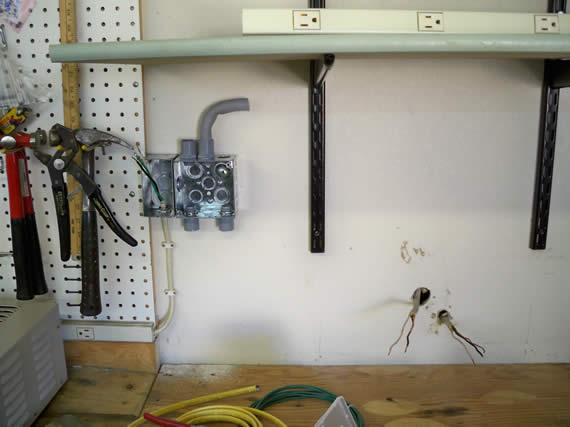
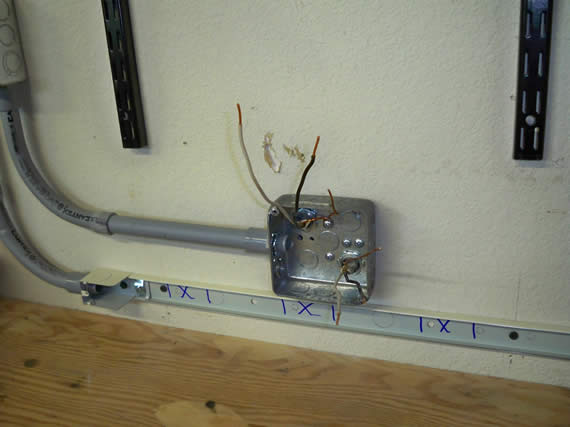
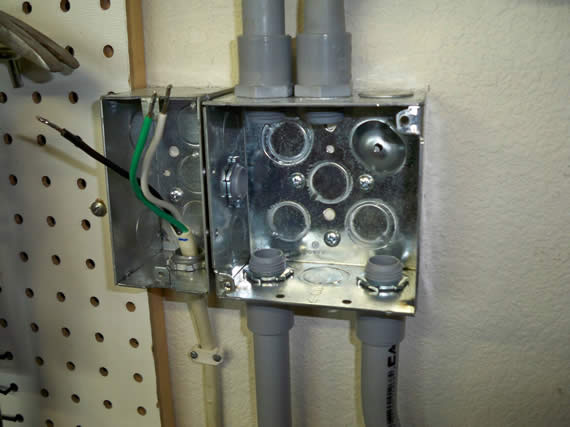
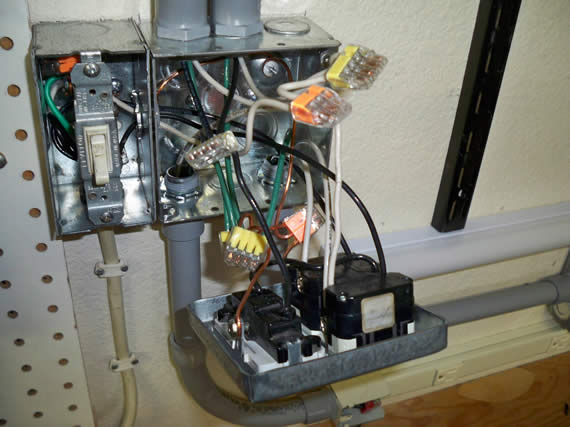
I’m routing the power from the old spot to this new junction box that will be above the first shelf and easy to reach. The left box is for the overhead light switch as well as the switch for the old corded power rail at my tool bench to the left of my tech bench. I cut the plug off the old corded power rail, tined the braded wire and secured the cord at the lower part of the junction box. The larger box on the right is for my GFI outlet and a switch to turn on/off all the power at the tech bench
CLICK TO READ ALL —>:
Make sure to mark where the outlets will be on the back rail with “X”s and lines. Try not to put any screws in the marked areas unless you use very shallow heads. If you use large pan head screws in the “X” areas the outlet rail will not snap onto the back rail.
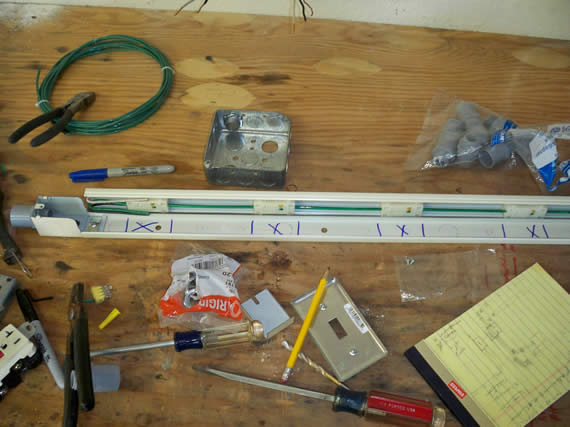
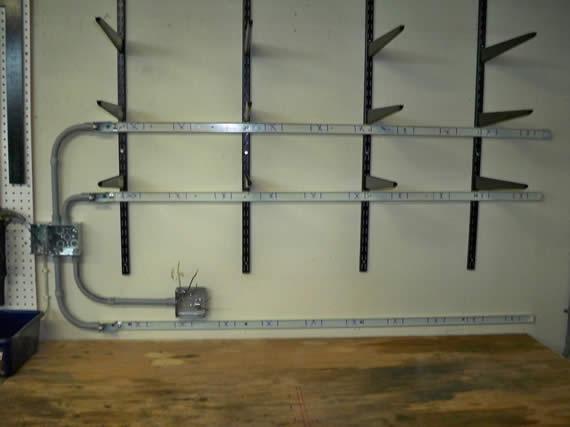
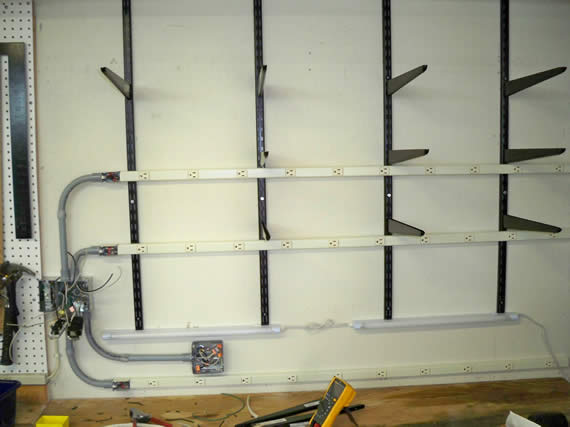
The back rails, boxes and conduit are ready. You don’t glue this type of conduit. Just push it together and use clamps to hold longer runs to the wall. You should plan for pulling wire. So leave a few open elbows or 90 degree joints with an access plate. My runs were short so I could just put everything up and pull wires later.
Below is the original 20A dedicated power feed to my bench and a 2nd wire that goes up to my overhead garage lighting just over my tech bench.
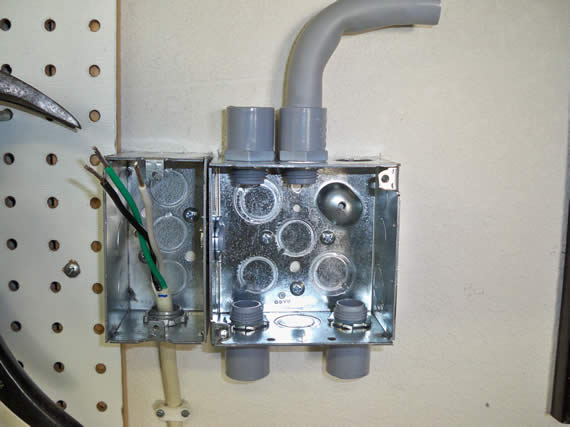
This is a close up of the junction boxes with conduit installed.
Great! All my wires are pulled. It was very easy because the runs were short.
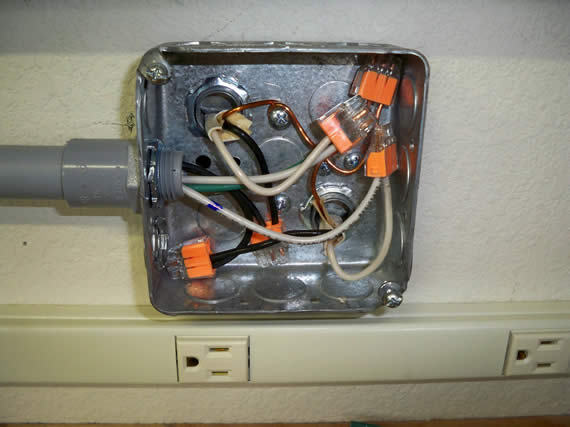
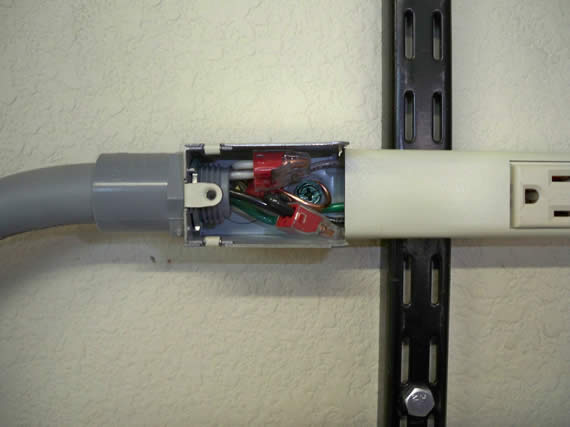
The feed power and wires that will be used to switch the overhead lighting are now installed. I used quick wire clips “In-Sure Connectors” instead of wire nuts as you can see. It does make wiring a ton easer because you don’t have to fuss holding 3 to 6 wires, twisting them and then crank on a wire nut. With these quick wire clips you just work with one wire at a time. Much less fuss, trust me. The connectors are made by IDEAL and I get them at Home Depot. Search for “In-Sure Connectors” What is really nice is one size fixes all. The connectors work for #20 up to #12 AWG wires even at the same time. So if you have #12 supply going into a fluorescent fixture with #18 hookup wire the connectors still work just fine.
The left end of each power rail had a $5 junction adapter which was in addition to the $34 power rails. The overall cost is not bad when you have 300 feet of 12 gage stranded wire leftover from other wire install jobs. If I had to buy the wire I might have picked 12 gage 2 wire armored cable and all metal construction for the ground return. That would be less wiring and being I can buy that by the foot at Home Depot I could have had a series solution with less than 3 feet.
That brings up a planning error I made. I should have run all the power rails in series because that would have made the wiring in the one main junction box a lot easier. And the install would have looked a lot cleaner. But I chose not to because I waned to save the $10 for the two extra power rail junction adapters that would have been needed for a series run. All the outlets on both benches are on the load side of my GFI so I’m protected from a grounding fault. That is standard in a garage and don’t be cheap with the GFI at your bench!
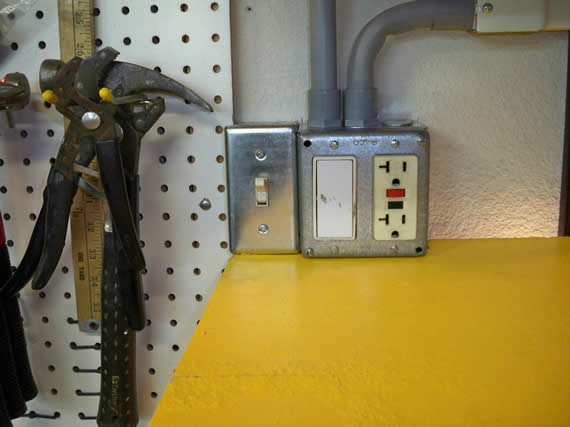
All buttoned up and ready for a test! In the video you will see I do find a fault with one of the quick wire clips. One popped off when I pushed them into the main junction box. After reviewing my footage I found I had not put the wire security into the clip so that was my fault. Those clips work great if you are careful to insert your wires all the way to the back. The ends of the quick wire clips are clear so you can easily check your work.
Now everything is testing great including my under bench lighting which is plugged in at the end of the lower power rail. This way the under shelf lights come on only when I turn on the tech bench outlets.
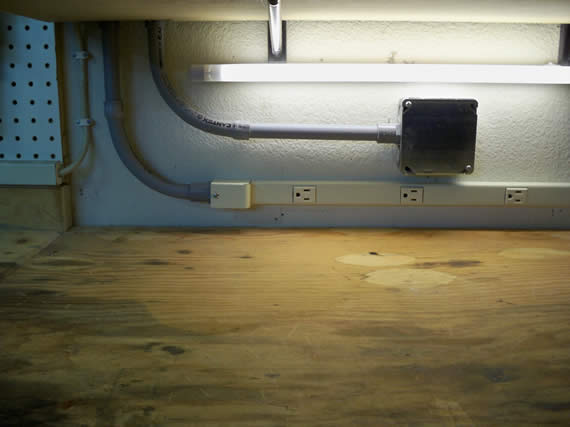
Looking good, just needs gear!
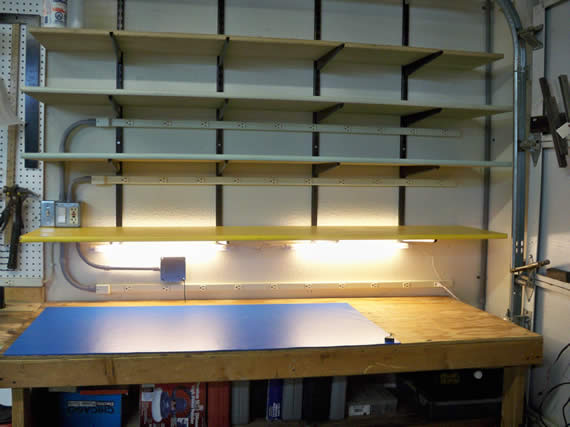
My workstation ESD mat: I put the mat’s grounding wire in a hole and under the bench to keep it out of the way.

The grounding wire comes back up another hole near the power junction box for my bench. The black wire in the below photo. Being this metal junction box is earthed I attached my ESD mat grounding wire to a cover screw at one corner. Under the bench I just stabled the wire up and out of the way.

The bench is all loaded up with gear. At the end of my video I give a tour of my gear if you’re interested. Click the below image for higher res.

Thanks for joining.
Todd

Links for Beginners in Electronics }:-)
Archives
- April 2017 (1)
- March 2017 (3)
- December 2016 (1)
- November 2016 (3)
- October 2016 (2)
- September 2016 (2)
- August 2016 (4)
- June 2016 (1)
- May 2016 (6)
- April 2016 (1)
- March 2016 (3)
- February 2016 (4)
- January 2016 (3)
- December 2015 (1)
- November 2015 (5)
- September 2015 (1)
- July 2015 (2)
- June 2015 (6)
- March 2015 (1)
- January 2015 (2)
- December 2014 (2)
- November 2014 (4)
- October 2014 (2)
- May 2014 (1)
- March 2014 (5)
- February 2014 (3)
- January 2014 (1)
- September 2013 (2)
- August 2013 (1)
- July 2013 (4)
- June 2013 (3)
- May 2013 (2)
- April 2013 (1)
- March 2013 (3)
- February 2013 (2)
- January 2013 (2)
- December 2012 (1)
- November 2012 (8)
- October 2012 (5)
- September 2012 (1)
- August 2012 (1)
- July 2012 (2)
- May 2012 (2)
- April 2012 (1)
- March 2012 (3)
- February 2012 (2)
- December 2011 (2)
- November 2011 (4)
- October 2011 (1)
- September 2011 (1)
- August 2011 (2)
- May 2011 (2)
- April 2011 (2)
- March 2011 (2)
- February 2011 (2)
- January 2011 (1)
- December 2010 (2)
- November 2010 (2)
- July 2010 (3)
- June 2010 (2)
- April 2010 (1)
- March 2010 (1)
- February 2010 (2)
- January 2010 (1)
- December 2009 (2)
- October 2009 (4)
- March 2009 (1)
- December 2008 (1)
- November 2008 (1)
- August 2008 (1)
- April 2008 (1)
- March 2008 (1)
- February 2008 (1)
- June 2007 (1)
- November 2005 (1)
- April 2005 (1)