
Archive for June, 2015
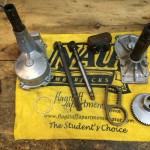
Video of some pinball parts unboxing for my Bally Star Trek. I also explanation what the parts are for and my plan on using them.
See my last post for a lot of relevant pinball links: Bally Star Trek Pinball Cleanup (Part 1 & 2)
IPDB Data on my Bally Star Trek
————————————————————————————-
Everything you could ever want to know about restoring pinball machines:
http://www.pinrepair.com/restore
————————————————————————————-
Major parts suppliers:
http://www.pbresource.com/
http://www.marcospecialties.com/
http://www.bayareaamusements.com/
http://www.pinballlife.com/
http://www.classicplayfields.com/
Board repair service:
https://ksarcade.net/board-repair.html
————————————————————————————-
Ratchet crimp tool and link on how to best use this tool:
http://astore.amazon.com/tod0f5-20/detail/B007JLN93S
http://www.pinrepair.com/connect/
Connector removal tool
http://astore.amazon.com/tod0f5-20/detail/B008PV8F30
Best cleaner for dirty cabinets
http://astore.amazon.com/tod0f5-20/detail/B0014CNFCI
Novus cleaner and polish
http://astore.amazon.com/tod0f5-20/detail/B002UCYRZU
Mr. Clean Magic Eraser
http://astore.amazon.com/tod0f5-20/detail/B0071SCSO0
See below video and links to vendors, parts I ordered, parts I want to order and board repair services. Also below is a high resolution photo gallery of my pinball machine and the play field disassemble.
<Video part 1 of 2>
<Video part 2 of 2>
Data on my Bally Star Trek:
http://www.ipdb.org/machine.cgi?gid=2355
————————————————————————————-
Everything you could ever want to know about restoring pinball machines:
http://www.pinrepair.com/restore
————————————————————————————-
Major parts suppliers:
http://www.pbresource.com/
http://www.marcospecialties.com/
http://www.bayareaamusements.com/
http://www.pinballlife.com/
http://www.classicplayfields.com/
Board repair service:
https://ksarcade.net/board-repair.html
————————————————————————————-
Playfield restoration steps I think I will follow
————————————————————————————-
0. Strip playfield of stuff.
1. Blow off playfield with compressed air and Vacuum
2. Clean with Super Clean or Mean Green enough to remove surface dirt
3. Wipe down with Naptha (lighter fluid)
4. Clean deep cracks with Mr. Clean Magic Eraser and with Iso Alcohol
5. Wipe down again with Naptha
6. Touch up with water based acrylic paint
7. Wipe down with Naptha
8. If not using full coverage Mylar shield then your best option is to apply automotive urethane clear coat but if you can’t then use 5 coats of water-based Minwax polyurethane
(Jeri says to use water based spray on Varathane in a can but once used you can’t apply alcohol, naptha or it will cloud the Varathane).
(Jeri says you can always clean off the Varathane with lots of naptha (lighter fluid) or goo gone.)
(I think I can also clear coat it with Krylon Triple-Thick 12 oz. spray can, I’m not sure of my best option yet.)
Clean off PF with compressed air
Spray a misting coating
Lightly sand with 600 grit
Wipe down with Naptha
Repeat four more times
9. Orbital sand with 800, 1000, 1200, 1500 grit sandpaper
10. Finish last polish with Novus 2
11. Wax twice with Wild Cat #125 or Johnson Paste Wax or (Best option for my pin Blitz Carnauba Paste Wax) – from:
http://www.pinballlife.com/index.php?p=product&id=2589
12. Buff with buffing pad to a high gloss finish
13. If you used automotive clear code instead of water-based Minwax polyurethane or Varathane then you don’t need Mylar protectors.
otherwise put down your Mylar for bumpers and sling shots.
14. replace all playfield stuff.
(done)
————————————————————————————-
Parts
————————————————————————————-
Bally Star Trek parts:
http://bayareaamusements.com/Merchant2/merchant.mvc?Screen=CTGY&Category_Code=GS-2355
https://ksarcade.net/catalogsearch/advanced/result/?used_by_game=1739
Video, photos and links below…
GE WHDSR209D2WW
Here is a great video on how to replace the Transmission and Brake Assembly
http://www.appliancepartspros.com/ge-transmission-and-brake-wh38x10002-ap2046402.html
You will really need this Spanner wrench!
Clothes Washer Wrench w/ Adapter – TB123A
Bearing 6205-2RS-1
The ‘-1’ is important, it means 1 inch inner diameter
If you damage or lose the spiral retention springs I have been told these fit this machine. J&E WRIST PIN RETAINER SPIRAL 1.081 IN. DIAMETER .042 IN. THICK # 990-042-CS $2.50 for 1 from Pit-Stop-Gang on ebay.
GE WH02X10032 Tub Seal
This is the tub seal I used in my washer repair video to fix the top loading GE washer.
You should always install a new tub seal!
Make sure to put the tub seal in using
Permatex 20539 Indian Head Gasket Shellac Compound
Use lots on seal to tub, not seal to shaft.
This will help keep the seal from leaking between the tub and seal.
Blaster 16-PB Penetrating oil
Put this on some stuck or rusted nuts and let soak for an hour or overnight. Must nuts and bolts will come right off! Way better than simple WD-40.
Photo Gallery
CLICK PHOTO for gallery view and click a SECOND time for hi-resolution image. Click thumbnails on lower right and lower left of gallery to navigate gallery photos.


Links for Beginners in Electronics }:-)
Archives
- April 2017 (1)
- March 2017 (3)
- December 2016 (1)
- November 2016 (3)
- October 2016 (2)
- September 2016 (2)
- August 2016 (4)
- June 2016 (1)
- May 2016 (6)
- April 2016 (1)
- March 2016 (3)
- February 2016 (4)
- January 2016 (3)
- December 2015 (1)
- November 2015 (5)
- September 2015 (1)
- July 2015 (2)
- June 2015 (6)
- March 2015 (1)
- January 2015 (2)
- December 2014 (2)
- November 2014 (4)
- October 2014 (2)
- May 2014 (1)
- March 2014 (5)
- February 2014 (3)
- January 2014 (1)
- September 2013 (2)
- August 2013 (1)
- July 2013 (4)
- June 2013 (3)
- May 2013 (2)
- April 2013 (1)
- March 2013 (3)
- February 2013 (2)
- January 2013 (2)
- December 2012 (1)
- November 2012 (8)
- October 2012 (5)
- September 2012 (1)
- August 2012 (1)
- July 2012 (2)
- May 2012 (2)
- April 2012 (1)
- March 2012 (3)
- February 2012 (2)
- December 2011 (2)
- November 2011 (4)
- October 2011 (1)
- September 2011 (1)
- August 2011 (2)
- May 2011 (2)
- April 2011 (2)
- March 2011 (2)
- February 2011 (2)
- January 2011 (1)
- December 2010 (2)
- November 2010 (2)
- July 2010 (3)
- June 2010 (2)
- April 2010 (1)
- March 2010 (1)
- February 2010 (2)
- January 2010 (1)
- December 2009 (2)
- October 2009 (4)
- March 2009 (1)
- December 2008 (1)
- November 2008 (1)
- August 2008 (1)
- April 2008 (1)
- March 2008 (1)
- February 2008 (1)
- June 2007 (1)
- November 2005 (1)
- April 2005 (1)