
Fun Stuff
As I said in the last video I wasn’t to happy with how smooth or straight the cart was with the 6 little wheels and the one rail. I found that local garage repair companies recycle several old garage doors daily included wheels, brackets and tracks. I contacted one and they didn’t even want to charge me to pickup some scrap track. So this build just got a whole lot cheaper and with two tracks for the camera cart it solved my smoothness issue as well as my camera swing. Check out the video and a few photos below. But first you may want to check out my first whack at this camera gantry where I show more of the welding, cutting and setup.
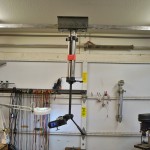
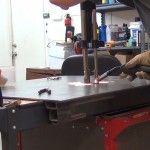
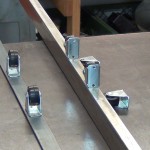
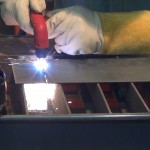
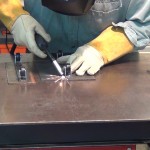
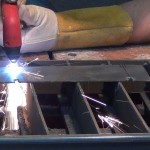
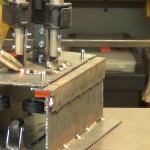
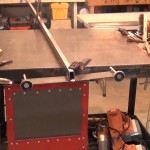
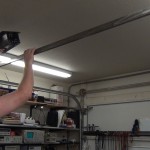
The new tracks welded to the old center rail.
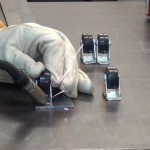
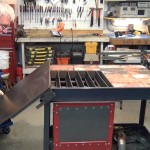
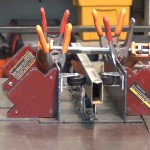
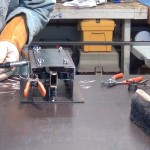
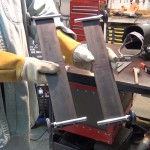
Below is the new cart for the camera to hang from.

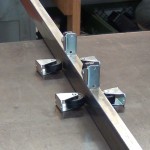
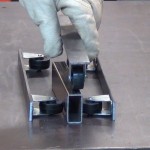
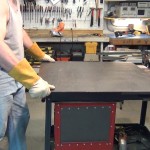
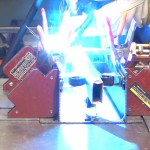
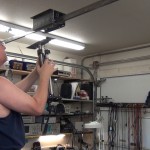
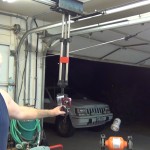
New and improved double sled system in action!

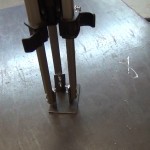
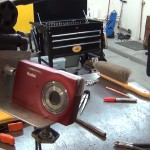
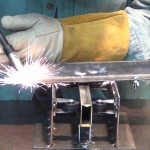
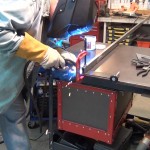
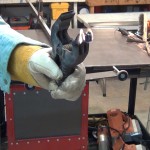
Camera and tripod bolted to the new inner sled slash cart slash truck. What ever you think is best to call it.

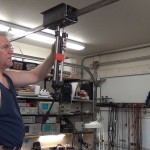
Just the slightest touch and the camera now takes off. Much smoother than the old cart.

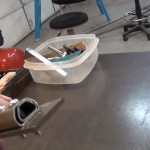
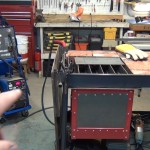
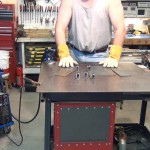
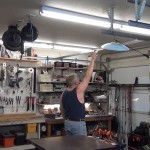
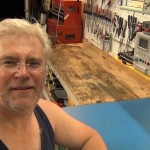
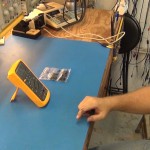
Easy to setup for a bench shot!

Now I can get any angle without the tripod legs under foot. NICE!

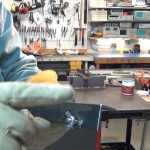
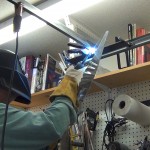
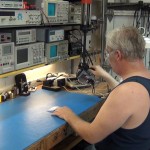
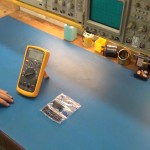
And this works great as an inspection microscope and I was even able to solder under it while zoomed. Just about as good as an optical stereo microscope and I could take footage as I repair or build in this mode. So maybe even better than a real microscope with $0 added cost really.

This is what I see while in inspection mode with my Sony handycam CX-160 and just a bit of zoom.

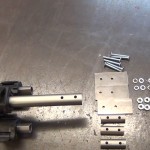
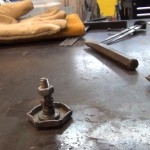
The new sled, bottom view with tripod mounted. Notice I welded the washers to the wing-nuts to make that job easier. Why not right!

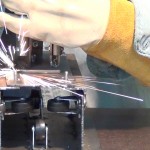
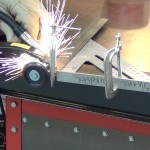
How the ends of the new tracks look where they meet the old garage door tracks.

Same spot looking up.

Same spot looking mostly down from above the garage door tracks.

Thanks for joining!

And remember to subscribe to my YouTube channel and my ToddFun.com RSS feed.
I really hate when I trip over my tripod while shooting blog videos at my bench. Plus it is a huge hassle moving the tripod around for different angles and setups. I realized I shoot my blog videos in my garage and I have an overhead garage door with nice roller tracks that I never use. So I designed a home built camera gantry using my old tripod welded upside down to a little rolling trolley cart. You can checkout the video of the build or the photo gallery below.

I didn’t really like the end result. The sled turned out great but the trolley cart was a bit too chunky and swingy. A new dual rail system with better wheels is currently being built. It will be more stable, smoother, cheaper and simpler construction. Stay tuned for follow up video!
During the build I realized I couldn’t live without a tripod. My son was helping shoot videos walking around with the camera for a week or so but it made for some real shaky videos. I happened to be at a garage sale and somebody was selling a marvelous tripod that must have been 10x what I paid for my old tripod which I hacked up for this build. I got the yard sale tripod for $1 and it is sooo much better than what I had. How cool is that?
Thanks for joining and remember to subscribe to my YouTube channel and my ToddFun.com RSS feed.
photo gallery
CLICK PHOTO for gallery view and click a SECOND time for hi-resolution image. Click thumbnails on low right and lower left of gallery to navigate gallery photos.


My son Alex and I spent the past two evenings working out the bugs on some new Halloween Fog Machine hacks for his graveyard. We tested many viewer tips from the last blog video and some configurations of our own. We came up with a whopper of a Bazooka looking Spooky Halloween Fog Machine. In the video we first give a build description of the final working fog bazooka and then show it in action in our Halloween graveyard. The first 7 minutes have the good stuff and the rest of the video is just clips of all the iterations we tried that didn’t work quite as well as the final bazooka design.
Update 2/10/2014 – A reader also recommended using better fog fluid: American DJ Fog Fluid or Chauvet.
This is super easy to build and works GREAT! I have to thank the viewers for such great ideas.
Alex starts off the video by reminding kids to “stay in school!”. Ha

This hack did work with just normal ice only as well as dry ice only but worked best with a 50/50 mix of ice and dry ice. The below 5 gallon bucket is 50/50 ice and dry ice. I picked up 15 lbs of dry ice at our local Fry’s food store. Each 5 lb block is about $5 and last a long time. I used all 15 lbs at once with about an equal amount of normal ice mixed well and filled to about 1 inch below the in/out pipe holes when the bucket is upside down. You don’t have to use a 5 gallon bucket but something that fills to about this level with this amount of ice and dry ice. Once you put on the lid let it set for 10 minutes while the dry ice and ice mix and get the inside real cool!

This turned out to be the best configuration. It kind of reminded Alex of a bazooka so we named it a Bazooka Halloween Fog Machine. We had started with the bucket right-side-up and the fog machine and pipe at the bottom but the ice just blocked the holes so we flipped it and it started working GREAT! So you don’t want the ice to be locking the holes.

Below is a dark photo of the graveyard with the spooky Halloween fog we can now create. (Click the photo for a hi-res version).

Front view with some lighting. (Click the photo for a hi-res version).

I used a 3 inch whole saw to cut two holes.

You could stop there but we wanted to try pipes so I put in two shower drains we got at Home Depot. The shower screen does seem to provide some back pressure and resistance but I don’t think this is too critical. Having the out pipe is critical and made a big difference. It seemed to help keep the fog in the bucket longer so it cools longer before finding its way out the 2 foot 2 inch exit pipe. The shower drain adapters made connecting the 2 inch pipe easy but duct tape and a large hose should work. You don’t need to drill the holes in the bottom so I taped them up on our final design.

This last photo is just to show that the fog machine on its own will only create hot fast raising fog that doesn’t have that spooky Halloween look that Alex wanted for his graveyard.

Thanks for joining and remember to subscribe to my YouTube channel and my ToddFun.com RSS feed.


Links for Beginners in Electronics }:-)
Archives
- April 2017 (1)
- March 2017 (3)
- December 2016 (1)
- November 2016 (3)
- October 2016 (2)
- September 2016 (2)
- August 2016 (4)
- June 2016 (1)
- May 2016 (6)
- April 2016 (1)
- March 2016 (3)
- February 2016 (4)
- January 2016 (3)
- December 2015 (1)
- November 2015 (5)
- September 2015 (1)
- July 2015 (2)
- June 2015 (6)
- March 2015 (1)
- January 2015 (2)
- December 2014 (2)
- November 2014 (4)
- October 2014 (2)
- May 2014 (1)
- March 2014 (5)
- February 2014 (3)
- January 2014 (1)
- September 2013 (2)
- August 2013 (1)
- July 2013 (4)
- June 2013 (3)
- May 2013 (2)
- April 2013 (1)
- March 2013 (3)
- February 2013 (2)
- January 2013 (2)
- December 2012 (1)
- November 2012 (8)
- October 2012 (5)
- September 2012 (1)
- August 2012 (1)
- July 2012 (2)
- May 2012 (2)
- April 2012 (1)
- March 2012 (3)
- February 2012 (2)
- December 2011 (2)
- November 2011 (4)
- October 2011 (1)
- September 2011 (1)
- August 2011 (2)
- May 2011 (2)
- April 2011 (2)
- March 2011 (2)
- February 2011 (2)
- January 2011 (1)
- December 2010 (2)
- November 2010 (2)
- July 2010 (3)
- June 2010 (2)
- April 2010 (1)
- March 2010 (1)
- February 2010 (2)
- January 2010 (1)
- December 2009 (2)
- October 2009 (4)
- March 2009 (1)
- December 2008 (1)
- November 2008 (1)
- August 2008 (1)
- April 2008 (1)
- March 2008 (1)
- February 2008 (1)
- June 2007 (1)
- November 2005 (1)
- April 2005 (1)