
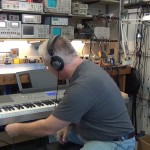
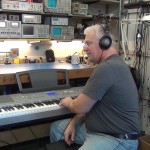
In this video I rip into my 4 day old $700 Yamaha DGX-640 to move the phono jack from the back to the front of the keyboard. So much for my 3 year warranty :( But it had to be done because it was not accessible in the back plus having the wire draped over the keys or roped between your legs was annoying. Another annoying feature was the easel being mounted at the very back of this large keyboard deck. It was so far away we couldn’t make out smaller notes or markings. So at the beginning of the video I show my swing away easel hack that fixed this issue nicely and was quite easy to make. (After the video is a bunch of hi-res photos)
photo gallery
CLICK PHOTO for gallery view and click a SECOND time for hi-resolution image. Click thumbnails on lower right and lower left of gallery to navigate gallery photos.
-

- The easel is to far to read notes.
-

- I welded a T from strap steel and riveted it to the plastic easel.
-
- Then welded a 3 inch tube at 30 degrees to the T.
-
- A bent rod inserts into the tube so the easel can swing out of the way.
-
- This rod also inserts into a 2nd tube welded to C clamps which are clamped to a self behind the keyboard.
-

- Now the easel is at just the right distance and hight.
-

- The easel swings out of the way.
-

- With the esael out of the way you can get to all the controls.
-
- This is the C clamps which clamps to a self behind the keyboard and as the tube welded on it for a pivit point.
-
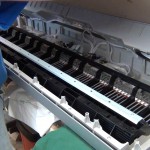
- Now to open up the piano and get to the phono jack.
-
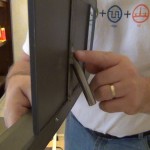
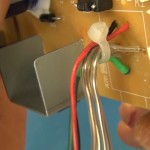
- This is the phono jack I need to move.
-
- The phono jack is going out the back and I need to move it to the front.
-
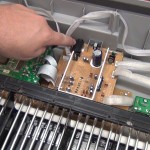
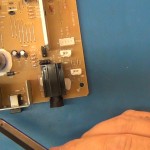
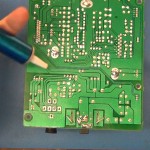
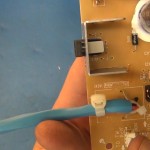
- Control board photo
-
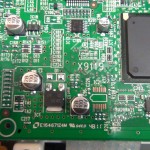
- Control board photo
-
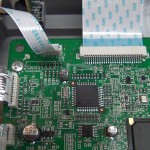
- Control board photo
-
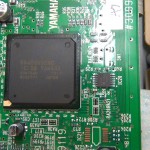
- Control board photo
-
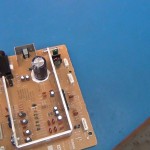
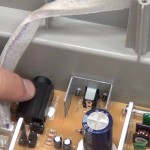
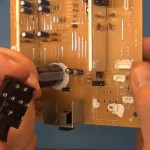
- Power board is out and ready for hacking
-
- If you ever have a power problem with such a keyboard remember there is a fuse on this power board.
-
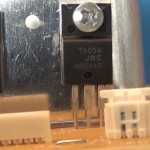
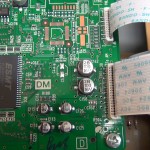
- Close up of the voltage regulators
-
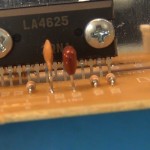
- LA4625 – 2 channel 13.5W BTL audio power amplifier
-
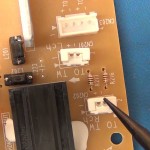
- Speaker connectors on power board.
-
- In the video I demonstrate how the phono plug controls the continuity to the speakers.
-
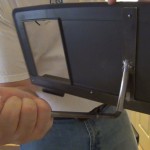
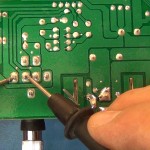
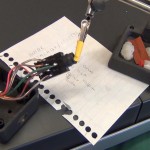
- I use a solder sucker to remove the phono jack.
-
- Ready to move the jack plug
-
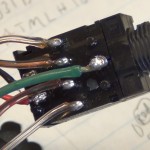
- I picked large wire for the internal speakers and ground and small 22 AWG stranded wire for the headset wires.
-
- Solder these select wires to the power board
-
- Shrink wrap and wire tie for strain relief
-

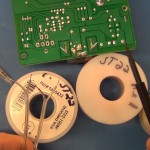
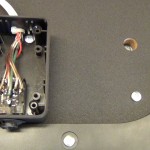
- Power board is back in the piano and phono wires are going out the back.
-
- These wires just need to go to the new location for the external jack
-
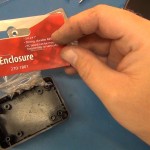
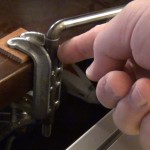
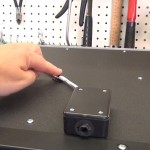
- I used a simple Radio Shack project box for the enclosure.
-
- Solded the relocation wires to the photo jack
-
- Screwed it to the bottom of the MDF board.
-

- Some extra shrink wrap and close up the box.
-
- Some sticky tab cable hold downs to keep the wires up and out of the way.
-
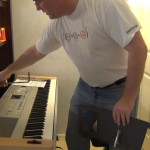
- Testing for the firs time.
-
- Sounds good to me but nobody else in the house will be bothered now.
-

- All good and thanks for joining.

Links for Beginners in Electronics }:-)
Archives
- April 2017 (1)
- March 2017 (3)
- December 2016 (1)
- November 2016 (3)
- October 2016 (2)
- September 2016 (2)
- August 2016 (4)
- June 2016 (1)
- May 2016 (6)
- April 2016 (1)
- March 2016 (3)
- February 2016 (4)
- January 2016 (3)
- December 2015 (1)
- November 2015 (5)
- September 2015 (1)
- July 2015 (2)
- June 2015 (6)
- March 2015 (1)
- January 2015 (2)
- December 2014 (2)
- November 2014 (4)
- October 2014 (2)
- May 2014 (1)
- March 2014 (5)
- February 2014 (3)
- January 2014 (1)
- September 2013 (2)
- August 2013 (1)
- July 2013 (4)
- June 2013 (3)
- May 2013 (2)
- April 2013 (1)
- March 2013 (3)
- February 2013 (2)
- January 2013 (2)
- December 2012 (1)
- November 2012 (8)
- October 2012 (5)
- September 2012 (1)
- August 2012 (1)
- July 2012 (2)
- May 2012 (2)
- April 2012 (1)
- March 2012 (3)
- February 2012 (2)
- December 2011 (2)
- November 2011 (4)
- October 2011 (1)
- September 2011 (1)
- August 2011 (2)
- May 2011 (2)
- April 2011 (2)
- March 2011 (2)
- February 2011 (2)
- January 2011 (1)
- December 2010 (2)
- November 2010 (2)
- July 2010 (3)
- June 2010 (2)
- April 2010 (1)
- March 2010 (1)
- February 2010 (2)
- January 2010 (1)
- December 2009 (2)
- October 2009 (4)
- March 2009 (1)
- December 2008 (1)
- November 2008 (1)
- August 2008 (1)
- April 2008 (1)
- March 2008 (1)
- February 2008 (1)
- June 2007 (1)
- November 2005 (1)
- April 2005 (1)